Server Sempurna - Ubuntu 11.10 [ISPConfig 3]
Tutorial ini menunjukkan cara menyiapkan server Ubuntu 11.10 (Oneiric Ocelot) untuk instalasi ISPConfig 3, dan cara menginstal ISPConfig 3. ISPConfig 3 adalah panel kontrol webhosting yang memungkinkan Anda mengkonfigurasi layanan berikut melalui browser web:Apache web server, server email Postfix, MySQL, server nama BIND atau MyDNS, PureFTPd, SpamAssassin, ClamAV, dan banyak lagi.
Harap perhatikan bahwa pengaturan ini tidak berfungsi untuk ISPConfig 2 ! Ini hanya berlaku untuk ISPConfig 3!
Saya tidak memberikan jaminan apa pun bahwa ini akan berhasil untuk Anda!
Panduan ISPConfig 3
Untuk mempelajari cara menggunakan ISPConfig 3, saya sangat menyarankan untuk mengunduh Manual ISPConfig 3.
Pada sekitar 300 halaman, ini mencakup konsep di balik ISPConfig (admin, reseller, klien), menjelaskan cara menginstal dan memperbarui ISPConfig 3, menyertakan referensi untuk semua formulir dan bidang formulir di ISPConfig bersama dengan contoh input yang valid, dan memberikan tutorial untuk tugas paling umum di ISPConfig 3. Ini juga menjelaskan cara membuat server Anda lebih aman dan dilengkapi dengan bagian pemecahan masalah di bagian akhir.
Aplikasi Monitor ISPConfig Untuk Android
Dengan Aplikasi Monitor ISPConfig, Anda dapat memeriksa status server Anda dan mengetahui apakah semua layanan berjalan seperti yang diharapkan. Anda dapat memeriksa port TCP dan UDP dan melakukan ping ke server Anda. Selain itu, Anda dapat menggunakan aplikasi ini untuk meminta detail dari server yang telah menginstal ISPConfig (harap dicatat bahwa versi ISPConfig 3 yang diinstal minimum dengan dukungan untuk Aplikasi ISPConfig Monitor adalah 3.0.3.3! ); detail ini mencakup semua yang Anda ketahui dari modul Monitor di Panel Kontrol ISPConfig (mis. layanan, log email dan sistem, antrian email, info CPU dan memori, penggunaan disk, kuota, detail OS, log RKHunter, dll.), dan tentu saja , karena ISPConfig berkemampuan multiserver, Anda dapat memeriksa semua server yang dikontrol dari server master ISPConfig Anda.
Untuk mengunduh dan petunjuk penggunaan, silakan kunjungi http://www.ispconfig.org/ispconfig-3/ispconfig-monitor-app-for-android/.
1 Persyaratan
Untuk menginstal sistem seperti itu, Anda memerlukan yang berikut:
- CD server Ubuntu 11.10, tersedia di sini:http://releases.ubuntu.com/releases/11.10/ubuntu-11.10-server-i386.iso (i386) atau http://releases.ubuntu.com/releases /11.10/ubuntu-11.10-server-amd64.iso (x86_64)
- koneksi internet yang cepat.
2 Catatan Awal
Dalam tutorial ini saya menggunakan hostname server1.example.com dengan alamat IP 192.168.0.100 dan gateway 192.168.0.1. Setelan ini mungkin berbeda untuk Anda, jadi Anda harus menggantinya jika perlu.
3 Sistem Dasar
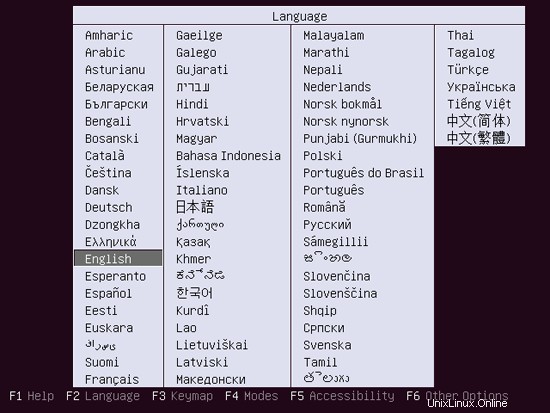
Masukkan CD instalasi Ubuntu Anda ke sistem Anda dan boot darinya. Pilih bahasa Anda:
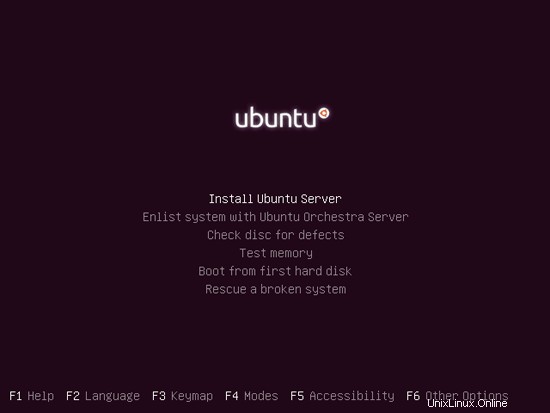
Kemudian pilih Instal Server Ubuntu:
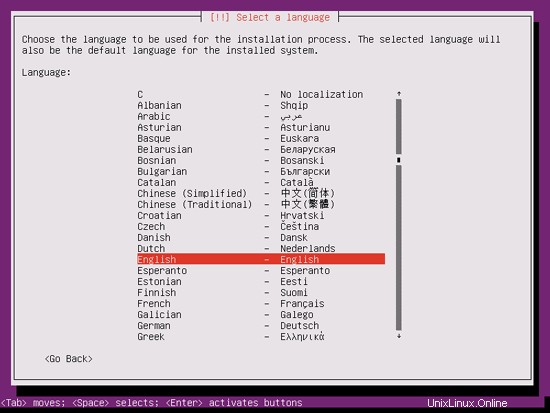
Pilih bahasa Anda lagi (?):
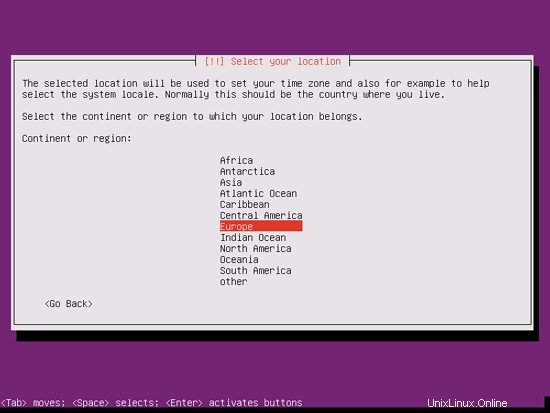
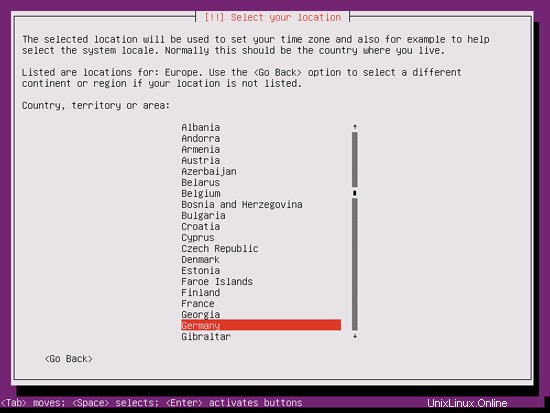
Kemudian pilih lokasi Anda:
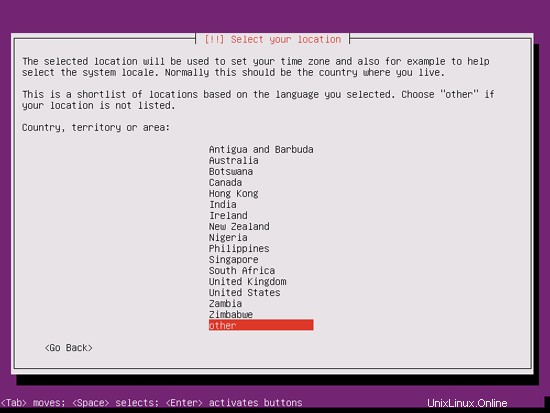
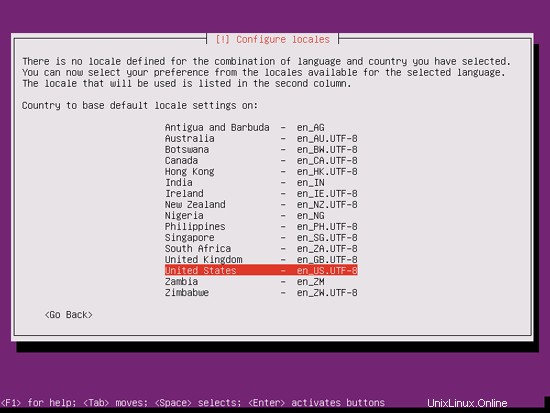
Jika Anda telah memilih kombinasi bahasa dan lokasi yang tidak biasa (seperti bahasa Inggris sebagai bahasa dan Jerman sebagai lokasi, seperti dalam kasus saya), penginstal mungkin memberi tahu Anda bahwa tidak ada lokal yang ditentukan untuk kombinasi ini; dalam hal ini Anda harus memilih lokal secara manual. Saya memilih en_US.UTF-8 di sini:
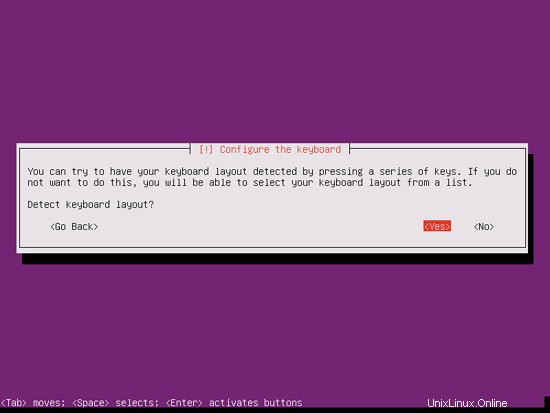
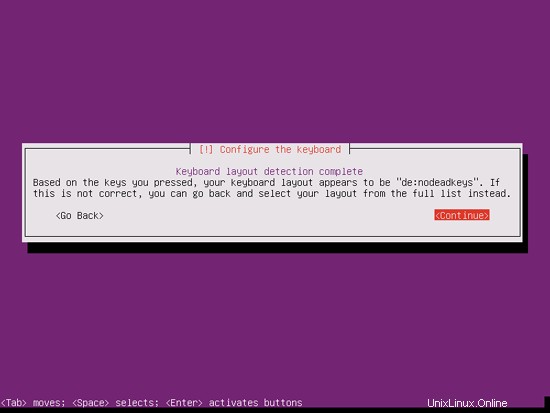
Pilih tata letak keyboard (Anda akan diminta untuk menekan beberapa tombol, dan penginstal akan mencoba mendeteksi tata letak keyboard Anda berdasarkan tombol yang Anda tekan):
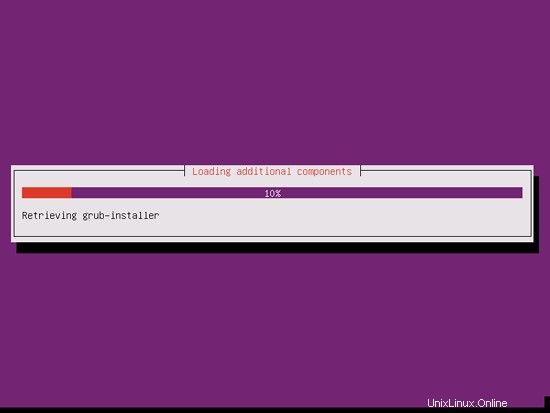
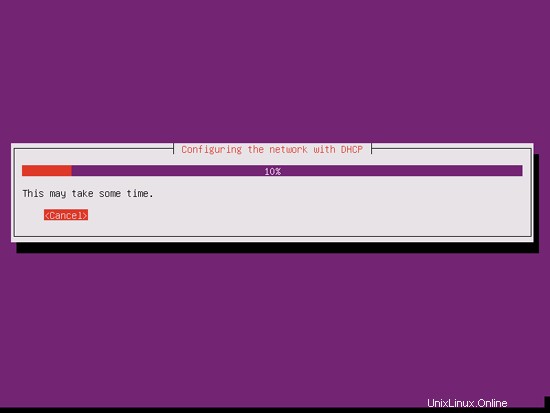
Penginstal memeriksa CD instalasi, perangkat keras Anda, dan mengkonfigurasi jaringan dengan DHCP jika ada server DHCP di jaringan:
Server Sempurna - Ubuntu 11.10 [ISPConfig 3] - Halaman 2
21 Instal ISPConfig 3
Untuk menginstal ISPConfig 3 dari versi rilis terbaru, lakukan ini:
cd /tmp
 wget http://www.ispconfig.org/downloads/ISPConfig-3-stable.tar.gz
 tar xfz ISPConfig-3-stable.tar.gz
 cd ispconfig3_install/install/
Langkah selanjutnya adalah menjalankan
php -q install.php
Ini akan memulai penginstal ISPConfig 3. Installer akan mengonfigurasi semua layanan seperti Postfix, SASL, Courier, dll. untuk Anda. Penyiapan manual seperti yang diperlukan untuk ISPConfig 2 (panduan penyiapan sempurna) tidak diperlukan.
example@unixlinux.online:/tmp/ispconfig3_install/install# php -q install.php
------------------- -------------------------------------------------- -----------
_____ ___________ _____ __ _ ____
|_ _/ ___| ___ \ / __ \ / _(_) /__ \
| | \ `--.| |_/ / | / \/ ___ _ __ | |_ _ __ _ _/ /
| | `--. \ __/ | | / _ \| '_ \| _| |/ _` | |_ |
_| |_/\__/ / | | \__/\ (_) | | | | | | | (_| | ___\ \
\___/\____/\_| \____/\___/|_| |_|_| |_|\__, | \____/
|
|___/
-------------------------------------- ------------------------------------------
>> Konfigurasi awal
Sistem Operasi: Debian atau kompatibel, versi tidak diketahui.
Berikut ini akan ada beberapa pertanyaan untuk konfigurasi primer jadi berhati-hatilah.
Nilai default ada dalam [tanda kurung] dan dapat diterima dengan
Ketuk dalam "keluar" (tanpa tanda kutip) untuk menghentikan pemasang.
Pilih bahasa (en,de) [en]: <-- ENTER
Mode penginstalan (standard,expert) [standard]: <-- ENTER
Hostname berkualifikasi lengkap (FQDN) dari server, misalnya server1.domain.tld [server1.example.com]: <-- ENTER
MySQL server hostname [localhost]: <-- ENTER
MySQL root nama pengguna [root]: <-- ENTER
MySQL root password []: <-- yourrootsqlpassword
MySQL database untuk membuat [dbispconfig]: <-- ENTER
MySQL charset [utf8]: <-- ENTER
Membuat kunci pribadi RSA 2048 bit
...+++
......................... ..........................................++
menulis kunci pribadi baru untuk 'smtpd.key'
-----
Anda akan diminta untuk memasukkan informasi yang akan dimasukkan ke dalam permintaan sertifikat Anda.
Apa yang Anda akan dimasukkan adalah yang disebut Distinguished Name atau DN.
Ada cukup beberapa bidang tetapi Anda dapat mengkosongkan beberapa
Untuk beberapa bidang akan ada nilai default,
Jika Anda masukkan '.', bidang akan dikosongkan .
-----
Nama Negara (2 kode huruf) [AU]: <-- ENTER
Nama Negara atau Provinsi ( nama lengkap) [Beberapa Negara Bagian]: <-- ENTER
Nama Lokal (mis., kota) []: <-- ENTER
Nama Organisasi (mis., perusahaan) [Internet Widgits Pty Ltd]: <-- MASUKKAN
Nama Unit Organisasi (mis., bagian) []: <-- ENTER
Common Name (mis., nama ANDA) []: <-- ENTER
Email Address []: <- ENTER
Mengonfigurasi Jailkit
Mengonfigurasi SASL
Mengonfigurasi PAM
Mengonfigurasi Courier
Mengonfigurasi Spamassassin
Mengonfigurasi Amavisd
Mengonfigurasi Getmail
Mengonfigurasi Pureftpd
Mengonfigurasi BIND
Mengonfigurasi Apache
Mengonfigurasi Vlogger
Mengonfigurasi Apps vhost
Mengonfigurasi Firewall
Memasang ISPConfig
ISPConfig Port [8080]: <-- ENTER
Mengonfigurasi DBServer
Menginstal ISPConfig crontab
tanpa crontab untuk root
tanpa crontab untuk getmail
Memulai ulang layanan ...
Daripada memanggil skrip init melalui /etc/init. d, menggunakan utilitas layanan(8)
, mis. service mysql restart
Karena skrip yang Anda coba minta telah dikonversi menjadi pekerjaan
Pemula, Anda juga dapat menggunakan utilitas stop(8) lalu mulai(8),
misalnya hentikan mysql ; mulai mysql. Utilitas restart(8) juga tersedia.
mysql stop/waiting
mysql start/running, process 2302
* Menghentikan Postfix Mail Transport Agent postfix
...selesai.
* Memulai Postfix Mail Transport Agent postfix
...selesai.
* Menghentikan SASL Authentication Daemon saslauthd
...selesai.
* Memulai SASL Authentication Dademon /> ...selesai.
Menghentikan amavisd: amavisd-new.
Memulai amavisd: amavisd-new.
* Menghentikan ClamAV daemon clamd
...selesai.
* Memulai ClamAV daemon clamd
Bytecode: Security mode set ke "TrustSigned".
...selesai.
* Menghentikan layanan autentikasi Courier authdaemond
...selesai. /> * Memulai Layanan autentikasi kurir authdaemond
...selesai.
* Menghentikan server IMAP Courier imapd
...selesai.
* Memulai server IMAP Courier imapd
imapd
...selesai.
* Menghentikan server IMAP-SSL kurir imapd-ssl
...selesai.
* Memulai Server IMAP-SSL Courier imapd-ssl
...selesai.
* Menghentikan server Courier POP3...
...selesai.
* Memulai server POP3 Courier.. .
...selesai.
* Menghentikan server POP3-SSL Courier...
...selesai.
* Memulai server POP3-SSL Courier...
...selesai.
* Memulai ulang server web apache2
... menunggu .... ...selesai.
Memulai ulang server ftp: Menjalankan: /usr/sbin/pure-ftpd -mysql-virtualchroot -l mysql:/etc/pure-ftpd/db/mysql.conf -l pam -8 UTF-8 -O clf:/var/log/pure-ftpd/transfer.log -D -H -b -A -E -u 1000 -Y 1 -B
Penginstalan selesai.
example@unixlinux.online:/tmp/ispconfig3_install/install#
Pemasang secara otomatis mengonfigurasi semua layanan yang mendasarinya, jadi tidak diperlukan konfigurasi manual.
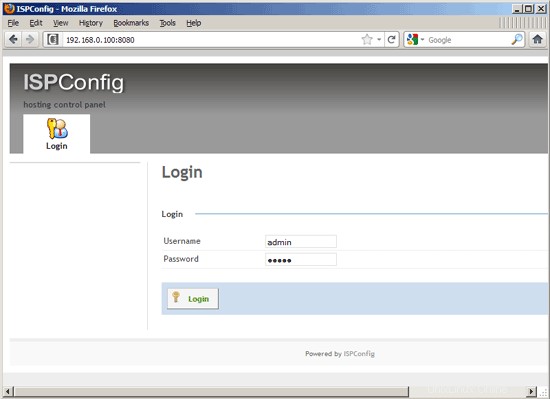
Setelah itu Anda dapat mengakses ISPConfig 3 di bawah http://server1.example.com:8080/ atau http://192.168.0.100:8080/. Masuk dengan nama pengguna admin dan kata sandi admin (Anda harus mengubah kata sandi default setelah login pertama Anda):
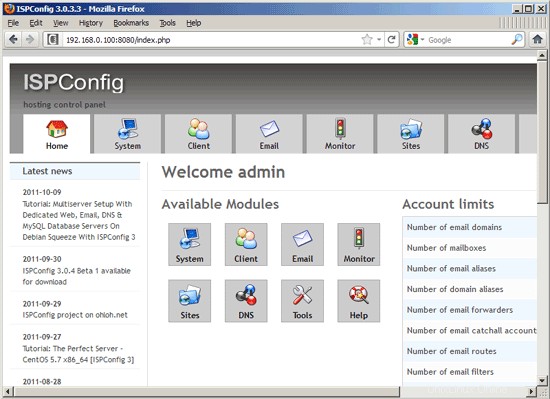
Sistem sekarang siap digunakan.
21.1 ISPConfig 3 Manual
Untuk mempelajari cara menggunakan ISPConfig 3, saya sangat menyarankan untuk mengunduh Manual ISPConfig 3.
Pada sekitar 300 halaman, ini mencakup konsep di balik ISPConfig (admin, reseller, klien), menjelaskan cara menginstal dan memperbarui ISPConfig 3, menyertakan referensi untuk semua formulir dan bidang formulir di ISPConfig bersama dengan contoh input yang valid, dan memberikan tutorial untuk tugas paling umum di ISPConfig 3. Ini juga menjelaskan cara membuat server Anda lebih aman dan dilengkapi dengan bagian pemecahan masalah di bagian akhir.
21.2 Aplikasi Monitor ISPConfig Untuk Android
Dengan Aplikasi Monitor ISPConfig, Anda dapat memeriksa status server Anda dan mengetahui apakah semua layanan berjalan seperti yang diharapkan. Anda dapat memeriksa port TCP dan UDP dan melakukan ping ke server Anda. Selain itu, Anda dapat menggunakan aplikasi ini untuk meminta detail dari server yang telah menginstal ISPConfig (harap diperhatikan bahwa versi ISPConfig 3 yang diinstal minimum dengan dukungan untuk Aplikasi Monitor ISPConfig adalah 3.0.3.3! ); detail ini mencakup semua yang Anda ketahui dari modul Monitor di ISPConfig Control Panel (misalnya layanan, log email dan sistem, antrian email, info CPU dan memori, penggunaan disk, kuota, detail OS, log RKHunter, dll.), dan tentu saja , karena ISPConfig berkemampuan multiserver, Anda dapat memeriksa semua server yang dikontrol dari server master ISPConfig Anda.
Untuk mengunduh dan petunjuk penggunaan, silakan kunjungi http://www.ispconfig.org/ispconfig-3/ispconfig-monitor-app-for-android/.
22 Catatan Tambahan
22.1 OpenVZ
Jika server Ubuntu yang baru saja Anda siapkan dalam tutorial ini adalah wadah OpenVZ (mesin virtual), Anda harus melakukan ini pada sistem host (saya berasumsi bahwa ID wadah OpenVZ adalah 101 - ganti dengan VPSID yang benar di sistem Anda):
VPSID=101
 untuk CAP di CHOWN DAC_READ_SEARCH SETGID SETUID NET_BIND_SERVICE NET_ADMIN SYS_CHROOT SYS_NICE CHOWN DAC_READ_SEARCH SETGID SETUID NET_BIND_SERVICE NET_ADMIN SYS_ CHROOT SYS_ NICE
 pada --save
 selesai
23 Tautan
- Ubuntu:http://www.ubuntu.com/
- ISPConfig:http://www.ispconfig.org/
Server Sempurna - Ubuntu 11.10 [ISPConfig 3] - Halaman 3
19 Instal fail2ban
Ini opsional tetapi disarankan, karena monitor ISPConfig mencoba menampilkan log fail2ban:
apt-get install fail2ban
Untuk membuat monitor fail2ban PureFTPd, SASL, dan Courier, buat file /etc/fail2ban/jail.local:
vi /etc/fail2ban/jail.local
[pureftpd]enabled =trueport =ftpfilter =pureftpdlogpath =/var/log/syslogmaxretry =3[sasl]enabled =trueport =smtpfilter =sasllogpath =/ var/log/mail.logmaxretry =5[courierpop3]enabled =trueport =pop3filter =kurirpop3logpath =/var/log/mail.logmaxretry =5[courierpop3s]enabled =trueport =pop3sfilter =kurirpop3slogpath =/var/log/mail.logmaxretry =5[courierimap]enabled =trueport =imap2filter =kuririmaplogpath =/var/log/mail.logmaxretry =5[courierimaps]enabled =trueport =imapsfilter =kuririmapslogpath =/var/log/mail.logmaxretry =5 |
Kemudian buat lima file filter berikut:
vi /etc/fail2ban/filter.d/pureftpd.conf
[Definition]failregex =.*pure-ftpd:\(.*@ |
vi /etc/fail2ban/filter.d/courierpop3.conf
# File konfigurasi Fail2Ban## $Revisi:100 $#[Definisi]# Option:failregex# Catatan.:regex untuk mencocokkan pesan kegagalan sandi di file log. Host# harus dicocokkan dengan grup bernama "host". Tag " |
vi /etc/fail2ban/filter.d/courierpop3s.conf
# File konfigurasi Fail2Ban## $Revisi:100 $#[Definisi]# Option:failregex# Catatan.:regex untuk mencocokkan pesan kegagalan sandi di file log. Host# harus dicocokkan dengan grup bernama "host". Tag " |
vi /etc/fail2ban/filter.d/courierimap.conf
# File konfigurasi Fail2Ban## $Revisi:100 $#[Definisi]# Option:failregex# Catatan.:regex untuk mencocokkan pesan kegagalan sandi di file log. Host# harus dicocokkan dengan grup bernama "host". Tag " |
vi /etc/fail2ban/filter.d/courierimaps.conf
# File konfigurasi Fail2Ban## $Revisi:100 $#[Definisi]# Option:failregex# Catatan.:regex untuk mencocokkan pesan kegagalan sandi di file log. Host# harus dicocokkan dengan grup bernama "host". Tag " |
Mulai ulang fail2ban setelahnya:
/etc/init.d/fail2ban restart
20 Instal SquirrelMail
Untuk menginstal klien webmail SquirrelMail, jalankan
apt-get install squirrelmail
Kemudian konfigurasikan SquirrelMail:
squirrelmail-configure
Kita harus memberitahu SquirrelMail bahwa kita menggunakan Courier-IMAP/-POP3:
Konfigurasi SquirrelMail : Baca: config.php (1.4.0)
--------------------------------- ------------------------
Menu Utama --
1. Preferensi Organisasi
2. Setelan Server
3. Default Folder
4. Opsi Umum
5. Tema
6. Buku Alamat
7. Pesan Hari (MOTD)
8. Plugin
9. Database
10. Bahasa
D. Menyetel setelan yang telah ditentukan sebelumnya untuk server IMAP tertentu
C Mengaktifkan warna
S Simpan data
Q Keluar
Command >> <-- D
Konfigurasi SquirrelMail : Baca: config.php
---- -------------------------------------------------- ---
Sementara kami telah membangun SquirrelMail, kami telah menemukan beberapa
preferensi yang berfungsi lebih baik dengan beberapa server yang tidak berfungsi dengan baik
dengan yang lain. Jika Anda memilih server IMAP, opsi ini akan
menyetel beberapa setelan yang telah ditentukan sebelumnya untuk server tersebut.
Harap perhatikan bahwa Anda masih harus melalui dan memastikan semuanya benar. Ini tidak mengubah semuanya. Hanya ada
hanya beberapa setelan yang akan diubah.
Harap pilih server IMAP Anda:
bincimap = Server IMAP Binc
kurir = server
dovecot =dovecot aman imap server
Exchange =Microsoft Exchange IMAP Server
hmailserver =hmailserver
macosx =mac OS x mailserver
Mercury32 =Mercury /32
uw = Server IMAP Universitas Washington
gmail = IMAP akses ke akun mail Google (Gmail)
= -- kurir
Konfigurasi SquirrelMail : Baca: config.php
----------------------- ----------------------------------
Saat kami telah membangun SquirrelMail, kami telah menemukan beberapa
preferensi yang berfungsi lebih baik dengan beberapa server yang tidak berfungsi dengan baik
dengan yang lain. Jika Anda memilih server IMAP, opsi ini akan
menyetel beberapa setelan yang telah ditentukan sebelumnya untuk server tersebut.
Harap perhatikan bahwa Anda masih harus melalui dan memastikan semuanya benar. Ini tidak mengubah semuanya. Hanya ada
hanya beberapa setelan yang akan diubah.
Harap pilih server IMAP Anda:
bincimap = Server IMAP Binc
kurir = server
dovecot =dovecot aman imap server
Exchange =Microsoft Exchange IMAP Server
hmailserver =hmailserver
macosx =mac OS x mailserver
Mercury32 =Mercury /32
uw = Universitas server IMAP Washington
berhenti = Jangan mengubah apa pun
Command >> kurir
uri_> default_folder_prefix =inbox.
trash_folder =trash
sent_folder =terkirim
draft_folder =draft
show_prefix_option =false
default_sub_of_inbox =false
show_contain_subfolders_opt_of_of_inbox =false
show_contain_subfolders_opted_of_of_inbox =false
show_contain_subfolders_opted opsional_pembatas = .
delete_folder = true
Tekan tombol apa saja untuk melanjutkan... <-- ENTER
Konfigurasi SquirrelMail : Baca: config.php ( 1.4.0)
------------------------------------------ ---------------
Menu Utama --
1. Preferensi Organisasi
2. Setelan Server
3. Default Folder
4. Opsi Umum
5. Tema
6. Buku Alamat
7. Pesan Hari (MOTD)
8. Plugin
9. Database
10. Bahasa
D. Menyetel setelan yang telah ditentukan sebelumnya untuk server IMAP tertentu
C Mengaktifkan warna
S Simpan data
Q Keluar
Perintah >> <-- S
Konfigurasi SquirrelMail : Baca: config.php (1.4.0)
-------- --------------------------------------------------
Menu Utama --
1. Preferensi Organisasi
2. Setelan Server
3. Default Folder
4. Opsi Umum
5. Tema
6. Buku Alamat
7. Pesan dari the Day (MOTD)
8. Plugin
9. Database
10. Bahasa
D. Menyetel setelan yang telah ditentukan sebelumnya untuk server IMAP tertentu
C Aktifkan warna
S Simpan data
Q Keluar
Command >> S
Data disimpan di config.php
Tekan enter untuk melanjutkan... <-- ENTER
Konfigurasi SquirrelMail : Baca: config.php (1.4.0)
---------- -------------------------------------------------------
Menu Utama --
1. Preferensi Organisasi
2. Setelan Server
3. Default Folder
4. Opsi Umum
5. Tema
6. Buku Alamat
7. Pesan Hari ini (MOTD)
8. Plugin
9. Database
10. Bahasa
D. Tetapkan yang telah ditentukan sebelumnya setelan untuk server IMAP tertentu
C Aktifkan warna
S Simpan data
Q Keluar
Command >> <-- Q
Sekarang kita akan mengkonfigurasi SquirrelMail sehingga Anda dapat menggunakannya dari dalam situs web Anda (dibuat melalui ISPConfig) dengan menggunakan alias /squirrelmail atau /webmail. Jadi jika situs web Anda adalah www.example.com, Anda akan dapat mengakses SquirrelMail menggunakan www.example.com/squirrelmail atau www.example.com/webmail.
Konfigurasi Apache SquirrelMail ada di file /etc/squirrelmail/apache.conf, tetapi file ini tidak dimuat oleh Apache karena tidak ada di direktori /etc/apache2/conf.d/. Oleh karena itu kami membuat symlink bernama squirrelmail.conf di direktori /etc/apache2/conf.d/ yang menunjuk ke /etc/squirrelmail/apache.conf dan memuat ulang Apache setelahnya:
cd /etc/apache2/conf.d/
 ln -s ../../squirrelmail/apache.conf squirrelmail.conf
 /etc/init.d/apache2 reload
Sekarang buka /etc/apache2/conf.d/squirrelmail.conf...
vi /etc/apache2/conf.d/squirrelmail.conf
... dan tambahkan baris berikut ke wadah
[...] |
Buat direktori /var/lib/squirrelmail/tmp...
mkdir /var/lib/squirrelmail/tmp
... dan menjadikannya milik pengguna www-data:
chown www-data /var/lib/squirrelmail/tmp
Muat ulang Apache lagi:
/etc/init.d/apache2 memuat ulang
Itu saja - /etc/Apache2/conf.d/squirrelmail.conf mendefinisikan alias yang disebut /squirrelmail yang menunjuk ke direktori instalasi SquirrelMail /usr/share/squirrelmail.
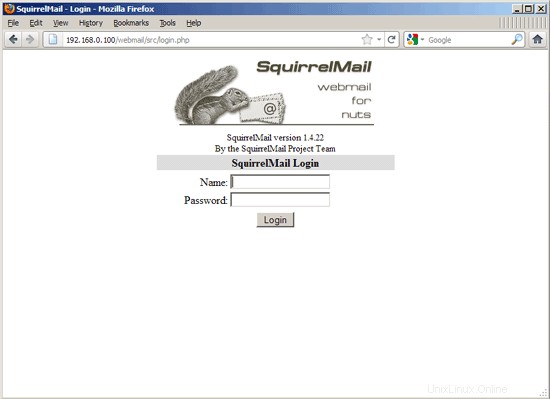
Anda sekarang dapat mengakses SquirrelMail dari situs web Anda sebagai berikut:
http://192.168.0.100/squirrelmail
 http://www.example.com/squirrelmail
Anda juga dapat mengaksesnya dari vhost panel kontrol ISPConfig (setelah Anda menginstal ISPConfig, lihat bab berikutnya) sebagai berikut (ini tidak memerlukan konfigurasi apa pun di ISPConfig):
http://server1.example.com:8080/squirrelmail
Jika Anda ingin menggunakan alias /webmail daripada /squirrelmail, cukup buka /etc/apache2/conf.d/squirrelmail.conf...
vi /etc/apache2/conf.d/squirrelmail.conf
... dan tambahkan baris Alias /webmail /usr/share/squirrelmail:
Alias /squirrelmail /usr/share/squirrelmailAlias /webmail /usr/share/squirrelmail[...] |
Kemudian muat ulang Apache:
/etc/init.d/apache2 memuat ulang
Sekarang Anda dapat mengakses Squirrelmail sebagai berikut:
http://192.168.0.100/webmail
http://www.example.com/webmail
http://server1.example.com:8080/webmail (setelah Anda menginstal ISPConfig, lihat bab selanjutnya)
Jika Anda ingin mendefinisikan vhost seperti webmail.example.com di mana pengguna Anda dapat mengakses SquirrelMail, Anda harus menambahkan konfigurasi vhost berikut ke /etc/Apache2/conf.d/squirrelmail.conf:
vi /etc/apache2/conf.d/squirrelmail.conf
[...] |
Pastikan Anda mengganti 1.2.3.4 dengan alamat IP server Anda yang benar. Tentu saja, harus ada catatan DNS untuk webmail.example.com yang menunjuk ke alamat IP yang Anda gunakan dalam konfigurasi vhost. Pastikan juga vhost webmail.example.com tidak ada di ISPConfig (jika tidak, kedua vhost akan saling mengganggu!).
Sekarang muat ulang Apache...
/etc/init.d/apache2 memuat ulang
... dan Anda dapat mengakses SquirrelMail di bawah http://webmail.example.com!
Server Sempurna - Ubuntu 11.10 [ISPConfig 3] - Halaman 4
12 Instal Postfix, Courier, Saslauthd, MySQL, rkhunter, binutils
Kita dapat menginstal Postfix, Courier, Saslauthd, MySQL, rkhunter, dan binutils dengan satu perintah:
apt-get install postfix postfix-mysql postfix-doc mysql-client mysql-server kurir-authdaemon kurir-authlib-mysql kurir-pop kurir-pop-ssl kurir-imap kurir-imap-ssl libsasl2-2 libsasl2-modul libsasl2-modules-sql sasl2-bin libpam-mysql openssl getmail4 rkhunter binutils maildrop
Anda akan ditanya pertanyaan berikut:
Kata sandi baru untuk pengguna "root" MySQL:<-- yourrootsqlpassword
Ulangi kata sandi untuk pengguna "root" MySQL:<-- yourrootsqlpassword
Buat direktori untuk administrasi berbasis web? <-- Tidak
Jenis umum konfigurasi email:<-- Situs Internet
Nama email sistem:<-- server1.example.com
Diperlukan sertifikat SSL <-- Oke
Jika Anda mengetahui (nanti setelah Anda mengonfigurasi akun email pertama Anda di ISPConfig) bahwa Anda tidak dapat mengirim email dan mendapatkan kesalahan berikut di /var/log/mail.log...
Otentikasi SASL LOGIN gagal:tidak ada mekanisme yang tersedia
... silakan buka https://www.howtoforge.com/forums/showpost.php?p=265831&postcount=25 untuk mempelajari cara menyelesaikan masalah.
Kami ingin MySQL mendengarkan di semua antarmuka, bukan hanya localhost, oleh karena itu kami mengedit /etc/mysql/my.cnf dan mengomentari baris bind-address =127.0.0.1:
vi /etc/mysql/my.cnf
[...]# Alih-alih melewatkan jaringan, defaultnya sekarang hanya mendengarkan di# localhost yang lebih kompatibel dan tidak kalah aman. #bind-address =127.0.0.1[...] |
Kemudian kita restart MySQL:
/etc/init.d/mysql restart
Sekarang periksa apakah jaringan diaktifkan. Jalankan
netstat -ketuk | grep mysql
Outputnya akan terlihat seperti ini:
example@unixlinux.online:~# netstat -tap | grep mysql
tcp 0 0 *:mysql *:* DENGARKAN 22355/mysqld
contoh online@unixDuring the installation, the SSL certificates for IMAP-SSL and POP3-SSL are created with the hostname localhost. To change this to the correct hostname (server1.example.com in this tutorial), delete the certificates...
cd /etc/courier
rm -f /etc/courier/imapd.pem
rm -f /etc/courier/pop3d.pem... and modify the following two files; replace CN=localhost with CN=server1.example.com (you can also modify the other values, if necessary):
vi /etc/courier/imapd.cnf
[...]CN=server1.example.com[...] |
vi /etc/courier/pop3d.cnf
[...]CN=server1.example.com[...] |
Then recreate the certificates...
mkimapdcert
 mkpop3dcert
... and restart Courier-IMAP-SSL and Courier-POP3-SSL:
/etc/init.d/courier-imap-ssl restart
 /etc/init.d/courier-pop-ssl restart
13 Install Amavisd-new, SpamAssassin, And Clamav
To install amavisd-new, SpamAssassin, and ClamAV, we run
apt-get install amavisd-new spamassassin clamav clamav-daemon zoo unzip bzip2 arj nomarch lzop cabextract apt-listchanges libnet-ldap-perl libauthen-sasl-perl clamav-docs daemon libio-string-perl libio-socket-ssl-perl libnet-ident-perl zip libnet-dns-perl
The ISPConfig 3 setup uses amavisd which loads the SpamAssassin filter library internally, so we can stop SpamAssassin to free up some RAM:
/etc/init.d/spamassassin stop
 update-rc.d -f spamassassin remove
14 Install Apache2, PHP5, phpMyAdmin, FCGI, suExec, Pear, And mcrypt
Apache2, PHP5, phpMyAdmin, FCGI, suExec, Pear, and mcrypt can be installed as follows:
apt-get install apache2 apache2.2-common apache2-doc apache2-mpm-prefork apache2-utils libexpat1 ssl-cert libapache2-mod-php5 php5 php5-common php5-gd php5-mysql php5-imap phpmyadmin php5-cli php5-cgi libapache2-mod-fcgid apache2-suexec php-pear php-auth php5-mcrypt mcrypt php5-imagick imagemagick libapache2-mod-suphp libruby libapache2-mod-ruby
You will see the following question:
Web server to reconfigure automatically:<-- apache2
Configure database for phpmyadmin with dbconfig-common? <-- No
Then run the following command to enable the Apache modules suexec, rewrite, ssl, actions, and include (plus dav, dav_fs, and auth_digest if you want to use WebDAV):
a2enmod suexec rewrite ssl actions include
a2enmod dav_fs dav auth_digest
Restart Apache afterwards:
/etc/init.d/apache2 restart
If you want to host Ruby files with the extension .rb on your web sites created through ISPConfig, you must comment out the line application/x-ruby rb in /etc/mime.types:
vi /etc/mime.types
[...]#application/x-ruby rb[...] |
(This is needed only for .rb files; Ruby files with the extension .rbx work out of the box.)
Restart Apache afterwards:
/etc/init.d/apache2 restart
15 Install PureFTPd And Quota
PureFTPd and quota can be installed with the following command:
apt-get install pure-ftpd-common pure-ftpd-mysql quota quotatool
Edit the file /etc/default/pure-ftpd-common...
vi /etc/default/pure-ftpd-common
... and make sure that the start mode is set to standalone and set VIRTUALCHROOT=true:
[...]STANDALONE_OR_INETD=standalone[...]VIRTUALCHROOT=true[...] |
Now we configure PureFTPd to allow FTP and TLS sessions. FTP is a very insecure protocol because all passwords and all data are transferred in clear text. By using TLS, the whole communication can be encrypted, thus making FTP much more secure.
If you want to allow FTP and TLS sessions, run
echo 1> /etc/pure-ftpd/conf/TLS
In order to use TLS, we must create an SSL certificate. I create it in /etc/ssl/private/, therefore I create that directory first:
mkdir -p /etc/ssl/private/
Afterwards, we can generate the SSL certificate as follows:
openssl req -x509 -nodes -days 7300 -newkey rsa:2048 -keyout /etc/ssl/private/pure-ftpd.pem -out /etc/ssl/private/pure-ftpd.pem
Country Name (2 letter code) [AU]:<-- Enter your Country Name (e.g., "DE").
State or Province Name (full name) [Some-State]:<-- Enter your State or Province Name.
Locality Name (eg, city) []:<-- Enter your City.
Organization Name (eg, company) [Internet Widgits Pty Ltd]:<-- Enter your Organization Name (e.g., the name of your company).
Organizational Unit Name (eg, section) []:<-- Enter your Organizational Unit Name (e.g. "IT Department").
Common Name (eg, YOUR name) []:<-- Enter the Fully Qualified Domain Name of the system (e.g. "server1.example.com").
Email Address []:<-- Enter your Email Address.
Change the permissions of the SSL certificate:
chmod 600 /etc/ssl/private/pure-ftpd.pem
Then restart PureFTPd:
/etc/init.d/pure-ftpd-mysql restart
Edit /etc/fstab. Mine looks like this (I added ,usrjquota=quota.user,grpjquota=quota.group,jqfmt=vfsv0 to the partition with the mount point /):
vi /etc/fstab
# /etc/fstab:static file system information.## Use 'blkid' to print the universally unique identifier for a# device; this may be used with UUID=as a more robust way to name devices# that works even if disks are added and removed. See fstab(5).## |
To enable quota, run these commands:
mount -o remount /
quotacheck -avugm
 quotaon -avug
16 Install BIND DNS Server
BIND can be installed as follows:
apt-get install bind9 dnsutils
17 Install Vlogger, Webalizer, And AWstats
Vlogger, webalizer, and AWstats can be installed as follows:
apt-get install vlogger webalizer awstats geoip-database
Open /etc/cron.d/awstats afterwards...
vi /etc/cron.d/awstats
... and comment out both cron jobs in that file:
#*/10 * * * * www-data [ -x /usr/share/awstats/tools/update.sh ] &&/usr/share/awstats/tools/update.sh# Generate static reports:#10 03 * * * www-data [ -x /usr/share/awstats/tools/buildstatic.sh ] &&/usr/share/awstats/tools/buildstatic.sh |
18 Install Jailkit
Jailkit is needed only if you want to chroot SSH users. It can be installed as follows (important:Jailkit must be installed before ISPConfig - it cannot be installed afterwards!):
apt-get install build-essential autoconf automake1.9 libtool flex bison debhelper
cd /tmp
 wget http://olivier.sessink.nl/jailkit/jailkit-2.14.tar.gz
 tar xvfz jailkit-2.14.tar.gz
 cd jailkit-2.14
 ./debian/rules binary
If the last command gives you an error like...
x86_64-linux-gnu-gcc -lpthread -o jk_socketd jk_socketd.o jk_lib.o utils.o iniparser.o
 jk_socketd.o:In function `main':
 /tmp/jailkit-2.14/src/jk_socketd.c:474:undefined reference to `pthread_create'
 collect2:ld returned 1 exit status
 make[2]:*** [jk_socketd] Error 1
 make[2]:Leaving directory `/tmp/jailkit-2.14/src'
 make[1]:*** [all] Error 2
 make[1]:Leaving directory `/tmp/jailkit-2.14'
 make:*** [build-arch-stamp] Error 2
 example@unixlinux.online:/tmp/jailkit-2.14#
... please install gcc-4.4:
apt-get install gcc-4.4
Now take a look at /usr/bin/gcc:
ls -l /usr/bin/gcc*
/usr/bin/gcc should currently be a symlink to /usr/bin/gcc-4.6:
example@unixlinux.online:/tmp/jailkit-2.14# ls -l /usr/bin/gcc*
 lrwxrwxrwx 1 root root      7 2011-08-14 09:16 /usr/bin/gcc -> gcc-4.6
 -rwxr-xr-x 1 root root 259232 2011-10-05 23:56 /usr/bin/gcc-4.4
 -rwxr-xr-x 1 root root 349120 2011-09-16 16:31 /usr/bin/gcc-4.6
 example@unixlinux.online:/tmp/jailkit-2.14#
We change this now so that /usr/bin/gcc links to /usr/bin/gcc-4.4:
ln -sf /usr/bin/gcc-4.4 /usr/bin/gcc
Now build Jailkit as follows:
make clean
 ./configure
 make
 make clean
 ./debian/rules binary
If the ./debian/rules binary command doesn't give you an error this time, you can now install the Jailkit .deb package as follows:
cd ..
 dpkg -i jailkit_2.14-1_*.deb
 rm -rf jailkit-2.14*
Finally, we change the /usr/bin/gcc symlink so that it points to /usr/bin/gcc-4.6 again:
ln -sf /usr/bin/gcc-4.6 /usr/bin/gcc
The Perfect Server - Ubuntu 11.10 [ISPConfig 3] - Page 5
4 Get root Privileges
After the reboot you can login with your previously created username (e.g. administrator). Because we must run all the steps from this tutorial with root privileges, we can either prepend all commands in this tutorial with the string sudo, or we become root right now by typing
sudo su
(You can as well enable the root login by running
sudo passwd root
and giving root a password. You can then directly log in as root, but this is frowned upon by the Ubuntu developers and community for various reasons. See http://ubuntuforums.org/showthread.php?t=765414.)
5 Install The SSH Server (Optional)
If you did not install the OpenSSH server during the system installation, you can do it now:
apt-get install ssh openssh-server
From now on you can use an SSH client such as PuTTY and connect from your workstation to your Ubuntu 11.10 server and follow the remaining steps from this tutorial.
6 Install vim-nox (Optional)
I'll use vi as my text editor in this tutorial. The default vi program has some strange behaviour on Ubuntu and Debian; to fix this, we install vim-nox:
apt-get install vim-nox
(You don't have to do this if you use a different text editor such as joe or nano.)
7 Configure The Network
Because the Ubuntu installer has configured our system to get its network settings via DHCP, we have to change that now because a server should have a static IP address. Edit /etc/network/interfaces and adjust it to your needs (in this example setup I will use the IP address 192.168.0.100 ):
vi /etc/network/interfaces
# This file describes the network interfaces available on your system# and how to activate them. For more information, see interfaces(5).# The loopback network interfaceauto loiface lo inet loopback# The primary network interfaceauto eth0iface eth0 inet static address 192.168.0.100 netmask 255.255.255.0 network 192.168.0.0 broadcast 192.168.0.255 gateway 192.168.0.1 |
Then restart your network:
/etc/init.d/networking restart
Then edit /etc/hosts. Make it look like this:
vi /etc/hosts
127.0.0.1 localhost.localdomain localhost192.168.0.100 server1.example.com server1# The following lines are desirable for IPv6 capable hosts::1 ip6-localhost ip6-loopbackfe00::0 ip6-localnetff00::0 ip6-mcastprefixff02::1 ip6-allnodesff02::2 ip6-allrouters |
Now run
echo server1.example.com> /etc/hostname
 /etc/init.d/hostname restart
Afterwards, run
hostname
 hostname -f
Both should show server1.example.com now.
8 Edit /etc/apt/sources.list And Update Your Linux Installation
Edit /etc/apt/sources.list. Comment out or remove the installation CD from the file and make sure that the universe and multiverse repositories are enabled. It should look like this:
vi /etc/apt/sources.list
## deb cdrom:[Ubuntu-Server 11.10 _Oneiric Ocelot_ - Release amd64 (20111011)]/ dists/oneiric/main/binary-i386/# deb cdrom:[Ubuntu-Server 11.10 _Oneiric Ocelot_ - Release amd64 (20111011)]/ dists/oneiric/restricted/binary-i386/# deb cdrom:[Ubuntu-Server 11.10 _Oneiric Ocelot_ - Release amd64 (20111011)]/ oneiric main restricted#deb cdrom:[Ubuntu-Server 11.10 _Oneiric Ocelot_ - Release amd64 (20111011)]/ dists/oneiric/main/binary-i386/#deb cdrom:[Ubuntu-Server 11.10 _Oneiric Ocelot_ - Release amd64 (20111011)]/ dists/oneiric/restricted/binary-i386/#deb cdrom:[Ubuntu-Server 11.10 _Oneiric Ocelot_ - Release amd64 (20111011)]/ oneiric main restricted# See http://help.ubuntu.com/community/UpgradeNotes for how to upgrade to# newer versions of the distribution.deb http://de.archive.ubuntu.com/ubuntu/ oneiric main restricteddeb-src http://de.archive.ubuntu.com/ubuntu/ oneiric main restricted## Major bug fix updates produced after the final release of the## distribution.deb http://de.archive.ubuntu.com/ubuntu/ oneiric-updates main restricteddeb-src http://de.archive.ubuntu.com/ubuntu/ oneiric-updates main restricted## N.B. software from this repository is ENTIRELY UNSUPPORTED by the Ubuntu## team. Also, please note that software in universe WILL NOT receive any## review or updates from the Ubuntu security team.deb http://de.archive.ubuntu.com/ubuntu/ oneiric universedeb-src http://de.archive.ubuntu.com/ubuntu/ oneiric universedeb http://de.archive.ubuntu.com/ubuntu/ oneiric-updates universedeb-src http://de.archive.ubuntu.com/ubuntu/ oneiric-updates universe## N.B. software from this repository is ENTIRELY UNSUPPORTED by the Ubuntu## team, and may not be under a free licence. Please satisfy yourself as to## your rights to use the software. Also, please note that software in## multiverse WILL NOT receive any review or updates from the Ubuntu## security team.deb http://de.archive.ubuntu.com/ubuntu/ oneiric multiversedeb-src http://de.archive.ubuntu.com/ubuntu/ oneiric multiversedeb http://de.archive.ubuntu.com/ubuntu/ oneiric-updates multiversedeb-src http://de.archive.ubuntu.com/ubuntu/ oneiric-updates multiverse## N.B. software from this repository may not have been tested as## extensively as that contained in the main release, although it includes## newer versions of some applications which may provide useful features.## Also, please note that software in backports WILL NOT receive any review## or updates from the Ubuntu security team.deb http://de.archive.ubuntu.com/ubuntu/ oneiric-backports main restricted universe multiversedeb-src http://de.archive.ubuntu.com/ubuntu/ oneiric-backports main restricted universe multiversedeb http://security.ubuntu.com/ubuntu oneiric-security main restricteddeb-src http://security.ubuntu.com/ubuntu oneiric-security main restricteddeb http://security.ubuntu.com/ubuntu oneiric-security universedeb-src http://security.ubuntu.com/ubuntu oneiric-security universedeb http://security.ubuntu.com/ubuntu oneiric-security multiversedeb-src http://security.ubuntu.com/ubuntu oneiric-security multiverse## Uncomment the following two lines to add software from Canonical's## 'partner' repository.## This software is not part of Ubuntu, but is offered by Canonical and the## respective vendors as a service to Ubuntu users.# deb http://archive.canonical.com/ubuntu oneiric partner# deb-src http://archive.canonical.com/ubuntu oneiric partner## Uncomment the following two lines to add software from Ubuntu's## 'extras' repository.## This software is not part of Ubuntu, but is offered by third-party## developers who want to ship their latest software.# deb http://extras.ubuntu.com/ubuntu oneiric main# deb-src http://extras.ubuntu.com/ubuntu oneiric main |
Then run
apt-get update
to update the apt package database and
apt-get upgrade
to install the latest updates (if there are any). If you see that a new kernel gets installed as part of the updates, you should reboot the system afterwards:
reboot
9 Change The Default Shell
/bin/sh is a symlink to /bin/dash, however we need /bin/bash, not /bin/dash. Therefore we do this:
dpkg-reconfigure dash
Use dash as the default system shell (/bin/sh)? <-- No
If you don't do this, the ISPConfig installation will fail.
10 Disable AppArmor
AppArmor is a security extension (similar to SELinux) that should provide extended security. In my opinion you don't need it to configure a secure system, and it usually causes more problems than advantages (think of it after you have done a week of trouble-shooting because some service wasn't working as expected, and then you find out that everything was ok, only AppArmor was causing the problem). Therefore I disable it (this is a must if you want to install ISPConfig later on).
We can disable it like this:
/etc/init.d/apparmor stop
 update-rc.d -f apparmor remove
 apt-get remove apparmor apparmor-utils
11 Synchronize the System Clock
It is a good idea to synchronize the system clock with an NTP (n etwork t ime p rotocol) server over the Internet. Simply run
apt-get install ntp ntpdate
and your system time will always be in sync.
The Perfect Server - Ubuntu 11.10 [ISPConfig 3] - Page 6
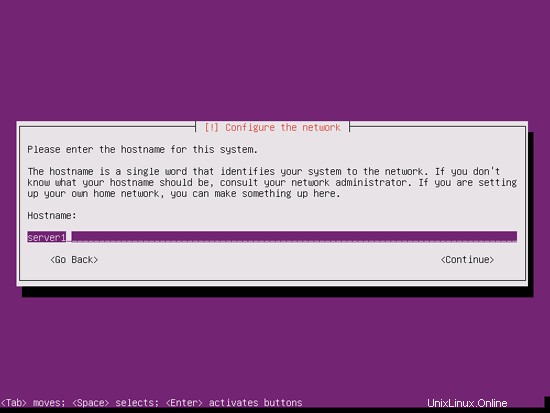
Enter the hostname. In this example, my system is called server1.example.com , so I enter server1 :
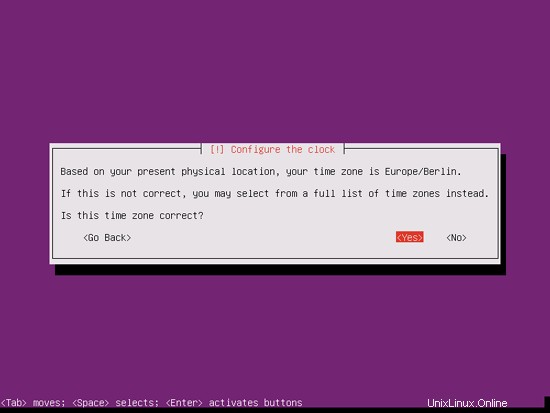
Please check if the installer detected your time zone correctly. If so, select Yes, otherwise No:
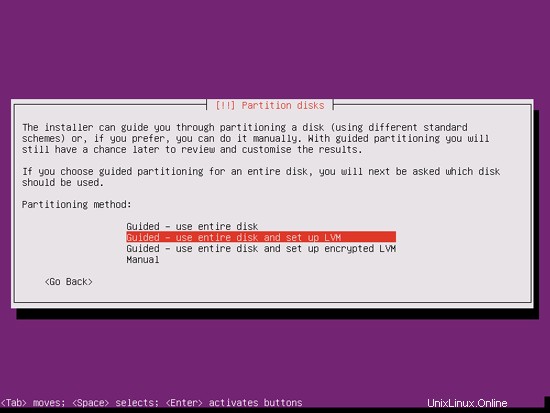
Now you have to partition your hard disk. For simplicity's sake I select Guided - use entire disk and set up LVM - this will create one volume group with two logical volumes, one for the / file system and another one for swap (of course, the partitioning is totally up to you - if you know what you're doing, you can also set up your partitions manually).
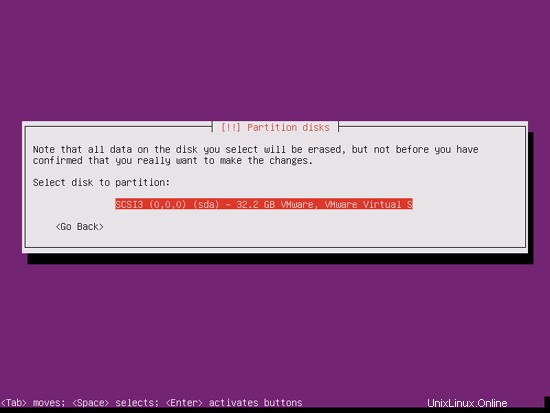
Select the disk that you want to partition:
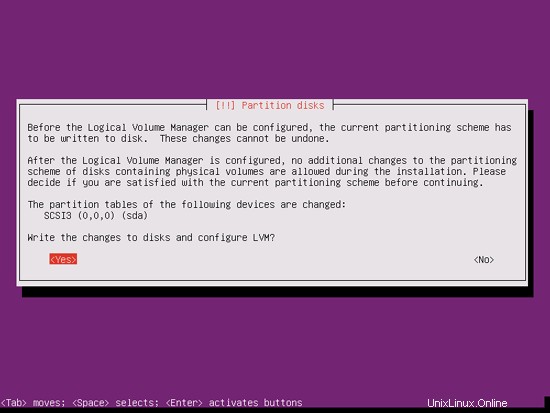
When you're asked Write the changes to disks and configure LVM?, select Yes:
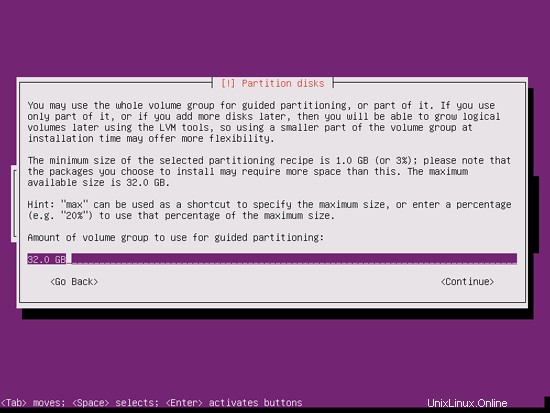
If you have selected Guided - use entire disk and set up LVM, the partitioner will create one big volume group that uses all the disk space. You can now specify how much of that disk space should be used by the logical volumes for / and swap. It makes sense to leave some space unused so that you can later on expand your existing logical volumes or create new ones - this gives you more flexibility.
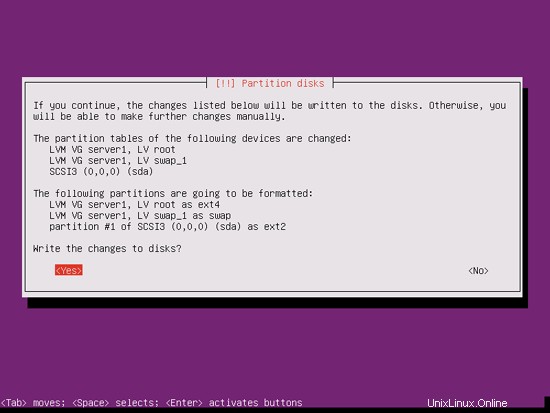
When you're finished, hit Yes when you're asked Write the changes to disks?:
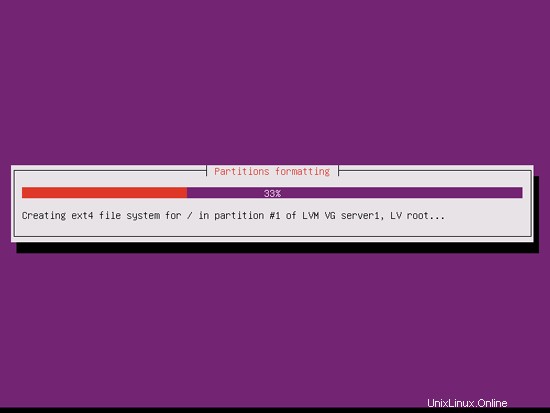
Afterwards, your new partitions are being created and formatted:
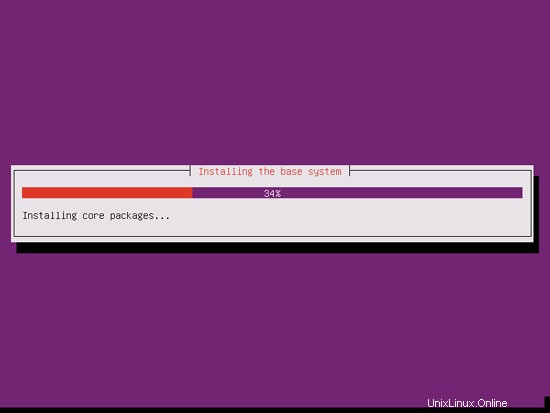
Now the base system is being installed:
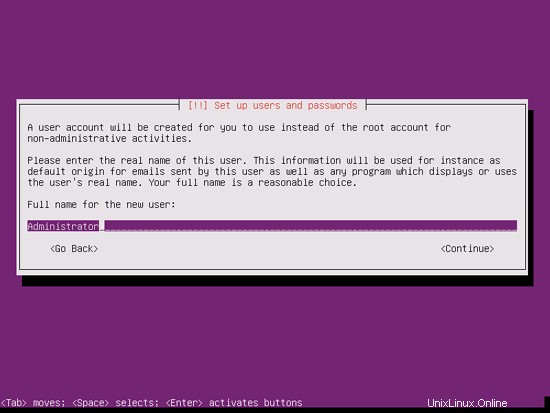
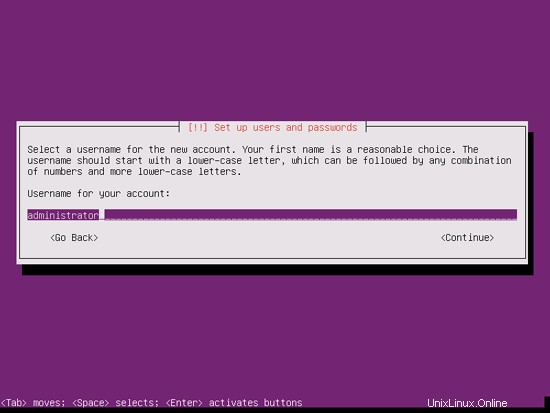
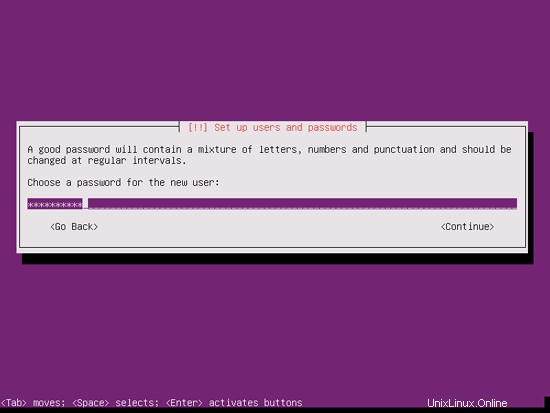
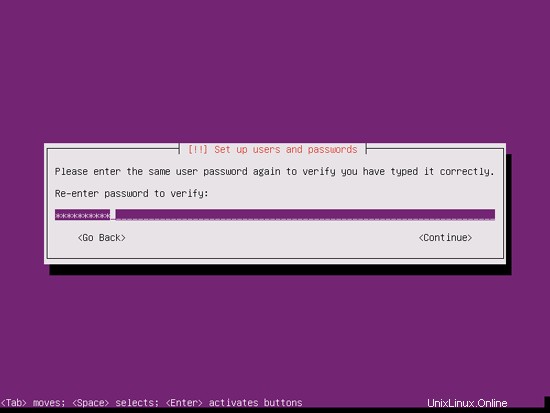
Create a user, for example the user Administrator with the user name administrator (don't use the user name admin as it is a reserved name on Ubuntu 11.10):
I don't need an encrypted private directory, so I choose No here:
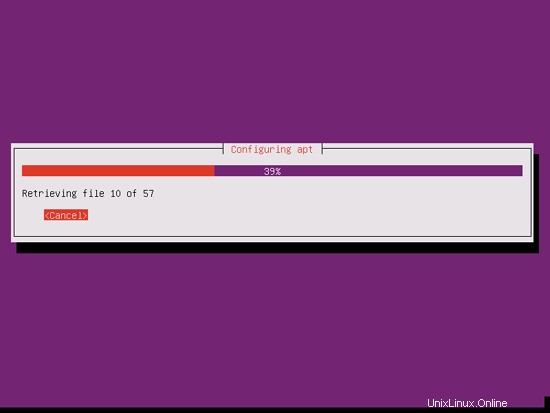
Next the package manager apt gets configured. Leave the HTTP proxy line empty unless you're using a proxy server to connect to the Internet:

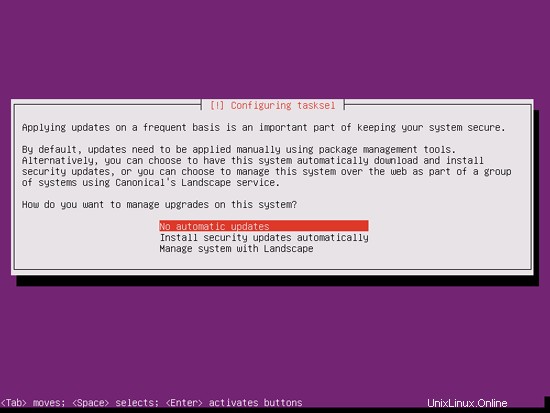
I'm a little bit old-fashioned and like to update my servers manually to have more control, therefore I select No automatic updates. Of course, it's up to you what you select here:
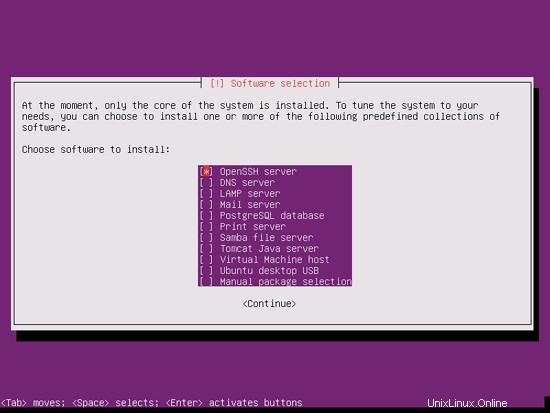
We need a DNS, mail, and LAMP server, but nevertheless I don't select any of them now because I like to have full control over what gets installed on my system. We will install the needed packages manually later on. The only item I select here is OpenSSH server so that I can immediately connect to the system with an SSH client such as PuTTY after the installation has finished:
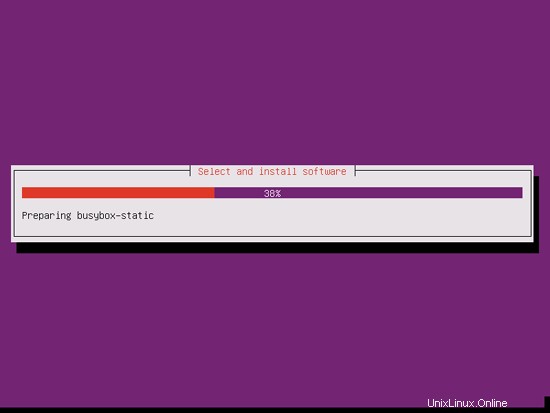
The installation continues:
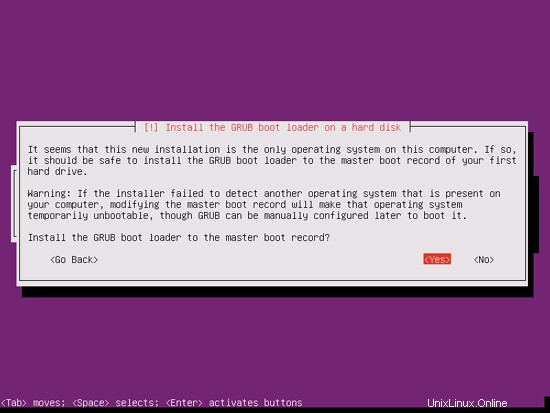
The GRUB boot loader gets installed:
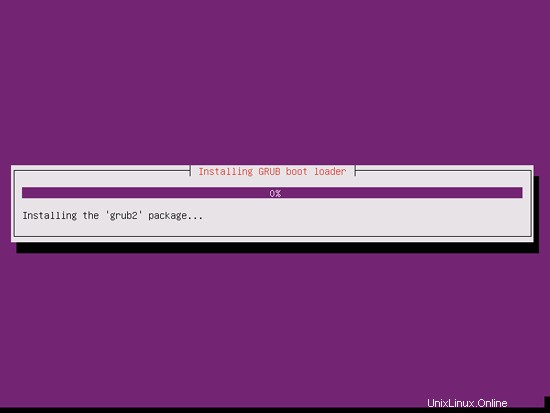
Select Yes when you are asked Install the GRUB boot loader to the master boot record?:
The base system installation is now finished. Remove the installation CD from the CD drive and hit Continue to reboot the system:
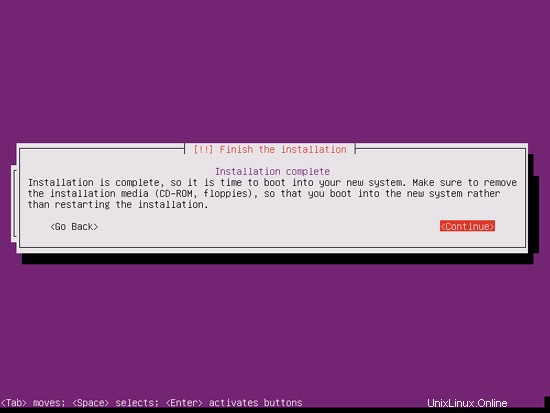
On to the next step...