Jika Anda bertanya kepada sekelompok pengembang apa itu Linux, kebanyakan dari mereka mungkin akan mengatakan bahwa itu adalah sistem operasi open-source. Mereka yang memiliki lebih banyak pengetahuan teknis mungkin akan menyebutnya kernel.
Bagi saya, Linux bukan hanya sistem operasi atau kernel. Bagi saya, itu adalah kebebasan. Kebebasan menyusun sistem operasi sesuai dengan kebutuhan saya, dan di situlah Arch Linux hadir.
Menurut wiki mereka,
Arch Linux adalah distribusi GNU/Linux tujuan umum x86-64 yang dikembangkan secara independen yang berusaha untuk menyediakan versi stabil terbaru dari sebagian besar perangkat lunak dengan mengikuti model rilis bergulir.
Instalasi default adalah sistem dasar minimal, dikonfigurasi oleh pengguna untuk hanya menambahkan apa yang memang diperlukan.
Dengan kata lain, Arch Linux adalah distribusi yang dioptimalkan untuk arsitektur x86-64 yang ditargetkan untuk pengguna Linux berpengalaman. Ini memungkinkan Anda memiliki tanggung jawab penuh dan kontrol atas sistem Anda.
Anda dapat memilih paket yang Anda inginkan, kernel (ya ada beberapa), boot-loader, lingkungan desktop, dan sebagainya.
Pernahkah Anda mendengar seseorang berkata,
Oh – ngomong-ngomong, saya menggunakan Arch Linux!
Ini karena menginstal Arch Linux pada mesin mengharuskan Anda memiliki pengetahuan yang tepat tentang cara kerja berbagai bagian distribusi Linux. Jadi menjalankan Arch Linux di sistem Anda merupakan bukti pemahaman Anda tentang Linux.
Berbicara dari pengalaman, menginstal Arch Linux tidak jauh berbeda dengan menginstal sesuatu seperti Fedora atau Ubuntu. Hanya saja Anda harus melalui langkah-langkah individual secara manual alih-alih meminta penginstal melakukan hal-hal untuk Anda. Namun begitu Anda melewati prosesnya, Anda akan mulai memahami cara kerja distribusi lain secara umum.
Pada artikel ini, saya akan memandu Anda melalui seluruh proses instalasi dan konfigurasi Arch Linux di komputer Anda. Saya juga akan membahas beberapa tugas umum dan tips pemecahan masalah menjelang akhir.
Jadi ikut saya dan saya akan menunjukkan seberapa dalam lubang kelinci itu.
Daftar Isi
- Beberapa Asumsi yang Saya Buat
- Cara Membuat Drive USB Arch Linux yang Dapat Di-boot
- Cara Mempersiapkan Komputer Anda untuk Menginstal Arch Linux
- Cara Menginstal Arch Linux
- Cara Menyetel Tata Letak dan Font Keyboard Konsol
- Cara Memverifikasi Mode Booting
- Cara Menghubungkan ke Internet
- Cara Memperbarui Jam Sistem
- Cara Mempartisi Disk
- Cara Memformat Partisi
- Cara Memasang Sistem File
- Cara Mengonfigurasi Cermin
- Cara Menginstal Sistem Basis Arch Linux
- Cara Mengonfigurasi Arch Linux
- Cara Membuat File Fstab
- Cara Masuk ke Sistem yang Baru Diinstal Menggunakan Arch-Croot
- Cara Mengonfigurasi Zona Waktu
- Cara Mengonfigurasi Pelokalan
- Cara Mengonfigurasi Jaringan
- Cara Menyetel Kata Sandi Root
- Cara Membuat Pengguna Non-root
- Cara Memasang Mikrokode
- Cara Memasang dan Mengonfigurasi Boot Loader
- Cara Memasang Xorg
- Cara Memasang Driver Grafis
- Cara Memasang Lingkungan Desktop
- Cara Memasang GNOME
- Cara Memasang Plasma
- Cara Menyelesaikan Instalasi
- Cara Beralih Antar Lingkungan Desktop
- Cara Mengelola Paket Menggunakan Pacman
- Cara Menginstal Paket Menggunakan Pacman
- Cara Menghapus Paket Menggunakan Pacman
- Cara Upgrade Paket Menggunakan Pacman
- Cara Mencari Paket Menggunakan Pacman
- Cara Menggunakan AUR di Arch Linux
- Cara Menginstal Paket Menggunakan Helper
- Cara Memasang Paket Secara Manual
- Cara Memecahkan Masalah Umum
- Cara Menggunakan Live Arch ISO sebagai Media Penyelamatan
- Bacaan Lebih Lanjut
- Kesimpulan
Beberapa Asumsi yang Saya Buat
Sebelum saya masuk ke inti tutorial, saya ingin mengklarifikasi beberapa hal. Untuk membuat seluruh artikel ini dapat didekati, saya membuat asumsi berikut tentang Anda dan sistem Anda:
- Anda tahu tentang Arch Linux pada tingkat dasar
- Linux Arch
- Pertanyaan yang sering diajukan
- Arch dibandingkan dengan distribusi lain
- Komputer Anda menggunakan UEFI dan bukan BIOS
- Anda memiliki drive USB yang cukup besar (4GB) untuk mem-boot Linux dari
- Anda memiliki pengalaman menginstal Linux (Ubuntu/Fedora) sebelumnya
- Anda memiliki cukup ruang untuk menginstal linux di HDD atau SSD
Itu cukup banyak. Jika Anda memiliki semua hal di atas, Anda siap melakukannya.
Cara Membuat Drive USB Arch Linux yang Dapat Di-boot
Untuk mengunduh Arch Linux, buka https://archlinux.org/download/ dan unduh rilis terbaru (2022.01.01 pada tulisan ini). ISO harus berukuran sekitar 870 megabyte.
Setelah diunduh, Anda harus memasukkannya ke dalam USB. Anda dapat menggunakan program Fedora Media Writer untuk melakukannya. Unduh dan instal aplikasi di sistem Anda. Sekarang hubungkan drive USB Anda dan buka aplikasinya:
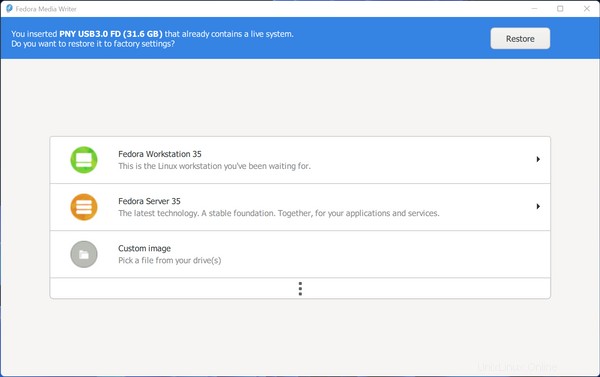
Klik "Gambar khusus" dan gunakan browser file untuk memilih file ISO Arch Linux yang diunduh.
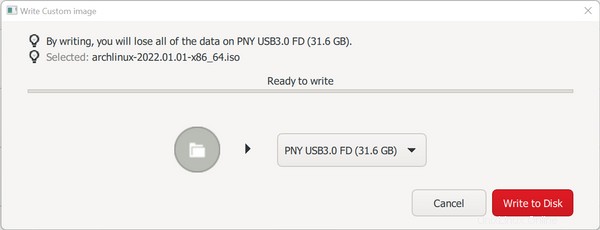
Aplikasi sekarang akan membiarkan Anda memilih salah satu drive USB yang terhubung. Berhati-hatilah dalam memilih yang tepat jika Anda memiliki beberapa drive USB yang terhubung ke mesin Anda. Sekarang tekan tombol "Write to Disk" dan tunggu sampai proses selesai.
Cara Mempersiapkan Komputer Anda untuk Menginstal Arch Linux
Pada langkah ini Anda harus membuat beberapa perubahan pada sistem Anda, jika tidak Arch Linux mungkin gagal untuk boot atau berjalan dengan benar.
Perubahan pertama yang harus Anda lakukan adalah menonaktifkan boot aman di konfigurasi UEFI Anda. Fitur ini membantu mencegah serangan malware saat boot tetapi juga mencegah penginstal Arch Linux dari boot.
Petunjuk terperinci tentang bagaimana Anda dapat menonaktifkan ini bervariasi tergantung pada motherboard atau merek laptop Anda. Anda harus mencari sendiri di internet untuk menemukan cara yang benar kali ini.
Hal kedua yang harus Anda nonaktifkan hanya relevan jika Anda menginstal Arch Linux bersama Windows. Ada fitur Windows bernama fast startup yang mengurangi waktu boot komputer Anda dengan hibernasi sebagian.
Ini biasanya merupakan fitur yang bagus untuk dimiliki tetapi mencegah sistem operasi lain dalam konfigurasi boot ganda untuk mengakses hard disk dalam prosesnya.
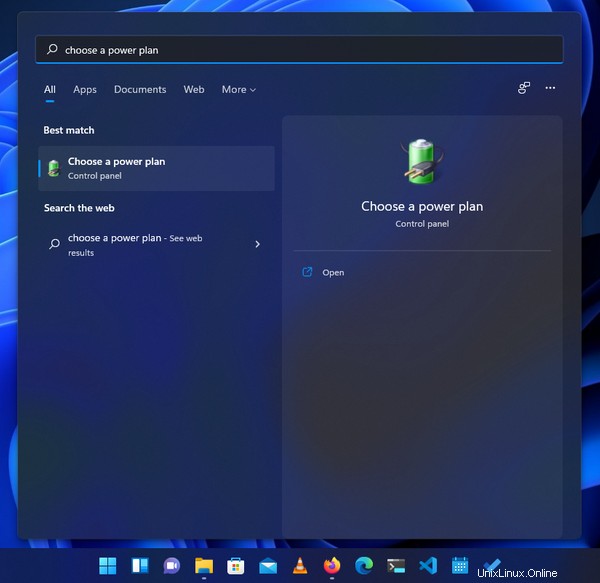
Untuk menonaktifkan fitur ini, buka menu mulai dan cari "Pilih paket daya" sebagai berikut:
Kemudian di jendela berikutnya, klik "Pilih fungsi tombol daya" dari bilah sisi kiri:

Kemudian pada jendela berikutnya Anda akan melihat daftar "Pengaturan Shutdown" dan opsi "Aktifkan startup cepat (disarankan)" akan ditampilkan sebagai hanya baca di sana.
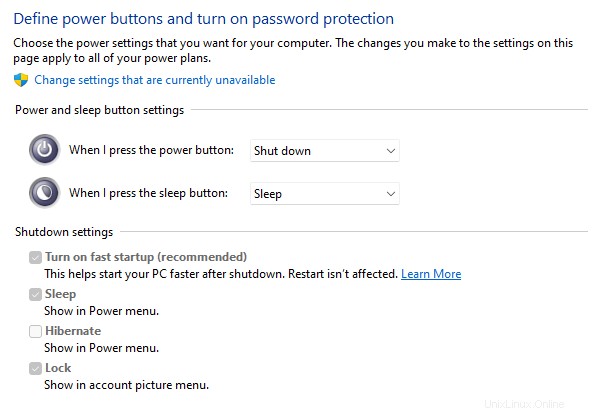
Klik "Ubah pengaturan yang saat ini tidak tersedia" di bagian atas dan Anda akan dapat mengubah pengaturan.
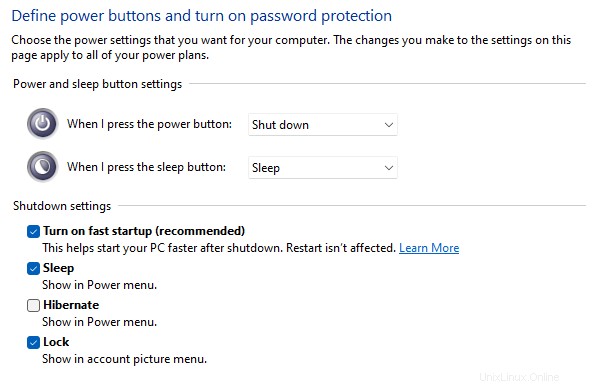
Hapus centang pada opsi "Aktifkan startup cepat (disarankan)" dan tekan tombol "Simpan perubahan" di bagian bawah. Mulai sekarang, proses booting mungkin memerlukan beberapa saat, tetapi semuanya sepadan.
Pada artikel ini, saya akan menginstal Arch Linux sebagai sistem operasi default saya. Jadi saya akan mengalokasikan seluruh ruang disk saya untuk itu.
Namun, jika Anda mencoba menginstalnya bersama Windows, saya memiliki artikel khusus tentang topik tersebut. Dan dalam artikel tersebut, ada bagian yang membahas proses partisi dengan sangat rinci.
Cara Menginstal Arch Linux
Dengan asumsi bahwa Anda memiliki drive USB yang dapat di-boot dan komputer Anda dikonfigurasi dengan benar, Anda harus mem-boot dari drive USB. Proses booting dari drive USB berbeda dari mesin ke mesin.
Di mesin saya, menekan tombol F12 saat boot membawa saya ke daftar perangkat yang dapat di-boot. Dari sana saya dapat memilih drive USB yang dapat di-boot. Anda mungkin sudah mengetahui teknik yang sesuai untuk komputer Anda atau Anda mungkin harus sedikit meneliti.
Setelah Anda berhasil masuk ke daftar perangkat yang dapat di-boot yang terhubung, pilih drive USB Anda untuk boot dan menu berikut akan muncul:
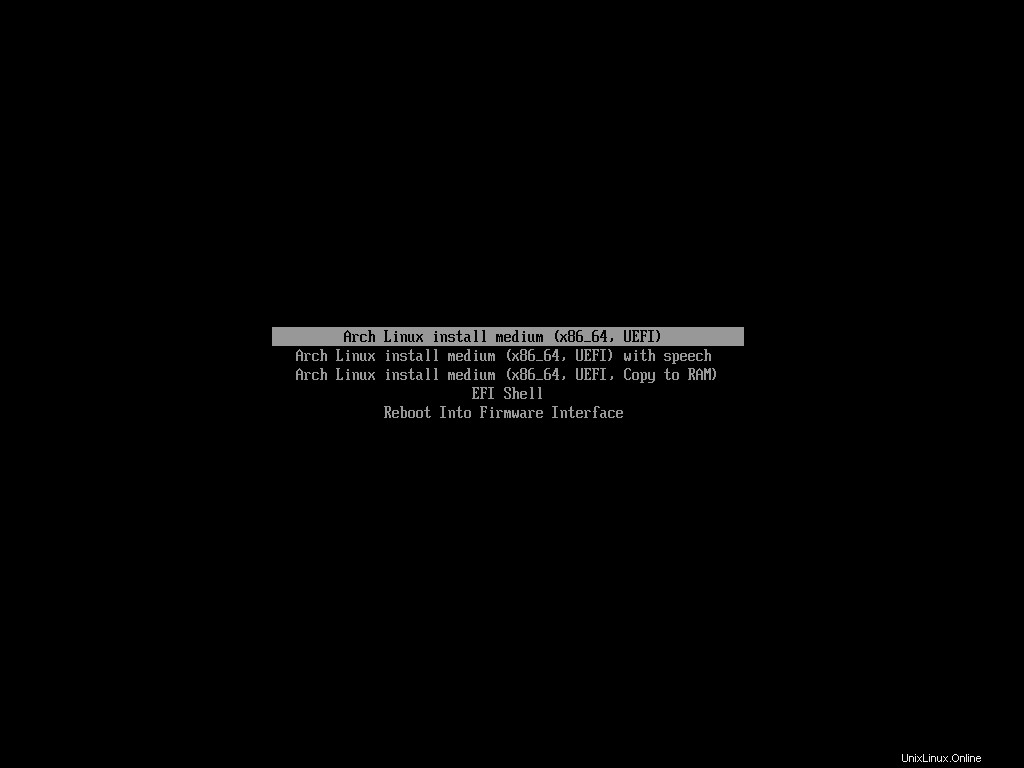
Pilih yang pertama dari daftar dan tunggu sampai penginstal Arch selesai boot. Setelah booting penuh, Anda akan melihat sesuatu seperti ini:
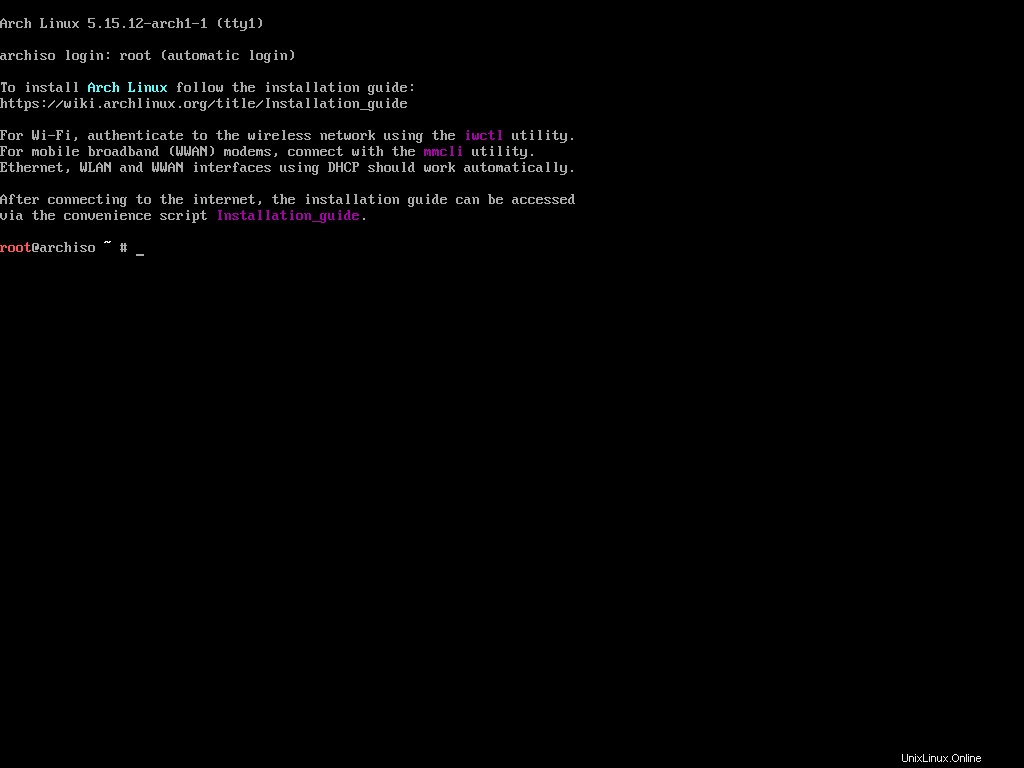
Itu dia. Itu saja yang akan Anda dapatkan. Tidak seperti sistem operasi lain yang mungkin Anda kenal, penginstal Arch tidak memiliki antarmuka pengguna grafis untuk mengotomatiskan penginstalan.
Ini lebih mengharuskan Anda untuk menginvestasikan waktu dan usaha Anda dan mengkonfigurasi setiap bagian dari distribusi sepotong demi sepotong. Ini mungkin terdengar menakutkan tetapi, sejujurnya, jika Anda memahami apa yang Anda lakukan, menginstal Arch Linux cukup menyenangkan.
Cara Menyetel Tata Letak dan Font Keyboard Konsol
Seperti yang sudah saya katakan, penginstal Arch tidak memiliki antarmuka pengguna grafis sehingga akan ada banyak pengetikan. Mengonfigurasi tata letak keyboard dan font yang terlihat bagus dapat membuat proses penginstalan jauh lebih tidak membuat frustrasi.
Secara default, konsol mengasumsikan bahwa Anda memiliki tata letak keyboard AS standar. Ini seharusnya baik-baik saja bagi kebanyakan orang tetapi untuk berjaga-jaga jika Anda memiliki yang berbeda, Anda dapat mengubahnya.
Semua peta kunci yang tersedia biasanya disimpan di dalam /usr/share/kbd/keymaps direktori dalam bentuk map.gz file. Anda dapat melihat daftarnya dengan menggunakan ls perintah:
ls /usr/share/kbd/keymaps/**/*.map.gz
Ini akan mencantumkan semua peta kunci yang tersedia:
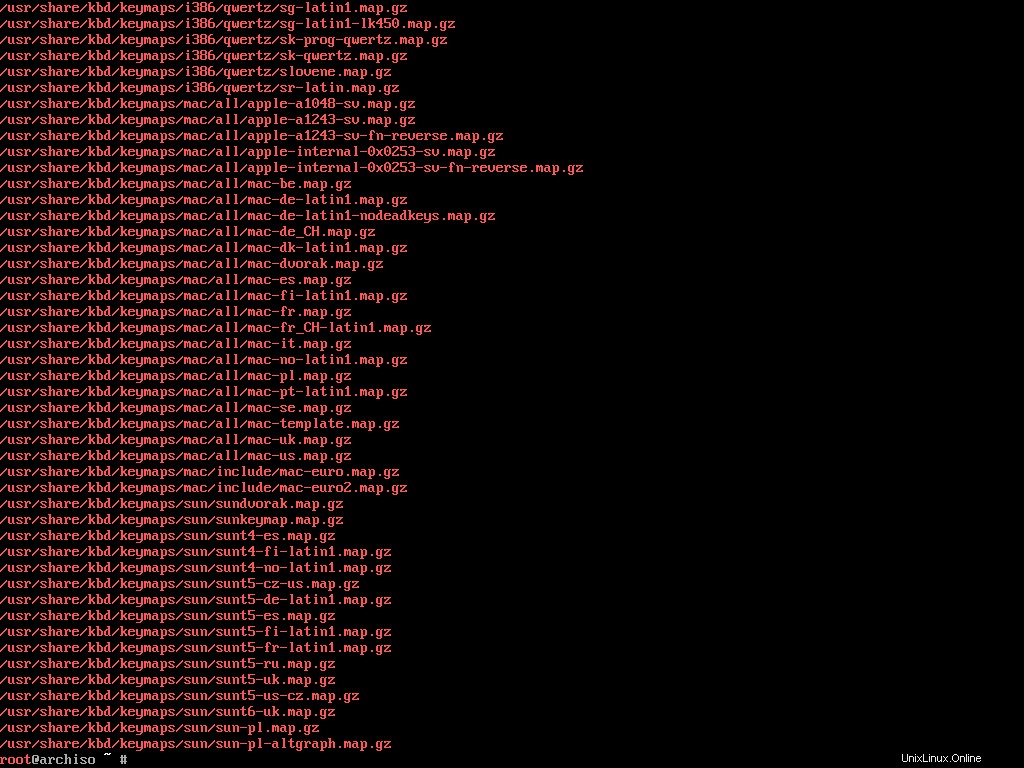
Sekarang misalnya, jika Anda memiliki tata letak keyboard Mac-US, cari map.gz yang sesuai file dari daftar ini yang merupakan mac-us.map.gz satu.
Anda dapat menggunakan loadkeys perintah untuk memuat keymap yang diinginkan. Untuk menyetel mac-us.map.gz sebagai default, jalankan perintah berikut:
loadkeys mac-us
Anda juga dapat mengubah font konsol jika Anda tidak menyukai yang default. Sama seperti peta kunci, font konsol disimpan di dalam /usr/share/kbd/consolefonts yang dapat Anda daftarkan menggunakan ls perintah:
ls /usr/share/kbd/consolefontsIni akan mencantumkan semua font yang tersedia:

Anda sekarang dapat menggunakan setfont perintah untuk mengatur salah satunya. Misalnya, jika Anda ingin mengatur drdos8x16 sebagai default, jalankan perintah berikut:
setfont drdos8x16
Kedua loadkeys dan setfont perintah adalah bagian dari kbd paket berisi alat keyboard Linux yang penting. Mereka memiliki dokumentasi yang bagus, jadi jika Anda ingin mempelajari lebih lanjut, silakan periksa.
Cara Memverifikasi Mode Booting
Setelah konsol Anda dikonfigurasi, langkah selanjutnya adalah memastikan bahwa Anda telah melakukan booting dalam mode UEFI dan bukan dalam mode BIOS.
Sejujurnya, langkah ini tampaknya tidak perlu bagi saya karena secara harfiah tertulis x86_64 UEFI di menu boot langsung. Tapi mari kita lakukan demi panduan instalasi Arch resmi.
Untuk memverifikasi mode boot, jalankan perintah berikut:
ls /sys/firmware/efi/efivarsJika Anda berada dalam mode UEFI, itu akan menampilkan banyak file di layar Anda:
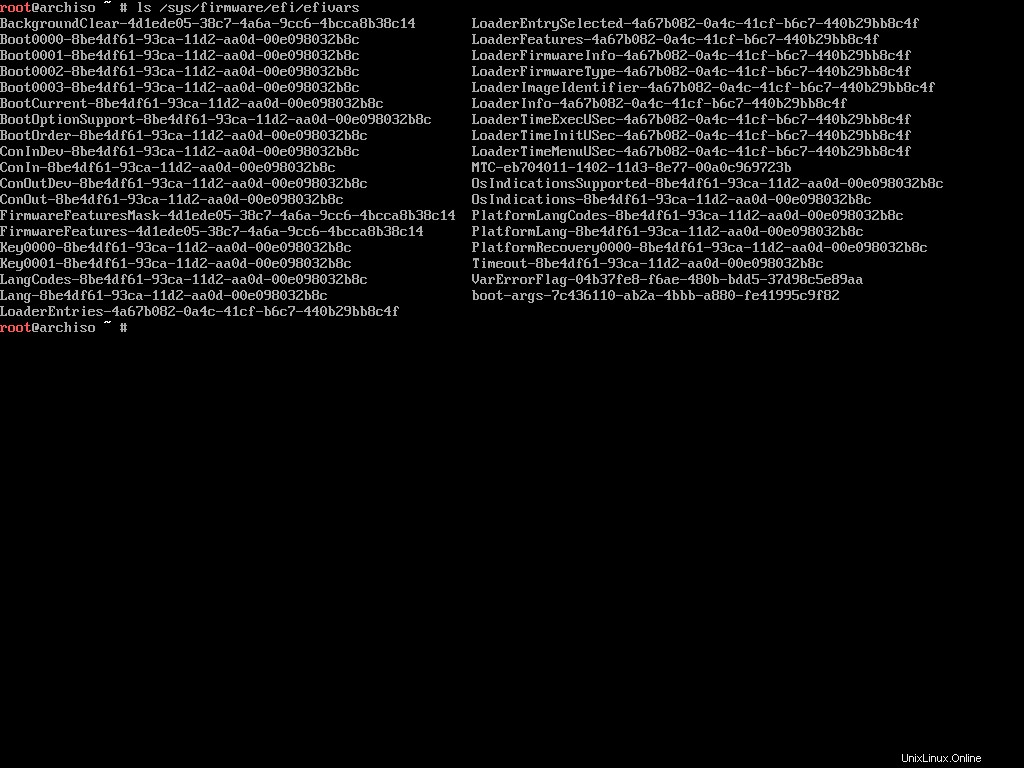
Dalam kasus boot BIOS, efi direktori bahkan tidak akan ada di dalam /sys/firmware direktori. Jika Anda berada dalam mode UEFI, (yang seharusnya terjadi jika Anda telah mengikuti semuanya dengan benar) lanjutkan ke langkah berikutnya.
Cara Menghubungkan ke Internet
Tidak seperti banyak distribusi langsung lainnya, lingkungan langsung Arch tidak dilengkapi dengan semua paket yang diperlukan yang terpasang di dalamnya. Ini berisi sejumlah paket minimal yang dapat Anda gunakan untuk menginstal sisa sistem. Jadi, koneksi internet yang berfungsi adalah suatu keharusan.
Jika Anda menggunakan jaringan kabel maka Anda harus memiliki koneksi internet yang berfungsi sejak awal. Untuk mengujinya, ping salah satu alamat publik di luar sana:
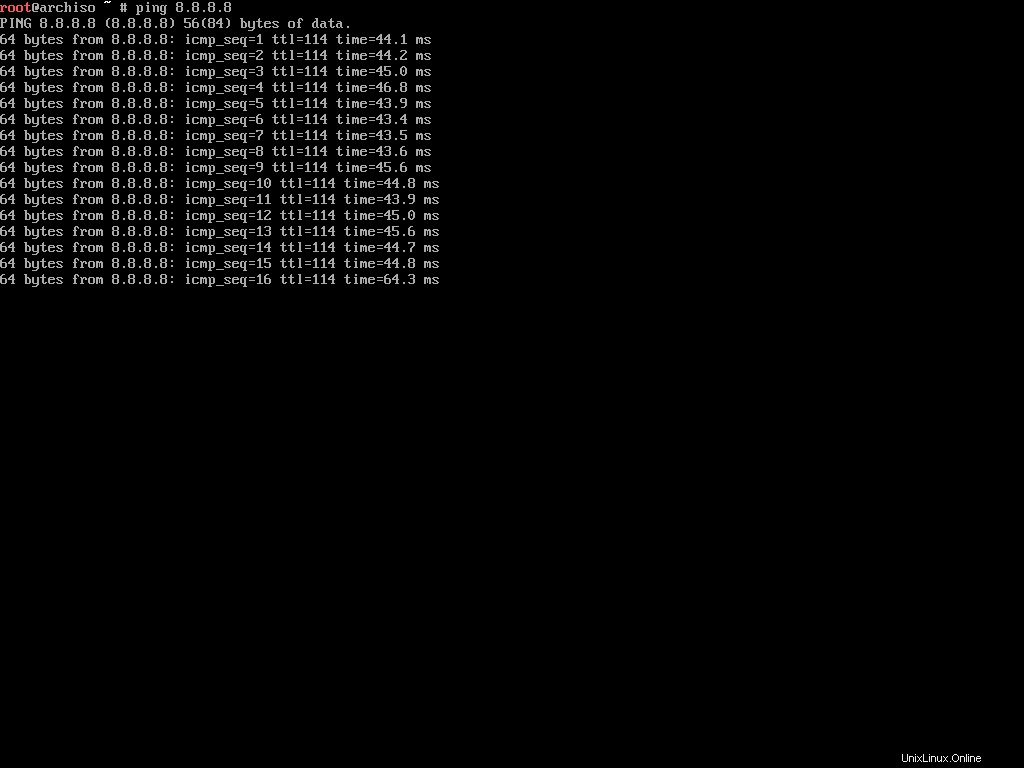
Saya membuat tangkapan layar ini menggunakan VirtualBox, sehingga koneksi internet berfungsi sempurna dengan koneksi kabel. Tetapi jika Anda memiliki koneksi nirkabel, semuanya bisa menjadi sedikit rumit.
Lingkungan hidup dilengkapi dengan iwd atau paket daemon nirkabel iNet. Anda dapat menggunakan paket ini untuk terhubung ke jaringan nirkabel terdekat.
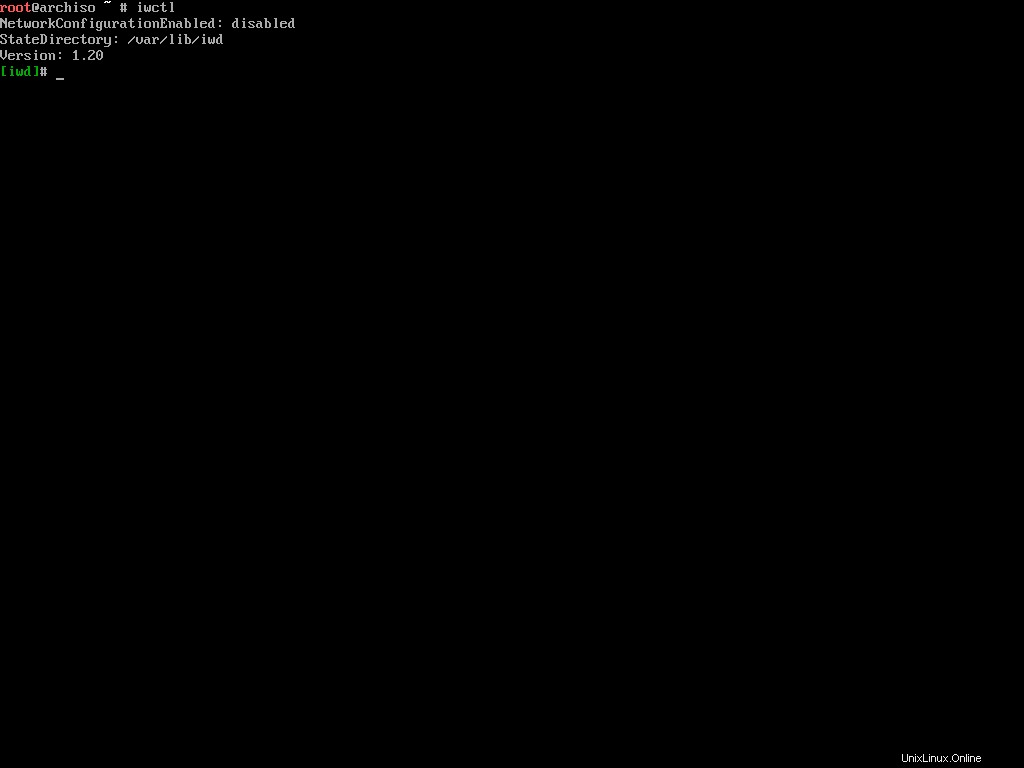
Untuk memulainya, jalankan perintah berikut:
iwctlIni akan memulai prompt interaktif sebagai berikut:
Sekarang jalankan perintah berikut untuk melihat daftar perangkat nirkabel yang tersedia:
device list
Ini akan mengeluarkan daftar perangkat nirkabel yang tersedia. Yang saya maksud dengan perangkat nirkabel adalah adaptor nirkabel yang terhubung ke komputer Anda. Mari kita asumsikan wlan0 adalah nama perangkat.
Untuk memindai jaringan nirkabel terdekat menggunakan perangkat yang ditemukan, jalankan perintah berikut:
# station <device> scan

station wlan0 scan
Anda mungkin berpikir bahwa perintah ini akan mencetak daftar semua jaringan terdekat, tetapi bukan itu masalahnya. Untuk melihat daftar jaringan, jalankan perintah berikut:
# station <device> get-networks

station wlan0 get-networks
Sekarang dengan asumsi nama jaringan rumah Anda disebut Skynet , Anda dapat menghubungkannya dengan menjalankan perintah berikut:
# station <device> connect <SSID>

station wlan0 connect Skynet
iwctl program akan meminta Anda untuk memasukkan kata sandi wi-fi. Masukkan dengan hati-hati dan, setelah terhubung ke jaringan, keluar dari program dengan menulis exit dan menekan enter. Coba ping alamat publik sekali lagi dan pastikan internet berfungsi dengan baik.
Cara Memperbarui Jam Sistem
Di Linux, NTP atau Network Time Protocol digunakan untuk menyinkronkan jam sistem komputer melalui jaringan. Anda dapat menggunakan timedatectl perintah untuk mengaktifkan NTP di lingkungan langsung Arch Anda:
timedatectl set-ntp truePerintah ini akan mulai mengeluarkan beberapa output dan setelah beberapa detik. Jika Anda tidak melihat kursor perintah muncul lagi, coba tekan Enter. Saya telah menghadapi ketidaknyamanan ini beberapa kali di masa lalu.
Cara Mempartisi Disk
Ini mungkin langkah paling sensitif dari keseluruhan proses instalasi – karena jika Anda mengacaukan partisi, Anda akan kehilangan data berharga Anda. Jadi saran saya adalah untuk tidak segera mengikuti bagian ini. Sebagai gantinya, baca seluruh bagian terlebih dahulu lalu ikuti.
Untuk memulai proses partisi, Anda harus terlebih dahulu mengetahui tentang berbagai disk yang terhubung ke komputer Anda. Anda dapat menggunakan fdisk yang merupakan program berbasis dialog untuk pembuatan dan manipulasi tabel partisi.
fdisk -lPerintah ini akan mencantumkan tabel partisi untuk semua perangkat yang tersedia di komputer Anda.
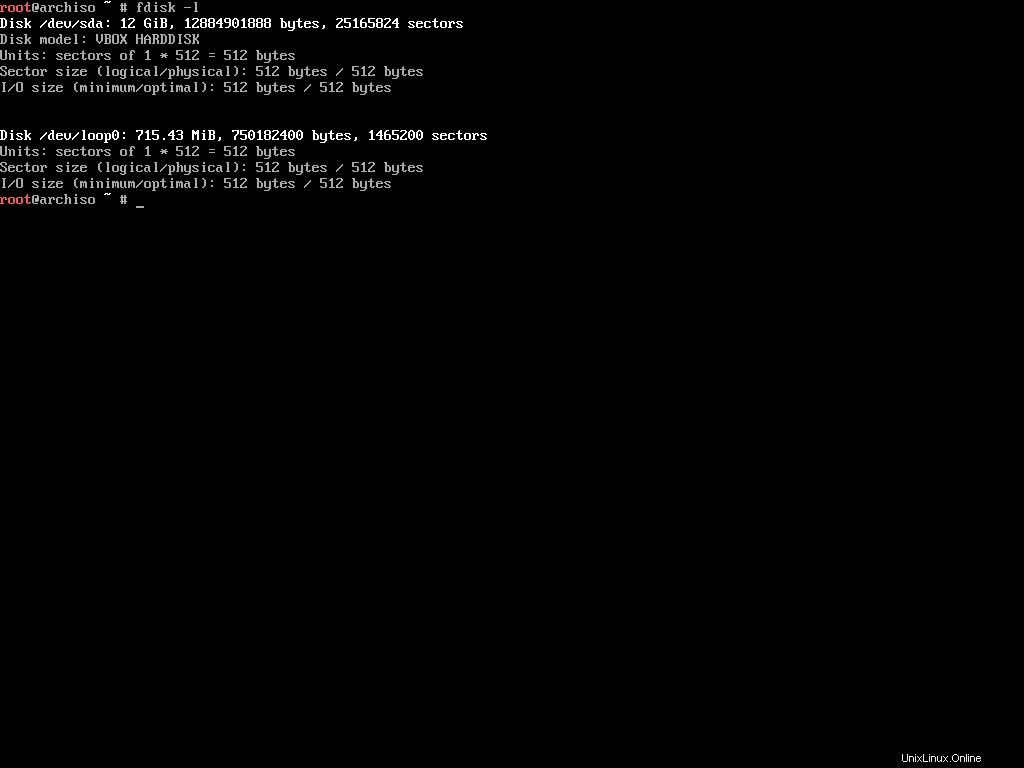
Seperti yang Anda lihat, ada dua perangkat yang terhubung ke komputer saya (mesin virtual sebenarnya). Tergantung pada jumlah perangkat yang Anda miliki, daftar ini bisa lebih panjang, jadi abaikan perangkat apa pun yang diakhiri dengan rom , loop , atau airoot saat meninjau daftar. Anda tidak dapat menggunakan perangkat tersebut untuk penginstalan.
Sehingga meninggalkan kita dengan /dev/sda perangkat. Ingatlah bahwa ini bisa sangat berbeda pada mesin Anda. Misalnya, jika Anda memiliki drive NVME, Anda mungkin melihat /dev/nvme0n1 sebagai gantinya.
Setelah Anda memutuskan perangkat mana yang akan digunakan, ada baiknya untuk memeriksa apakah ada partisi yang ada di dalam perangkat tersebut. Untuk melakukannya, Anda dapat menggunakan variasi berikut dari fdisk . yang sama perintah:
fdisk /dev/sda -l
Ingatlah untuk mengganti /dev/sda dengan apa yang Anda miliki. Perintah ini akan mencantumkan semua partisi di dalam perangkat yang diberikan.
Meskipun tidak ada partisi di perangkat ini, dalam situasi kehidupan nyata Anda mungkin telah membuat partisi sebelumnya. Partisi tersebut akan muncul sebagai /dev/sda1 , /dev/sda2 atau dalam kasus drive NVME /dev/nvme0n1p1 , /dev/nvme0n1p2 dan seterusnya.
fdisk program dapat melakukan lebih dari sekadar membuat daftar partisi. Lihat halaman ArchWiki terkait untuk mengetahui tentang tugas yang dapat Anda lakukan menggunakan program ini.
Ada program lain cfdisk yang merupakan manipulator tabel partisi disk berbasis kutukan- (perpustakaan pemrograman) untuk Linux. Fungsinya mirip dengan fdisk tetapi berbasis kutukan berarti ia memiliki antarmuka yang membuatnya lebih mudah untuk digunakan.
Jalankan perintah berikut untuk memulai cfdisk di perangkat pilihan Anda:
cfdisk /dev/sda
Ingatlah untuk mengganti /dev/sda dengan apa yang Anda miliki. Jika perangkat memiliki tabel partisi yang dibuat sebelumnya, maka cfdisk akan langsung menampilkan daftar partisi. Jika tidak, Anda harus memilih jenis tabel partisi untuk memulai dengan:
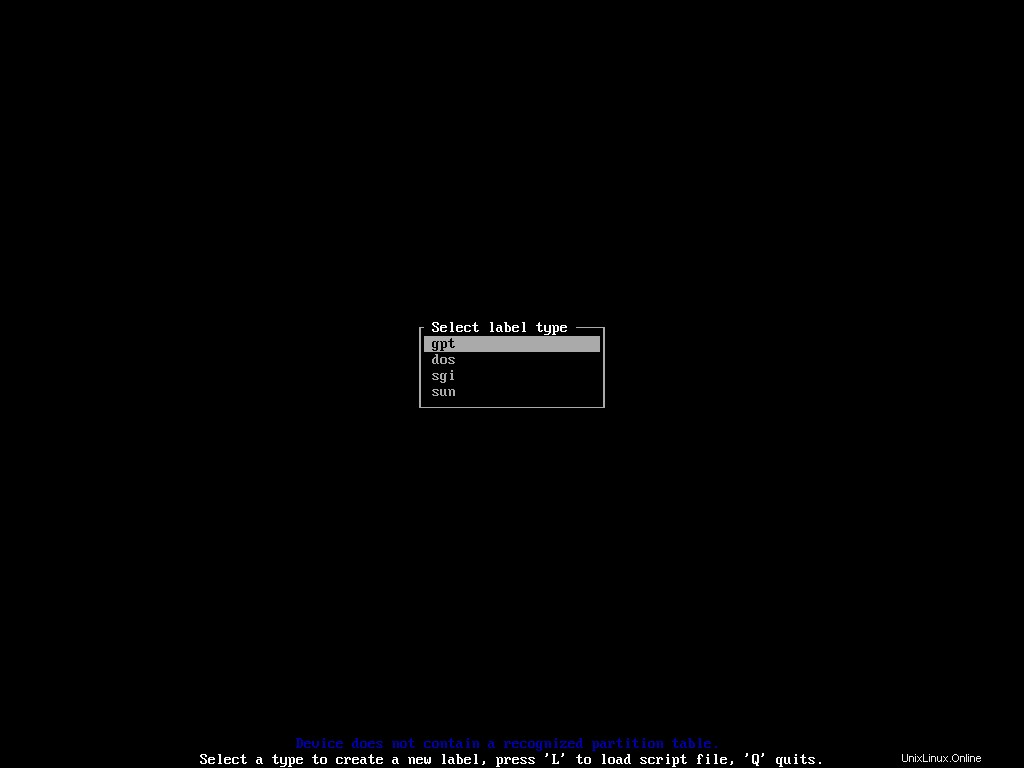
Pilih gpt untuk sistem berbasis UEFI Anda. Selanjutnya, Anda akan masuk ke daftar partisi dan ruang kosong di perangkat:
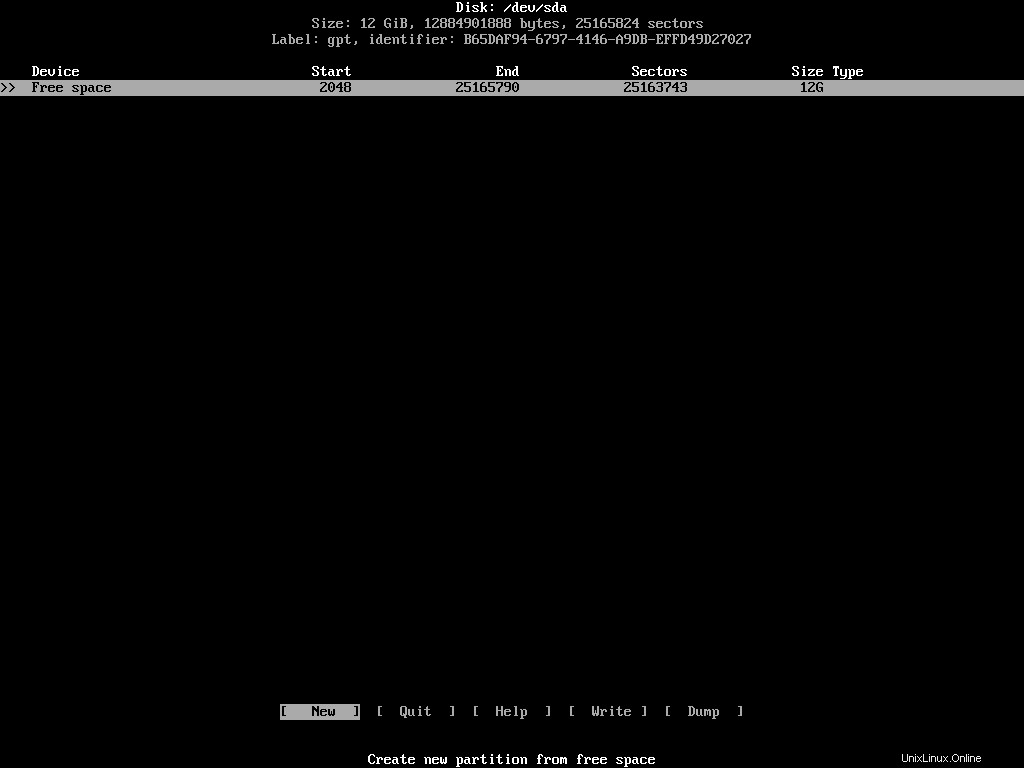
Anda dapat bergerak secara vertikal di sepanjang daftar perangkat menggunakan tombol panah atas/bawah dan bergerak secara horizontal di sepanjang tindakan yang berbeda menggunakan tombol panah kiri/kanan.
Untuk menginstal Arch, atau distribusi Linux lainnya, Anda memerlukan tiga partisi terpisah. Mereka adalah sebagai berikut:
- Partisi sistem EFI – untuk menyimpan file yang diperlukan oleh firmware UEFI.
- ROOT – untuk menginstal distribusi itu sendiri.
- SWAP – untuk berfungsi sebagai ruang luapan untuk RAM Anda.
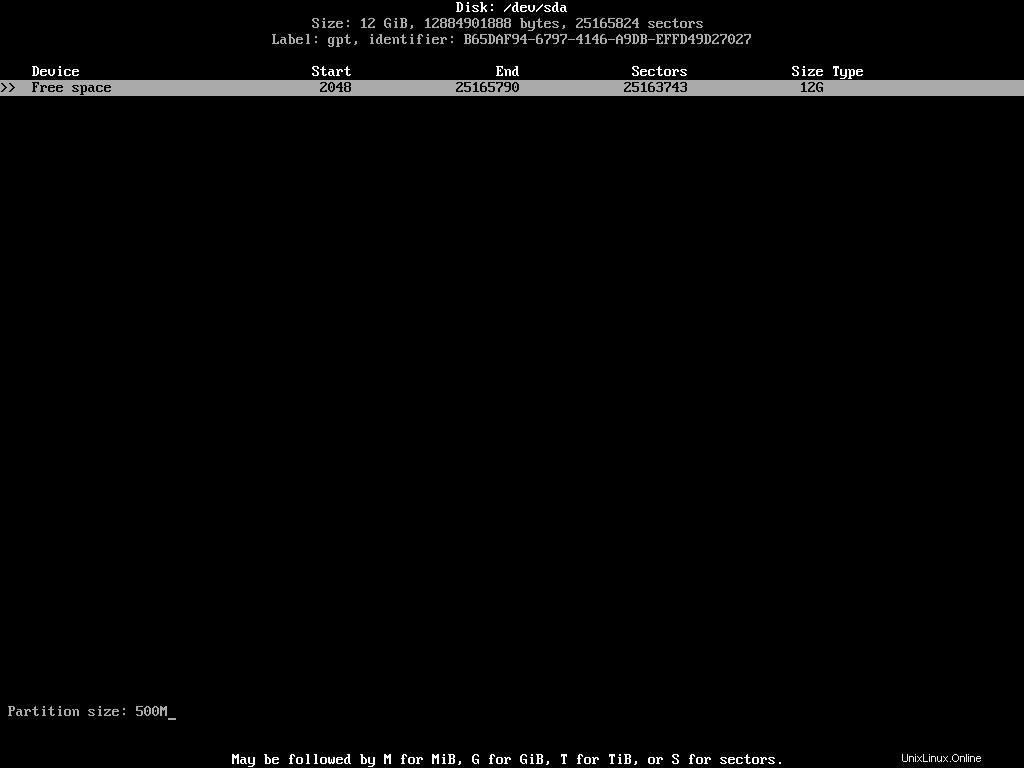
Pastikan partisi/ruang kosong yang tepat disorot dalam daftar dan pilih [ New ] tindakan.
Masukkan ukuran partisi yang diinginkan. Anda dapat menggunakan M untuk menyatakan megabyte, G untuk gigabyte, dan T untuk terabyte.
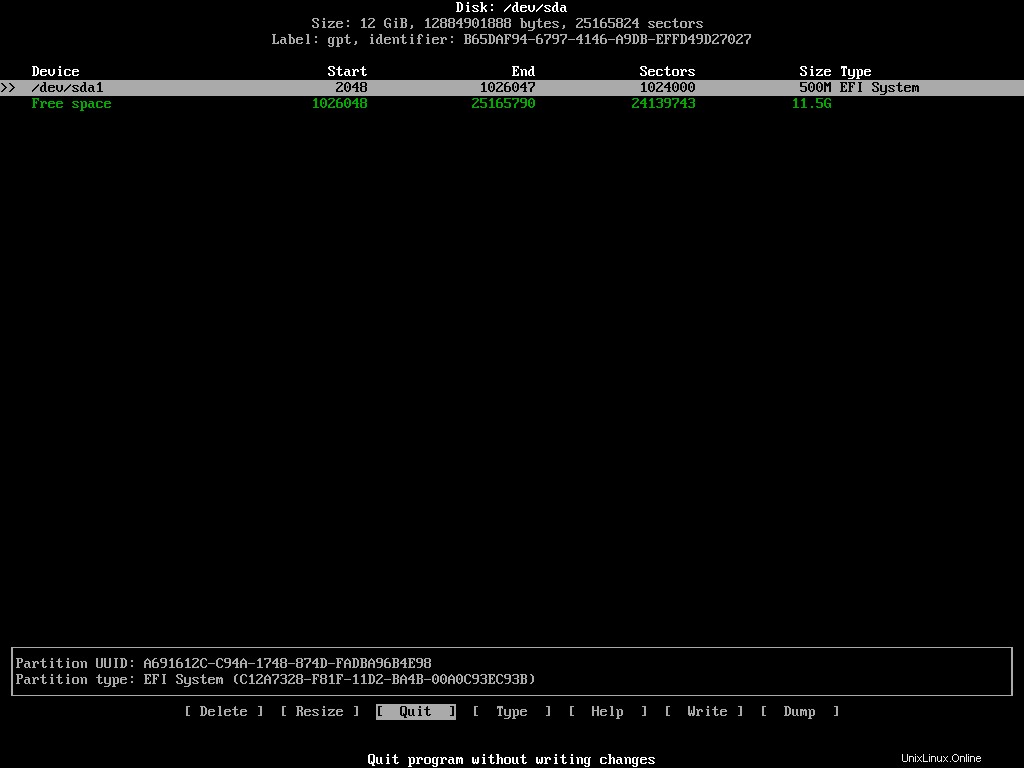
Untuk partisi sistem EFI, Anda harus mengalokasikan setidaknya 500MB. Setelah Anda memasukkan ukuran keinginan Anda, tekan Enter untuk menyelesaikan. Daftar partisi yang diperbarui mungkin terlihat sebagai berikut:
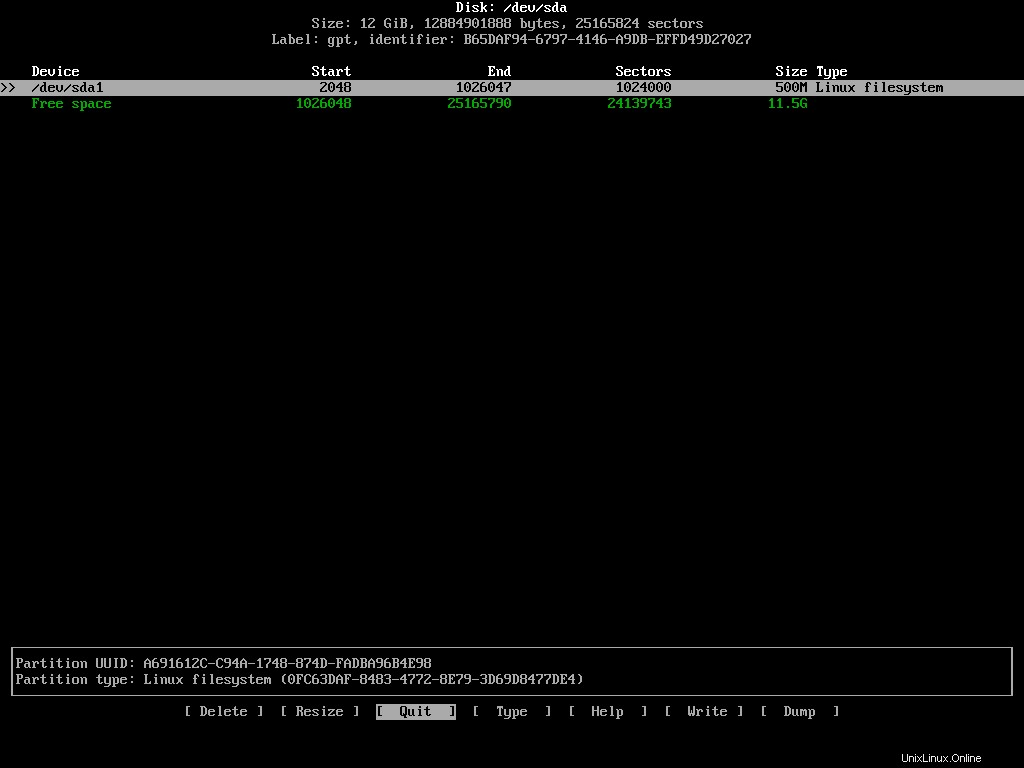
Partisi sistem EFI adalah jenis partisi khusus. Itu harus dalam jenis dan format tertentu. Untuk mengubah tipe default, biarkan partisi yang baru dibuat tetap disorot dan pilih [ Type ] dari daftar tindakan.
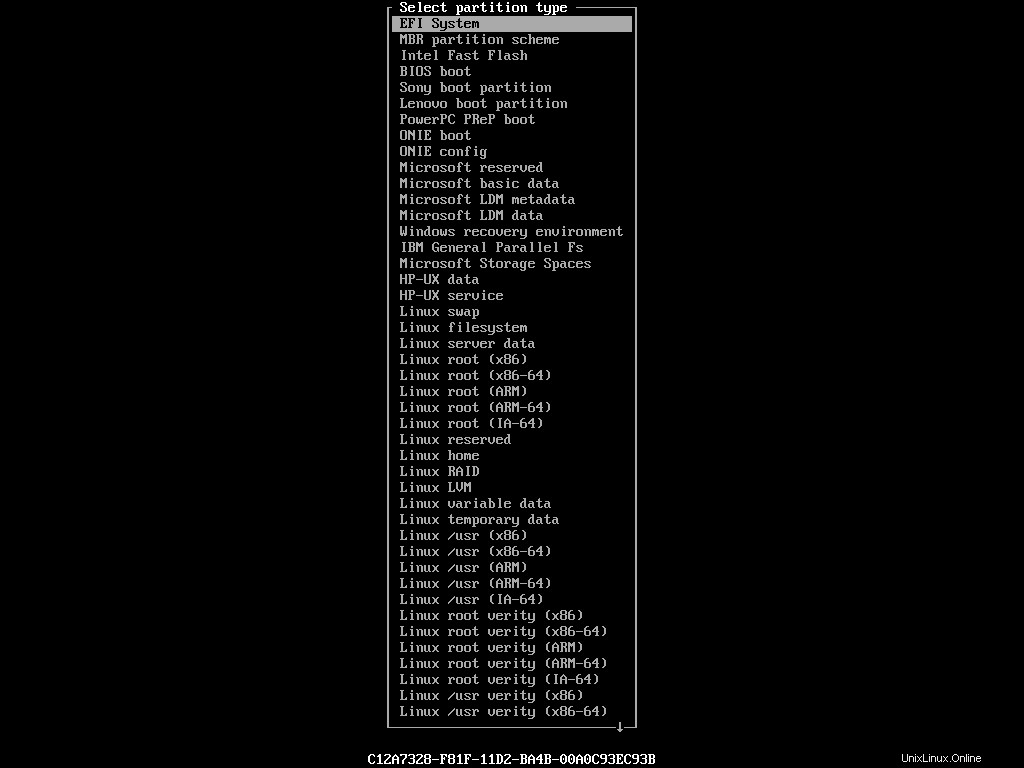
Dari daftar panjang jenis ini, sorot EFI System dan tekan Enter. Jenis partisi dalam daftar harus diperbarui sesuai:
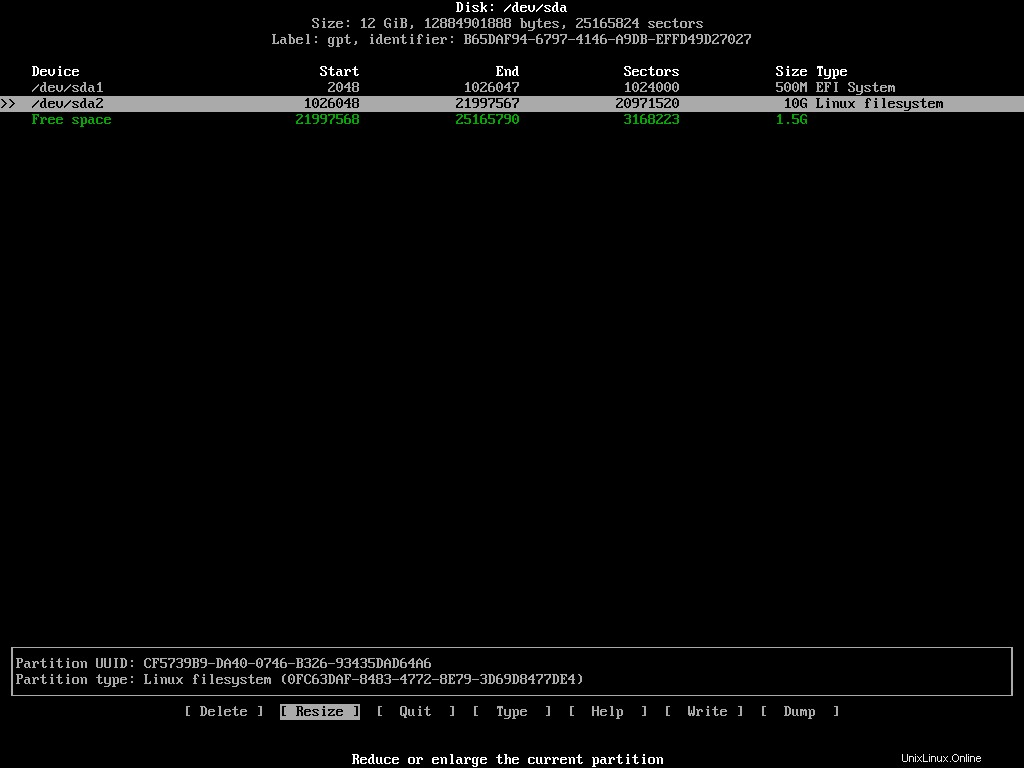
Selanjutnya adalah partisi root. Sorot ruang kosong yang tersisa dan pilih [ New ] sekali lagi. Kali ini tetapkan 10GB ke partisi ini. Ukuran ideal partisi root tergantung pada kebutuhan Anda. Secara pribadi saya mengalokasikan setidaknya 100GB ke partisi root dari semua instalasi Linux saya.
Anda tidak perlu mengubah jenis partisi ini. Linux filesystem default akan melakukannya.
Buat satu partisi terakhir dengan sisa ruang dan ubah jenisnya menjadi Linux swap dari menu:
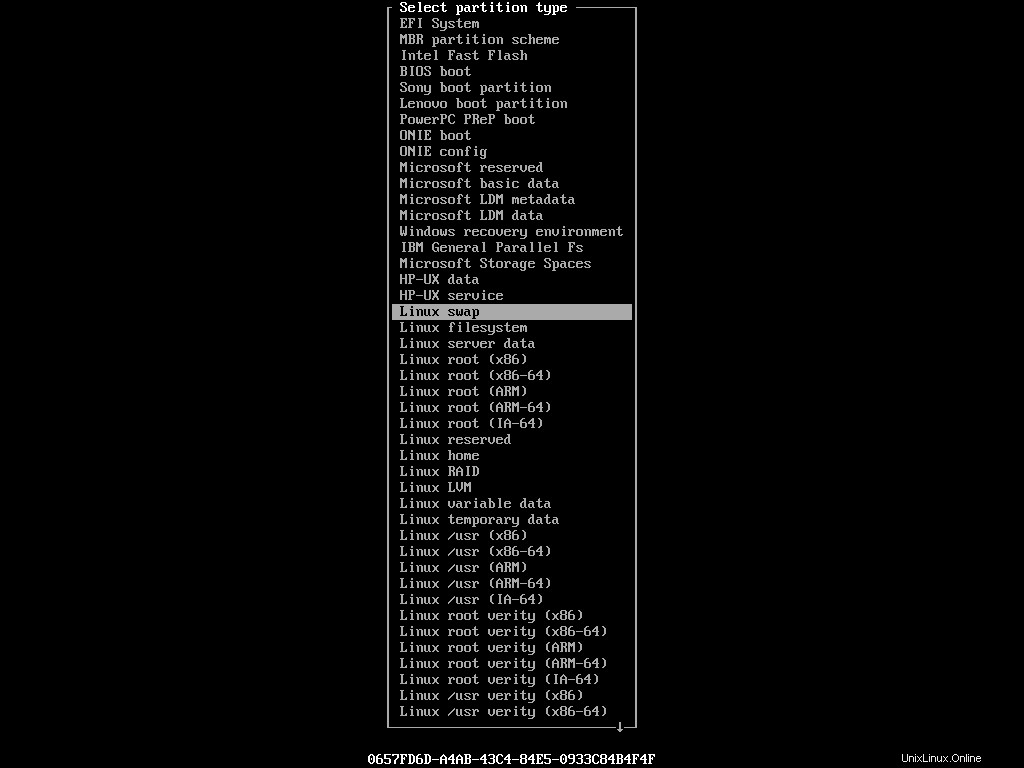
Ukuran ideal dari partisi swap masih diperdebatkan. Secara pribadi saya tidak memiliki partisi swap di mesin saya. Jumlah RAM fisik yang saya miliki lebih dari cukup. Tetapi jika saya merasa membutuhkannya nanti, saya menggunakan swapfile sebagai gantinya. Bagaimanapun, status akhir perangkat Anda adalah sebagai berikut:
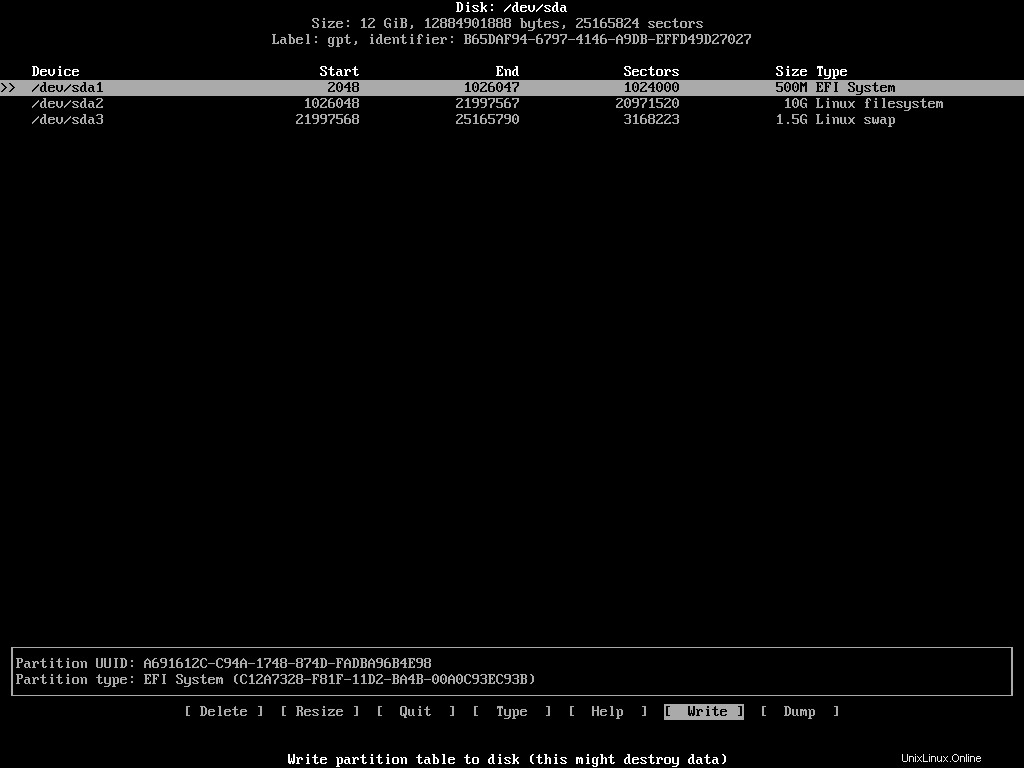
Jika Anda senang dengan pengaturannya, sorot [ Write ] dari daftar tindakan dan tekan Enter. Program akan menanyakan apakah Anda ingin mempertahankan perubahan ini atau tidak. Anda harus menulis yes dan tekan enter jika Anda setuju. Setelah tabel partisi diubah, pilih [ Quit ] untuk keluar dari program.
Satu hal yang ingin saya sebutkan bagi mereka yang mencoba menginstal Arch Linux bersama Windows adalah, dalam hal ini, partisi sistem EFI seharusnya sudah ada di perangkat Anda. Jadi jangan sentuh itu. Cukup buat partisi lain dan lanjutkan.
Cara Memformat Partisi
Sekarang setelah Anda membuat partisi yang diperlukan, Anda harus memformatnya sesuai dengan itu. Anda dapat menggunakan mkfs dan mkswap program untuk melakukan itu. Sebelum memformat, lihat terakhir daftar partisi Anda dengan menjalankan perintah berikut:
fdisk /dev/sda -lKali ini Anda akan melihat tiga partisi yang baru dibuat dengan detailnya:
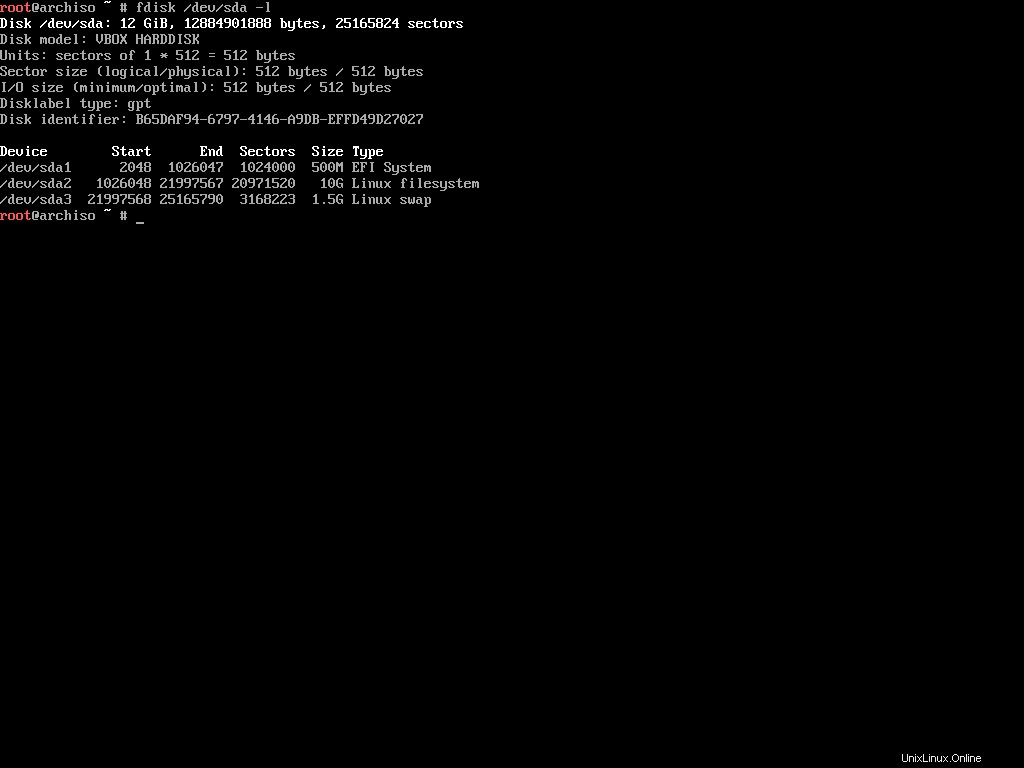
Catat nama perangkat, seperti /dev/sda1 , /dev/sda2 , /dev/sda3 dan seterusnya. Partisi sistem EFI harus dalam format FAT32. Jalankan perintah berikut untuk memformat partisi dalam format FAT32:
mkfs.fat -F32 /dev/sda1Yang berikutnya adalah partisi root. Itu bisa dalam beberapa format, tetapi saya lebih suka menggunakan EXT4 untuk semua sistem file Linux saya. Gunakan perintah berikut untuk memformat partisi di EXT4:
mkfs.ext4 /dev/sda2Operasi ini mungkin memerlukan beberapa saat untuk selesai tergantung pada ukuran partisi Anda. Akhirnya, partisi swap. Gunakan perintah berikut untuk memformatnya:
mkswap /dev/sda3Dengan itu, Anda telah menyelesaikan proses penyiapan partisi untuk instalasi.
Cara Memasang Sistem File
Sekarang setelah Anda membuat dan memformat partisi, Anda siap memasangnya. Anda dapat menggunakan mount perintah dengan titik pemasangan yang sesuai untuk memasang partisi apa pun:
# mount <device> <mount point>

mount /dev/sda2 /mnt
Saya harap Anda ingat bahwa /dev/sda2 partisi dibuat untuk menjadi partisi root. /mnt mount point di Linux adalah untuk memasang perangkat penyimpanan sementara. Karena kita hanya perlu memasang partisi untuk menginstal Arch Linux di dalamnya, /mnt titik pemasangan sempurna.
Dalam kasus partisi swap, Anda tidak akan memasangnya seperti yang lain. Anda harus memberi tahu Linux untuk menggunakan partisi ini sebagai swap secara eksplisit. Untuk melakukannya, jalankan perintah berikut:
swapon /dev/sda3
Seperti yang sudah Anda duga, swapon perintah memberitahu sistem untuk bertukar pada perangkat ini. Kami akan bekerja dengan partisi sistem EFI di bagian selanjutnya. Untuk saat ini, memasang dua partisi ini sudah cukup.
Cara Mengonfigurasi Cermin
Ada satu langkah terakhir sebelum Anda dapat menginstal Arch Linux di mesin Anda, dan itu adalah mengkonfigurasi mirror. Mirror adalah server yang terletak di berbagai titik di seluruh dunia untuk melayani populasi terdekat.
Pemasang dilengkapi dengan Reflektor, skrip Python yang ditulis untuk mengambil daftar cermin terbaru halaman Status Cermin Linux Arch. Untuk mencetak daftar cermin terbaru, cukup jalankan perintah berikut:
reflectorJika Anda memiliki koneksi internet yang lambat, Anda mungkin menemukan pesan kesalahan sebagai berikut:
failed to rate http(s) download (https://arch.jensgutermuth.de/community/os/x86_64/community.db): Download timed out after 5 second(s).Ini terjadi bila batas waktu default (5 detik) lebih rendah dari waktu sebenarnya yang diperlukan untuk mengunduh informasi.
Anda dapat mengatasi masalah ini dengan menggunakan --download-timeout pilihan:
reflector --download-timeout 60Sekarang reflektor akan menunggu selama satu menit sebelum mulai berteriak. Daftar panjang cermin akan muncul di layar Anda:
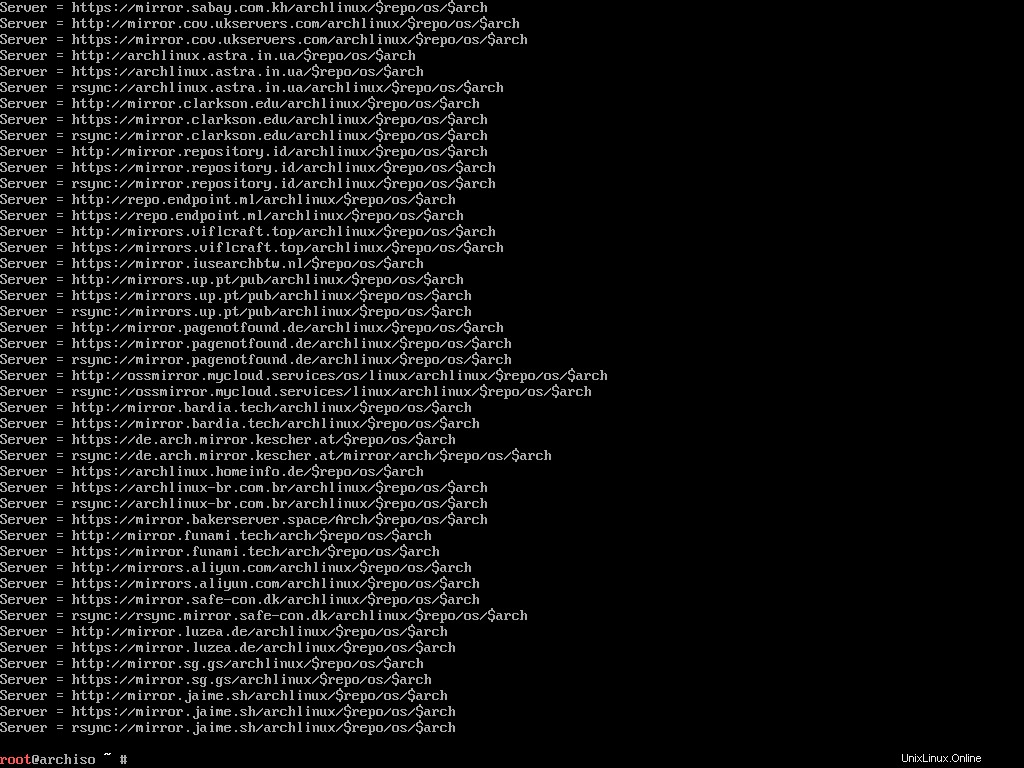
Menelusuri seluruh daftar untuk menemukan cermin terdekat akan merepotkan. Itulah mengapa reflektor dapat melakukannya untuk Anda.
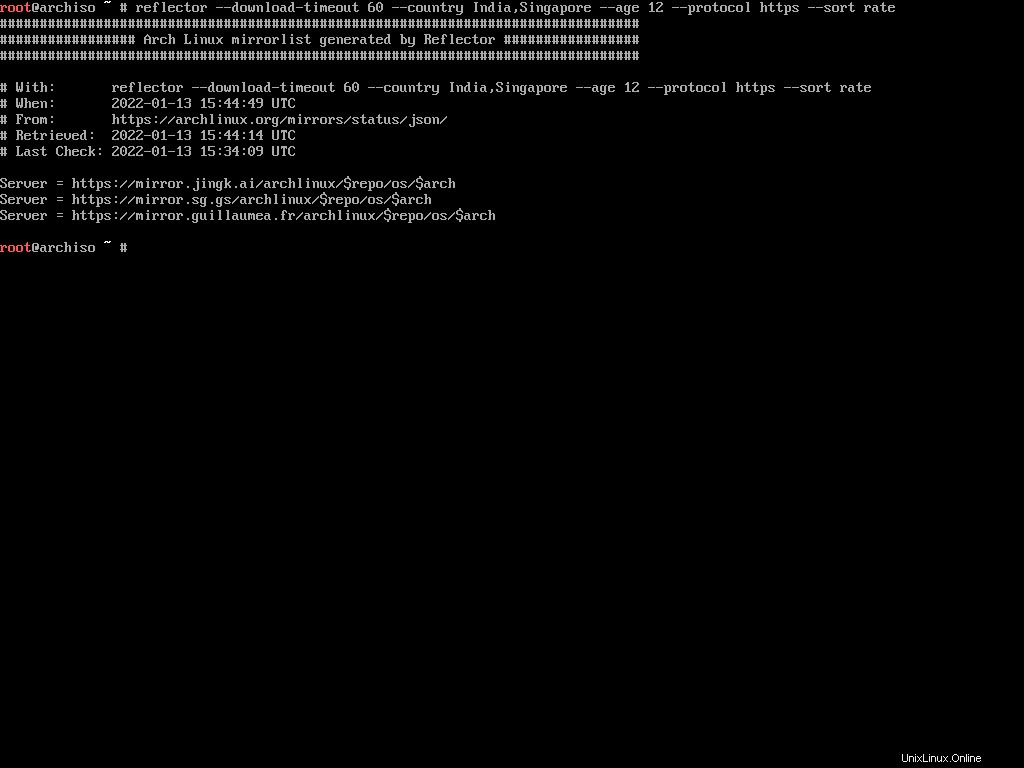
Reflektor dapat menghasilkan daftar cermin berdasarkan sejumlah batasan yang diberikan. Misalnya, saya ingin daftar mirror yang disinkronkan dalam 12 jam terakhir dan yang berlokasi di India atau Singapura (keduanya paling dekat dengan lokasi saya), dan mengurutkan mirror berdasarkan kecepatan unduh.
Ternyata reflektor bisa melakukan itu:
reflector --download-timeout 60 --country India,Singapore --age 12 --protocol https --sort rateServer yang ditemukan akan terdaftar seperti sebelumnya:
Mencetak daftar cermin seperti ini tidak cukup. Anda harus menyimpan daftar di /etc/pacman.d/mirrorlist lokasi. Pacman, manajer paket default untuk Arch Linux, menggunakan file ini untuk mempelajari tentang mirror.
Sebelum menimpa daftar cermin default, buat salinannya:
cp /etc/pacman.d/mirrorlist /etc/pacman.d/mirrorlist.bak
Sekarang jalankan perintah reflektor dengan --save pilihan sebagai berikut:
reflector --download-timeout 60 --country India,Singapore --age 12 --protocol https --sort rate --save /etc/pacman.d/mirrorlistPerintah ini akan menghasilkan daftar cermin dan menimpa yang default. Sekarang Anda siap untuk menginstal sistem dasar Arch Linux.
Cara Menginstal Sistem Basis Arch Linux
Sebelum menginstal sistem dasar, ada baiknya untuk memperbarui cache paket sesuai dengan daftar cermin baru. Untuk melakukannya, jalankan perintah berikut:
pacman -Sy
pacman program untuk Arch Linux adalah apa apt adalah ke Ubuntu atau dnf adalah untuk Fedora. -S opsi berarti sinkronisasi yang setara dengan install di apt atau dnf pengelola paket.
Setelah proses update selesai, Anda dapat menggunakan pacstrap script untuk menginstal sistem Arch Linux. Jalankan perintah berikut untuk memulai proses instalasi:
pacstrap /mnt base base-devel linux linux-firmware sudo nano ntfs-3g networkmanager
pacstrap script dapat menginstal paket ke direktori root baru yang ditentukan. Seperti yang mungkin Anda ingat, partisi root telah di-mount pada /mnt mount point, jadi itulah yang akan Anda gunakan dengan skrip ini. Kemudian Anda akan memberikan nama paket yang ingin Anda instal:
base– Paket minimal diatur untuk menentukan instalasi Arch Linux dasar.base-devel– Kumpulan paket yang diperlukan untuk membangun perangkat lunak dari sumber.linux– Kernel itu sendiri.linux-firmware– Driver untuk perangkat keras umum.sudo– Anda ingin menjalankan perintah sebagai root kan?nano– Klon editor pico dengan beberapa penyempurnaan.ntfs-3g– Driver dan utilitas sistem file NTFS diperlukan untuk bekerja dengan drive NTFS.networkmanager– Menyediakan deteksi dan konfigurasi agar sistem terhubung ke jaringan secara otomatis.
Saya ingin mengklarifikasi bahwa daftar tujuh paket ini bukanlah sesuatu yang wajib. Untuk memiliki instalasi Arch Linux yang fungsional, Anda hanya perlu base , linux , dan linux-firmware paket. Tapi mengingat Anda tetap membutuhkan yang lain, mengapa tidak menangkap semuanya sekaligus.
Tergantung pada koneksi internet Anda, proses instalasi mungkin memakan waktu cukup lama. Duduk dan rileks sampai pacstrap melakukan hal itu. Setelah selesai, Anda akan melihat sesuatu sebagai berikut:
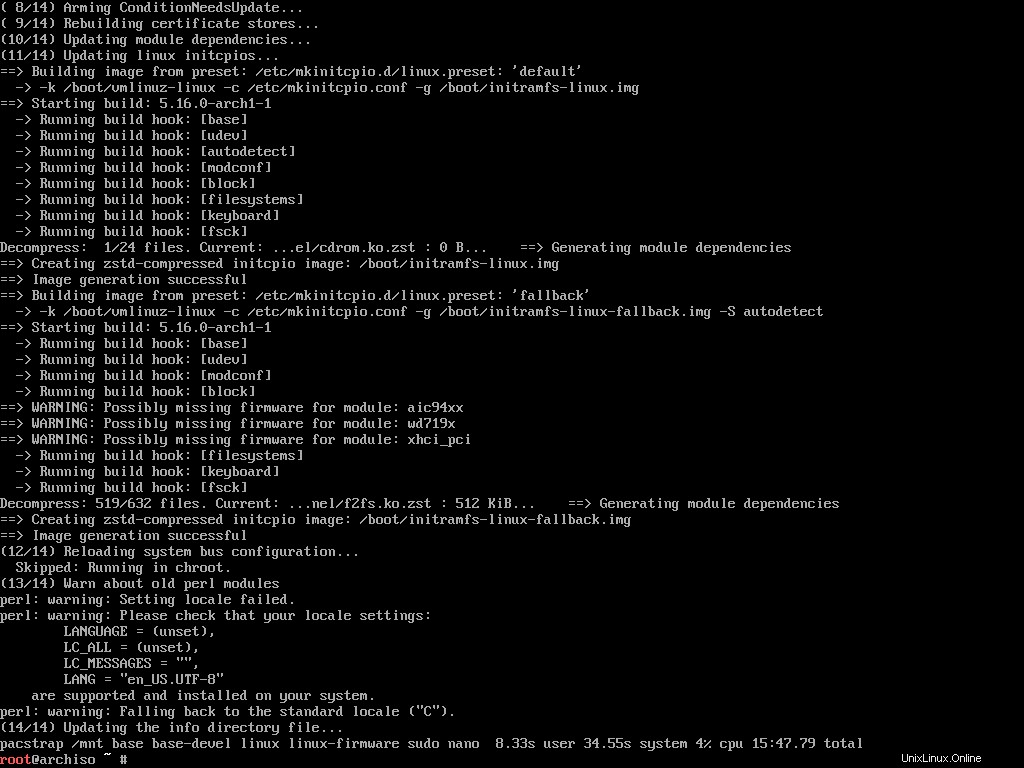
Selamat, Anda telah berhasil menginstal Arch Linux di komputer Anda. Yang tersisa untuk dilakukan sekarang adalah mengonfigurasi sistem.
Cara Mengonfigurasi Arch Linux
Menginstal Arch Linux tidak terlalu sulit bukan? Bahkan menurut saya, menginstalnya jauh lebih mudah daripada mengonfigurasinya. Ada banyak yang harus dilakukan di sini. Jadi mari kita mulai.
Cara Membuat File Fstab
Menurut ArchWiki,
fstab file dapat digunakan untuk menentukan bagaimana partisi disk, berbagai perangkat blok lainnya, atau sistem file jarak jauh harus dipasang ke sistem file.Di distribusi lain seperti Ubuntu atau Fedora, ini dihasilkan secara otomatis selama instalasi. Namun di Arch, Anda harus melakukannya secara manual. Untuk melakukannya, jalankan perintah berikut:
genfstab -U /mnt >> /mnt/etc/fstab
genfstab program dapat mendeteksi semua mount saat ini di bawah titik mount yang diberikan dan mencetaknya dalam format yang kompatibel dengan fstab ke output standar. Jadi genfstab -U /mnt akan menampilkan semua mount saat ini di bawah /mnt titik pemasangan. Kita dapat menyimpan output tersebut ke /mnt/etc/fstab file menggunakan >> operator.
Cara Masuk ke Sistem yang Baru Diinstal Menggunakan Arch-Croot
Saat ini Anda masuk ke lingkungan langsung dan bukan ke sistem yang baru Anda instal.
Untuk melanjutkan konfigurasi sistem yang baru diinstal, Anda harus login terlebih dahulu. Untuk melakukannya, jalankan perintah berikut:
arch-chroot /mnt
arch-chroot skrip bash adalah bagian dari arch-install-scripts package and lets you change to the newly installed system's root user without any reboot. How cool is that!
How To Configure the Time Zone
Once you've switched root, the first thing to configure is the time zone. To see a list of all the available zones, execute the following command:
ls /usr/share/zoneinfoAll the major zones should be in the directory.
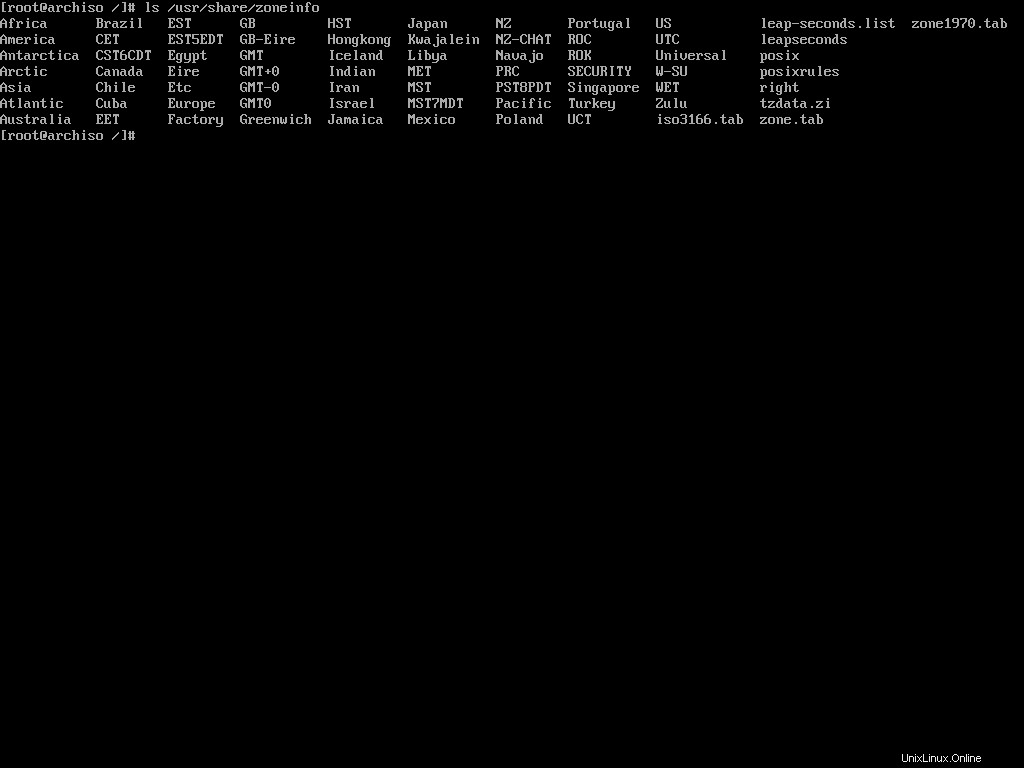
I live in Dhaka, Bangladesh which resides inside the Asia zone. If I list out the content of Asia, I should see Dhaka there:
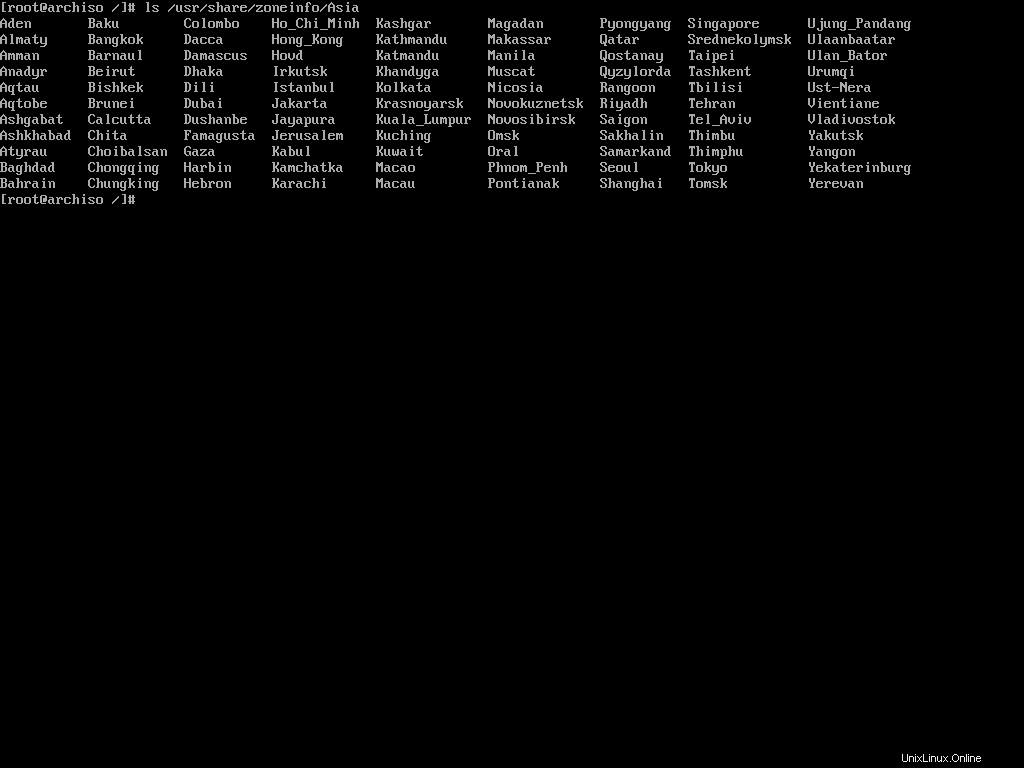
To set Asia/Dhaka as my default time zone, I'll have to make a symbolic link of the file at the /etc/localtime lokasi:
ln -sf /usr/share/zoneinfo/Asia/Dhaka /etc/localtime
The ln command is used for creating symbolic links. The -sf options indicate soft and force, respectively.
How To Configure the Localization
Now you'll have to configure your languages. Arch Linux has an easy way to set that up as well.
First, you'll have to edit the etc/locale.gen file according to your localization. Open the file in the nano text editor:
nano /etc/locale.genYou'll see a long list of languages:
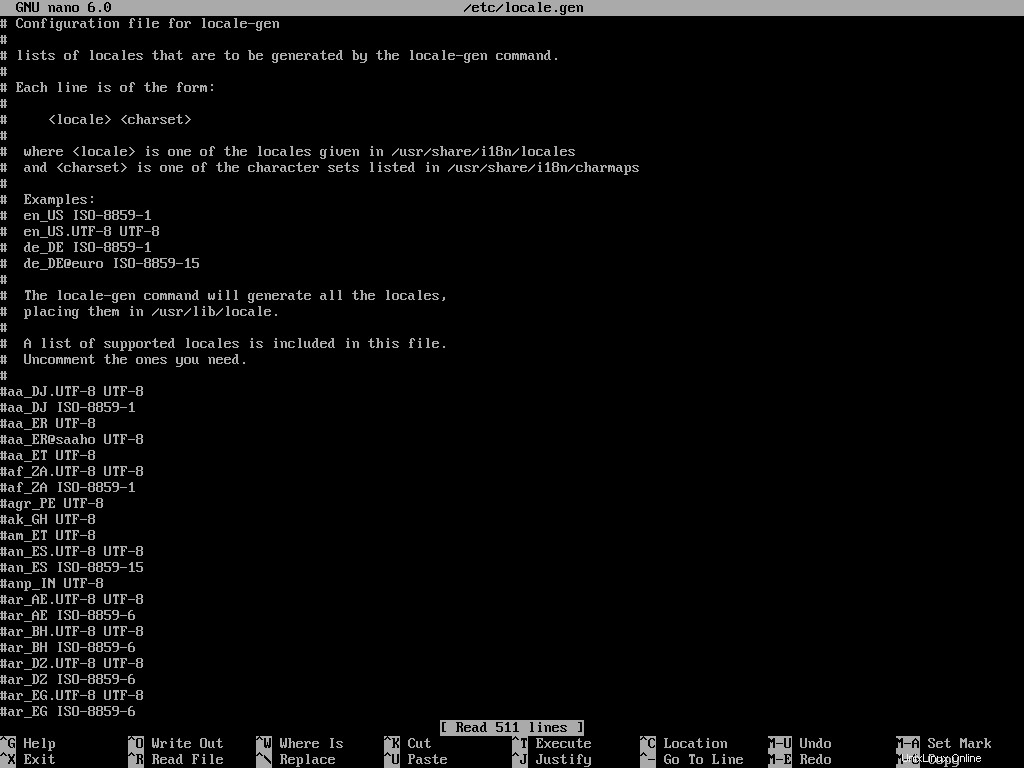
You'll have to uncomment the languages that you want to enable. I usually only need English and Bengali. So I'll locate the en_US.UTF-8 UTF-8 , bn_BD UTF-8 , and bn_IN UTF-8 languages. Save the file by pressing Ctrl + O and exit nano by pressing the Ctrl + X key combination.
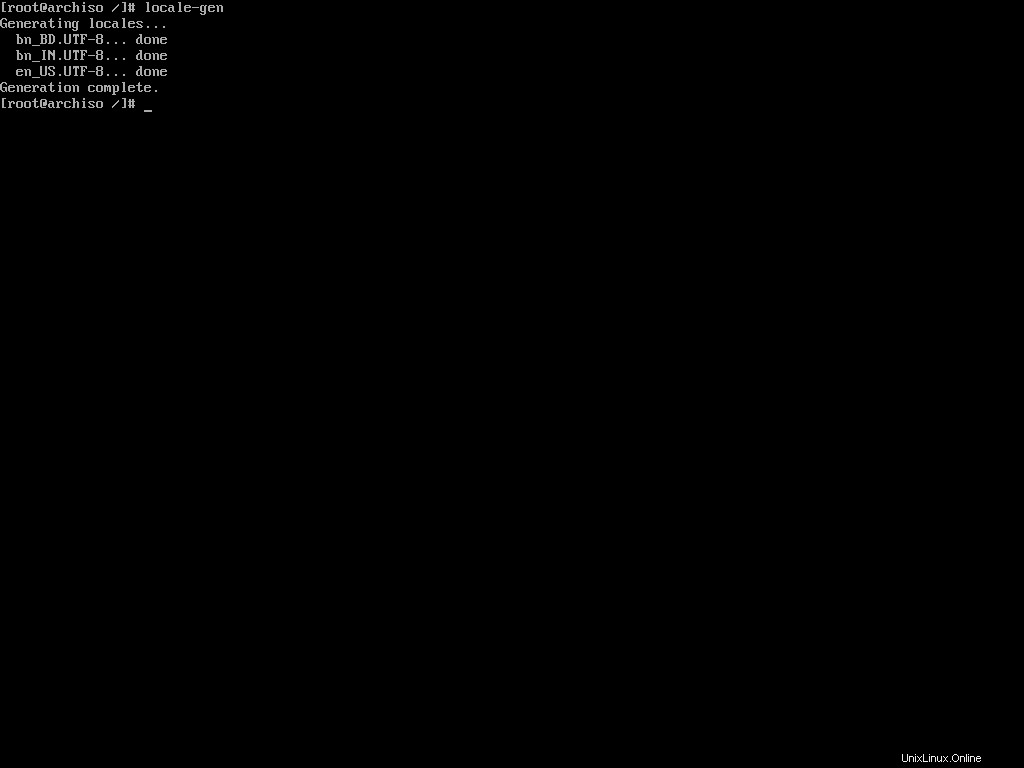
Now you'll have to execute the following command:
locale-gen
The locale-gen command will read your /etc/locale.gen file and generate the locales accordingly.
Now that you've enabled multiple languages, you'll have to tell Arch Linux which one to use by default. To do so, open the /etc/locale.conf file and add the following line to it:
LANG=en_US.UTF-8
That's all you gotta do to configure your locale. You can always go back to the /etc/locale.gen file and add or remove languages from it. Just remember to run locale-gen whenever you do that.
Apart from the locales, if you've made any changes to your console keymaps in the first step of installation, you may want to persist them now. To do so, open the /etc/vconsole.conf file and add your preferred keymaps there.
For example, if you changed the default keymaps to mac-us in the first step, then you may want to add the following line to the vconsole.conf berkas:
KEYMAP=mac-usNow every time you use the virtual console, it'll have the correct keymap and you will not have to configure it every time.
How To Configure the Network
Configuring a network manually in any Linux distribution can be tricky. That's why I advised you to install the networkmanager package during the system installation. If you did as I said, you're good to go. Otherwise, use pacman to install the package now:
pacman -S networkmanager
Pacman is a package manager. You'll learn more about it later. Let's set the host name for your computer now. A host name is a unique name created to identify a machine on a network, written in the /etc/hostname berkas.
Open the file with nano and write your host name in it. You can use anything to identify your machine. I usually use my device brand or model as my hostname and as I'm on a legion laptop, I'll simply write the following:
legion
Local host name resolution is provided by nss-myhostname (an NSS module provided by systemd) without having to edit /etc/hosts mengajukan. It is enabled by default.
But some software may still read the /etc/hosts file directly. Open the file in nano and add the following lines to it:
127.0.0.1        localhost
::1              localhost
127.0.1.1        legion
Make sure to replace legion with your host name. Now you may install the aforementioned package:
pacman -S networkmanager
Enable the NetworkManager service by executing the following command:
systemctl enable NetworkManager
Make sure to write NetworkManager and not networkmanager as the service name. If the command succeeds, network manager will start automatically on boot from now on and do its thing.
How To Set the Root Password
You may want to set a password for the root user because why not? To do so, execute the following command:
passwd
The passwd command lets you change the password for a user. By default it affects the current user's password which is the root right now.
It'll ask for a new password and confirmation password. Input them carefully and make sure you don't forget the password.
How To Create a Non-root User
Using your Linux system as the root user for long is not a good idea. So creating a non-root user is important. To create a new user, execute the following command:
useradd -m -G wheel farhan
The useradd command lets you create a new user. Make sure to replace my name with the one you want to use. The -m option indicates that you also want it to create the corresponding home directory. The -G option will add the new user to the wheel group which is the administration user group in Arch Linux.
Now you can use the passwd command once again to set the password for the newly created user:
passwd farhanThe program will prompt you for a new password and a password confirmation. Again, don't forget to replace my name with the one you've used.
Finally, you'll have to enable sudo privilege for this new user. To do so, open the /etc/sudoers file using nano. Once open, locate the following line and uncomment it:
# %wheel ALL=(ALL) ALL
This file essentially means that all users in the wheel group can use sudo by providing their password. Save the file by hitting Ctrl + O and exit nano by hitting Ctrl + X. Now the new user will be able to use sudo when necessary.
How To Install Microcode
According to PCMag,
A set of elementary instructions in a complex instruction set computer (CISC). The microcode resides in a separate high-speed memory and functions as a translation layer between the machine instructions and the circuit level of the computer. Microcode enables the computer designer to create machine instructions without having to design electronic circuits.
Processor manufacturers such as Intel and AMD often release stability and security updates to the processor. These updates are crucial for the system's stability.
In Arch Linux, microcode updates are available through official packages that every user should install on their systems.
# for amd processors
pacman -S amd-ucode

# for intel processors
pacman -S intel-ucode
Just installing these packages is not enough though. You'll have to make sure that your bootloader is loading them. You'll learn about it in the next section.
How To Install and Configure a Boot Loader
According to Wikipedia,
A bootloader, also spelled as boot loader or called boot manager and bootstrap loader, is a computer program that is responsible for booting a computer.
The internals of bootloader is out of scope of this article so I'll just go on with the installation process. If you've used any other Linux distribution in the past you may have encountered the GRUB menu.
GRUB is one of the most popular bootloaders out there. Although there are a number of options available, I'll demonstrate the installation of GRUB because it is what most people will likely use.
To install GRUB, you'll have to first install two packages.
pacman -S grub efibootmgr
If you're installing alongside other operating systems, you'll also need the os-prober package:
pacman -S os-proberThis program will search for already installed operating systems on your system and will make them a part of the GRUB configuration file.
Now, you'll have to mount the EFI system partition you created a few sections ago. To do so, you'll have to first create an efi direktori:
mkdir /boot/efiAccording to Wikipedia,
In Linux, and other Unix-like operating systems, the /boot/ directory holds files used in booting the operating system.
This directory is present in all Unix-like operating systems. The above mentioned command creates a directory called efi inside the /boot direktori. After creating the directory, you'll have to mount your EFI system partition in that directory.
mount /dev/sda1 /boot/efi
I hope you remember that we formatted the /dev/sda1 device as the EFI system partition during the partitioning phase. Make sure to use the correct one for your device.
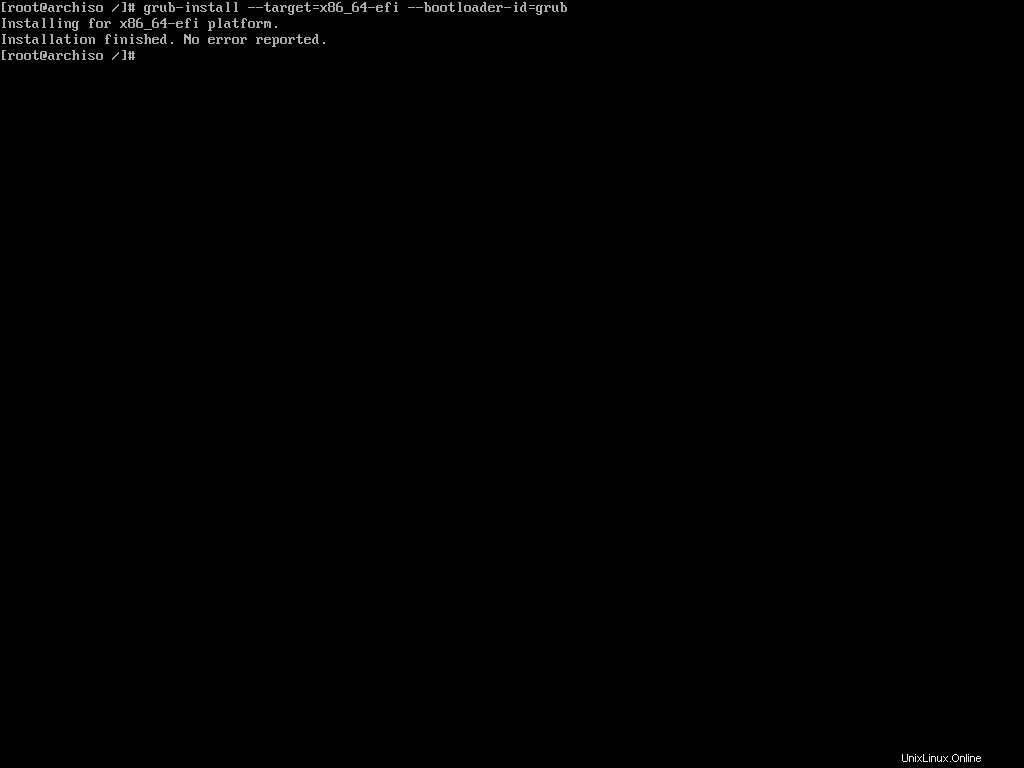
Now, we'll use the grub-install command to install GRUB in the newly mounted EFI system partition:
grub-install --target=x86_64-efi --bootloader-id=grub
You can more or less use this command verbatim. You can change the --bootloader-id to something more expressive like arch or something else. If the installation finishes without any errors, you'll then have to generate the GRUB configuration file.
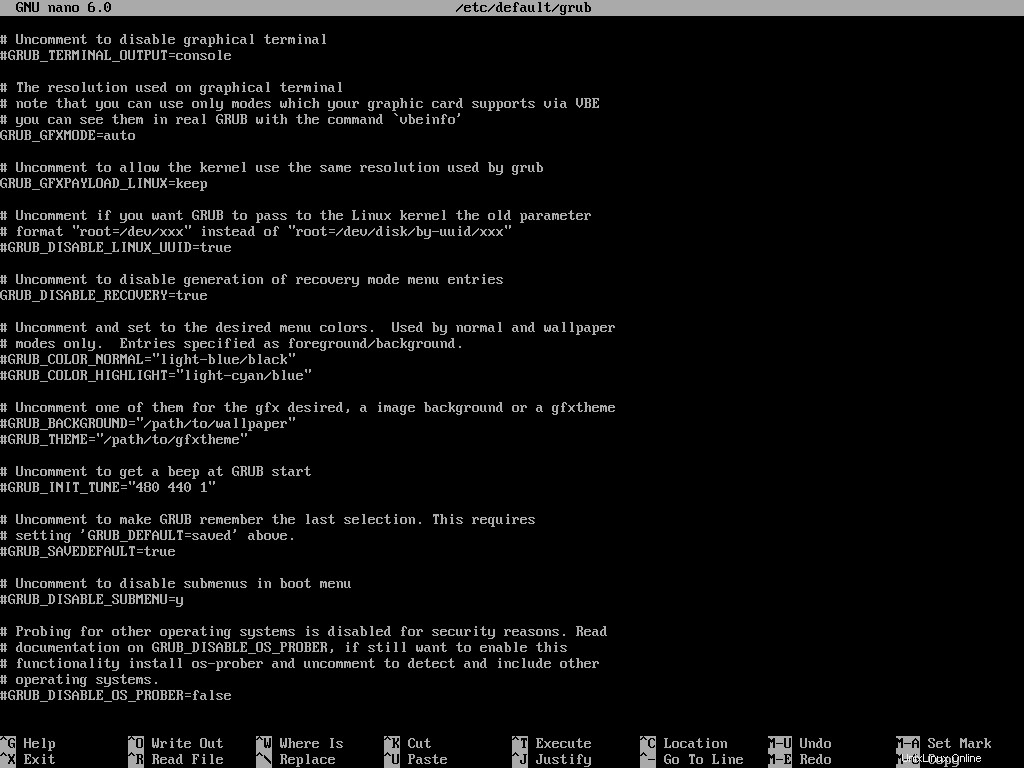
If you're installing alongside other operating systems, you'll have to enable os-prober before generating the configuration file. To do so, open the /etc/default/grub file in nano text editor. Locate the following line and uncomment it:
#GRUB_DISABLE_OS_PROBER=falseThis should be the last line in the aforementioned file so just scroll to the bottom and uncomment it.
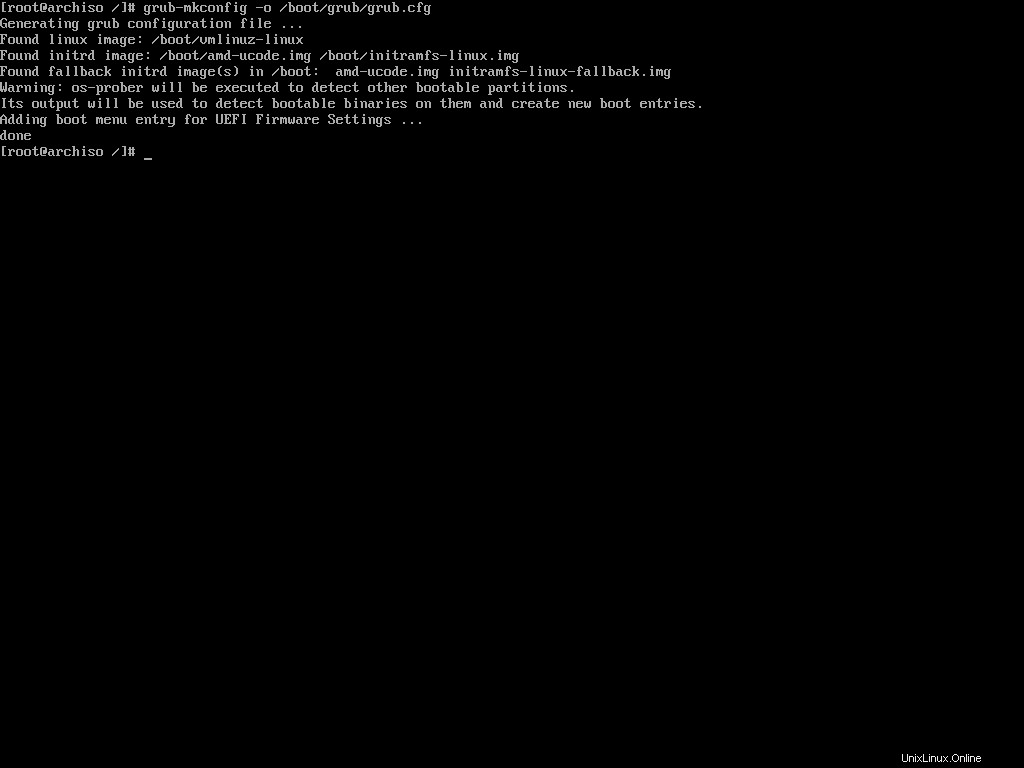
Now execute the following command to generate the configuration file:
grub-mkconfig -o /boot/grub/grub.cfg
The grub-mkconfig command generates the GRUB configuration file and saves it to a given target location. In this case /boot/grub/grub.cfg is the target location.
The command will also take into account the microcode you installed earlier and any other existing operating system on your machine.
Congratulations, you now have a working Arch Linux installation. At this point, you can exit the Arch-Chroot environment, unmount the partition, and reboot. But I would suggest you to stay a bit longer and set-up the graphical user interface as well.
How To Install Xorg
To run programs with graphical user interfaces on your system, you'll have to install an X Window System implementation. The most common one is Xorg.
To install Xorg, execute the following command:
pacman -S xorg-serverWait until the installation is done and then move on to installing the necessary graphics drivers.
How To Install Graphics Drivers
Installing graphics drivers on Arch Linux is very straightforward. You just install the packages required by your graphics processing unit and call it a day.
# for nvidia graphics processing unit
pacman -S nvidia nvidia-utils

# for amd discreet and integrated graphics processing unit
pacman -S xf86-video-amdgpu

# for intel integrated graphics processing unit
pacman -S xf86-video-intel
If you need further assistance, feel free to check the ArchWiki page.
How To Install a Desktop Environment
Now that you've installed Xorg and the necessary graphics drivers, you're ready to install a desktop environment like GNOME, Plasma, or XFCE.
Arch Linux supports a long list of desktop environments but I've only tried out GNOME and Plasma. I'll demonstrate how you can install either of these two.
How To Install GNOME
To install GNOME, you'll have to install the gnome kemasan. To do so, execute the following command:
pacman -S gnome
During the installation, you'll be offered multiple choices for pipwire-session-manager and emoji-font paket. Accept the defaults by hitting Enter in both prompts. The installation may take some time to finish.
The gnome package comes with GDM or Gnome Display Manager. You can enable the service by executing the following command:
systemctl enable gdmThat's all you need to do to get GNOME up and running on your Arch system.
How To Install Plasma
The KDE Plasma installation is not that different from GNOME. You'll need to install Plasma related packages instead of GNOME.
pacman -S plasma plasma-wayland-session
If you have an NVIDIA graphics card, then avoid installing the plasma-wayland-session and use plain old X11. I own two devices with NVIDIA GPUs and both of them have shown instability when using Wayland.
During the installation, you'll get multiple choices for ttf-font , pipwire-session-manager , and phonon-qt5-backend paket. Make sure to pick noto-fonts as your ttf-font and accept the defaults for the other two.
Like gdm in GNOME, Plasma comes with sddm as the default display manager. Execute the following command to enable the service:
systemctl enable sddmAnd that's all you need to do to get Plasma up and running on your Arch Linux system.
How To Finalize The Installation
Now that you've installed Arch Linux and gone through all necessary configuration steps, you can reboot to your newly installed system. To do so, first come out of the Arch-Chroot environment:
exitNext, unmount the root partition to make sure there are no pending operations:
umount -R /mntNow reboot the machine:
rebootWait until you see the GRUB menu.
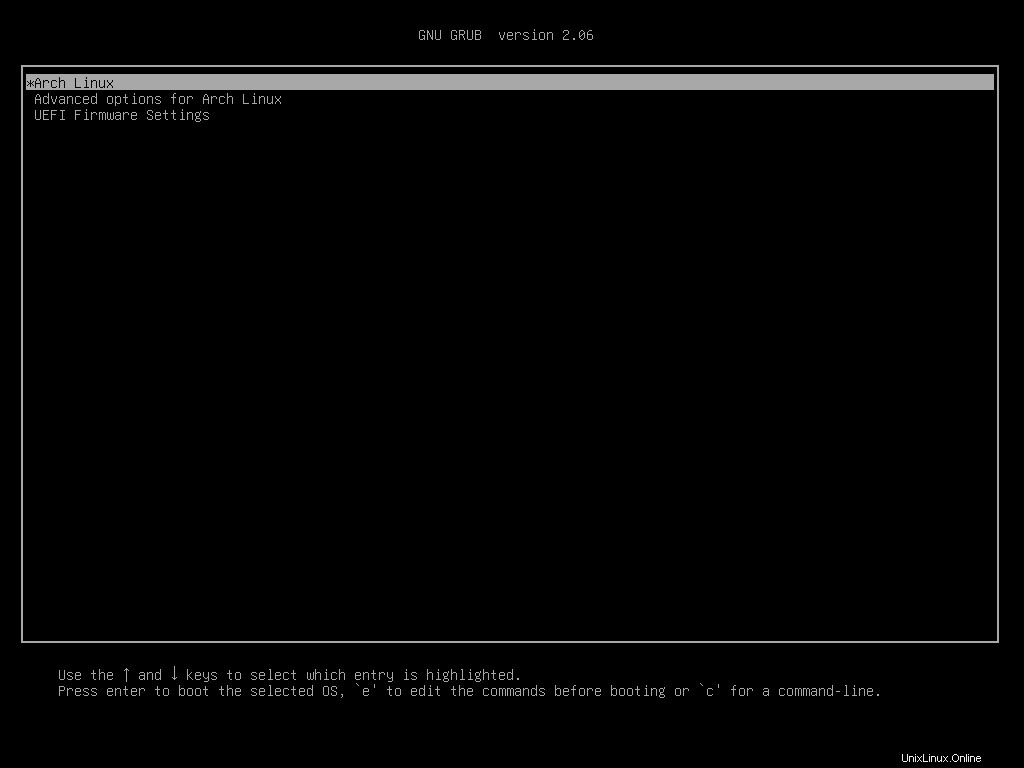
Choose Arch Linux from the list and wait until the system finishes booting up.
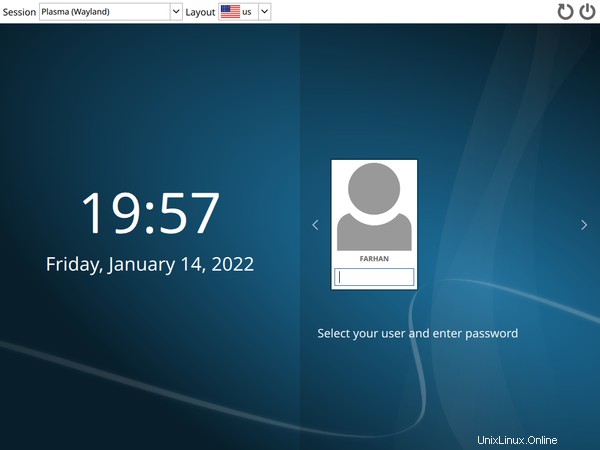
Log in with your user credentials and voilà!
Your shiny new Arch Linux system is ready to do wonders.
How To Switch Between Desktop Environments
Unlike other distributions coupled tightly with their default desktop environment, Arch is flexible. You can switch to another desktop environment whenever you feel like it.
To do so, first logout of your current session.
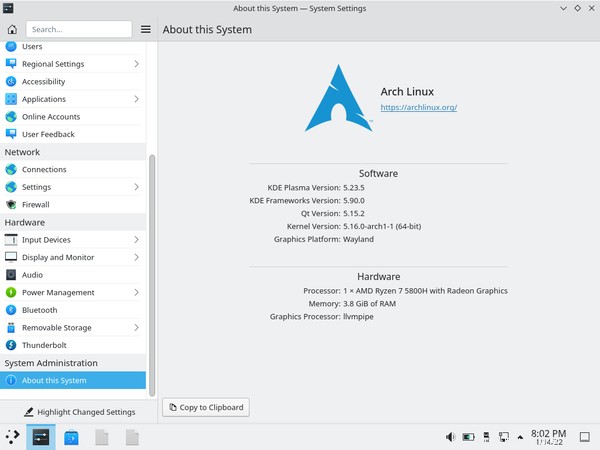
As you can see, I'm currently using Plasma. Now switch to TTY2 press Ctrl + Alt + F2 key combination. You'll see a console login prompt:
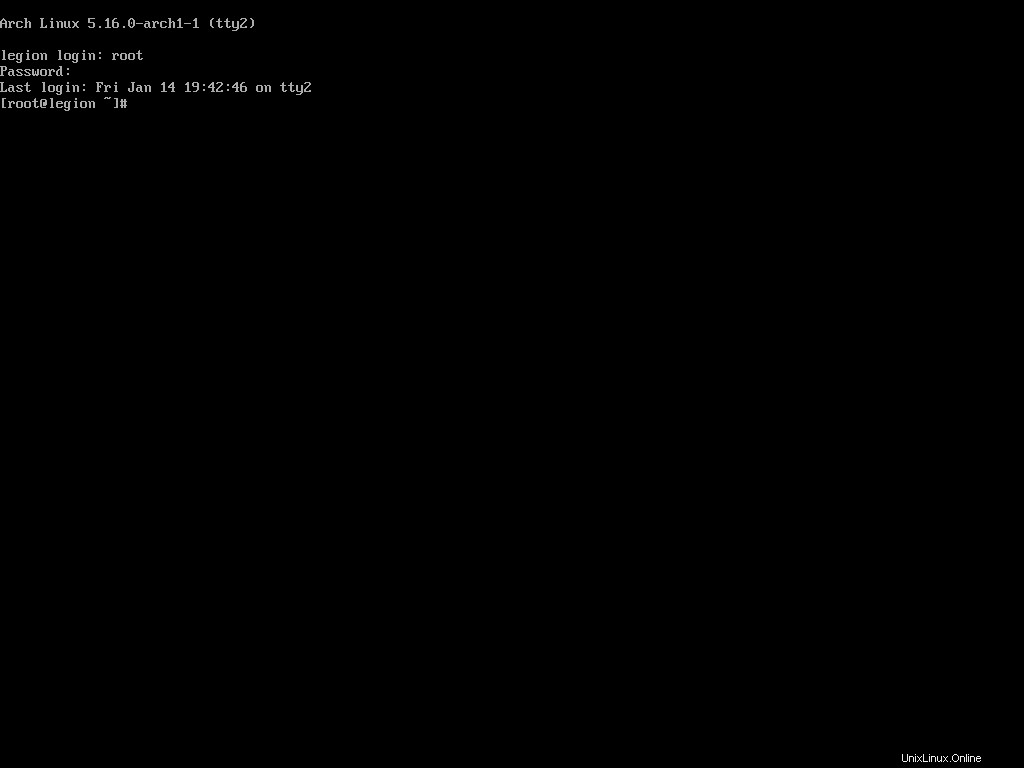
Login with the root credentials and disable the sddm display manager.
systemctl disable sddmThen uninstall the Plasma related packages you installed earlier:
sudo pacman -Rns plasma plasma-wayland-sessionOnce the packages have been uninstalled, install the packages needed for GNOME:
pacman -S gnome
Then perform the installation according to the section you read earlier. After the gnome package has been installed, enable the gdm display manager:
systemctl enable gdmRestart the computer.
rebootWait until the Arch Linux system finishes booting.
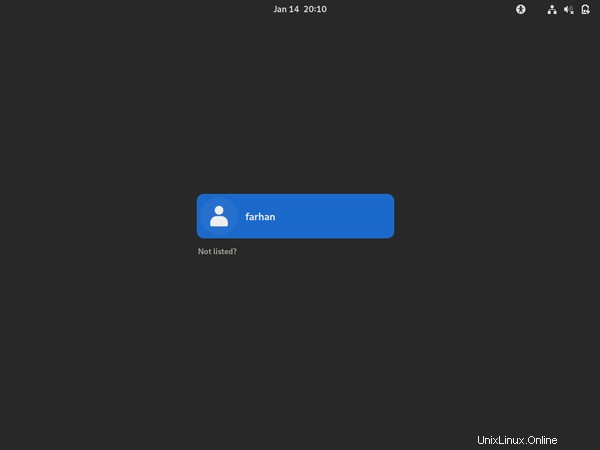
Lo and behold, the gorgeous Gnome Display Manager. Login with your credentials.
You can switch between the desktop environments as much as you want to, but I would suggest on settling down with one of them. Also, I wouldn't recommend having multiples of them installed at the same time.
How To Manage Packages Using Pacman
You've already installed a number of packages using pacman. It's equivalent to package managers like apt in Ubuntu and dnf in Fedora.
In this section, I'll introduce you to some of the common pacman commands that you may need on a daily basis.
How To Install Packages Using Pacman
To install a package using pacman, you can use the following command syntax:
# sudo pacman -S <package name>

sudo pacman -S rust
You can install multiple packages as follows:
# sudo pacman -S <package name> <package name>

sudo pacman -S rust golang
You can also specify the repository you want to install the package from like this:
# sudo pacman -S <package repository>/<package name>

sudo pacman -S extra/rust
In this command, the -S option means synchronize which is equivalent to install in the case of apt or dnf package managers.
How To Remove Packages Using Pacman
To remove a package using pacman you can use the following syntax:
# sudo pacman -R <package name>

sudo pacman -R rust
This will remove the package but will leave the dependencies. You can remove the package with dependencies if they're not required by any other package by executing the following command:
# sudo pacman -Rs <package name>

sudo pacman -Rs rust
Pacman often saves important configuration files when removing certain applications. You can override this behavior by using the following syntax:
# sudo pacman -Rn <package name>

sudo pacman -Rn rust
I usually use sudo pacman -Rns whenever I want to uninstall something. One last thing that I want to show is how to remove orphan packages.
In Ubuntu the sudo apt autoremove command uninstalls any unnecessary package. The equivalent command in Arch is:
sudo pacman -Qdtq | pacman -Rs -This will cleanup any leftover package from previously installed packages.
How To Upgrade Packages Using Pacman
To upgrade all the packages in your system, you can use the following syntax:
sudo pacman -Syu
In this command, the S option synchronizes the packages, y refreshes the local package cache, and u updates the system. This is like the ultimate upgrade command and I run it at least once everyday.
How To Search for Packages Using Pacman
To search for a package in the database, you can use the following syntax:
# sudo pacman -Ss <package name>

sudo pacman -Ss rust
This will print out all the packages found in the database with that search term and will also indicate if any of those are already installed.
If you would like to check if a package is already installed or not, you can use the following command:
# sudo pacman -Qs <package name>

sudo pacman -Qs rust
This is useful when you want to uninstall a package but do not know its exact name.
How To Use AUR in Arch Linux
According to It's FOSS,
AUR stands for Arch User Repository. It is a community-driven repository for Arch-based Linux distributions users. It contains package descriptions named PKGBUILDs that allow you to compile a package from source with makepkg and then install it via pacman (package manager in Arch Linux).
AUR is one of the most attractive features of Arch Linux. It's due to AUR that Arch Linux has a package count almost equal to Debian. You've already used pacman to install various packages. Sadly, you can not use that to install packages from AUR.
You'll have to install one of the AUR helpers instead. Arch Linux doesn't support any of these helpers and advises you to learn how to build packages manually. I'll explain both techniques here. If you understand how a helper works, you'll be able to do it manually as well.
How To Install Packages Using a Helper
Among the available and currently maintained AUR helpers, I like the yay or yet another yogurt package. It's written in Go and is quite solid.
You can not install yay like other packages. You'll have to get the source code and compile the program. You'll need git and the base-devel package to do so. Assuming you've already installed base-devel during Arch Linux installation:
pacman -S git
Clone the yay repository from GitHub and cd into it:
git clone https://aur.archlinux.org/yay.git && cd yayTo build and install yay from source, execute the following command:
makepkg -si
The makepkg script automates the build process of packages. The -si options stand for sync dependencies and install. The first option will install required dependencies (Golang in this case) and the later option will install the built package.
After the build process finishes, makepkg will ask for installation confirmation and your password. Input your password carefully and let the installation finish.
Check if yay has been installed properly or not:
yay --version

# yay v11.1.0 - libalpm v13.0.1
Now let's install something using yay. One of the common packages you may want to install is the visual-studio-code-bin package. To do so, execute the following command:
yay -S visual-studio-code-binUnlike pacman, you shouldn't run yay with sudo. Yay will look for the given package and will ask whether you would like to see the diff or not:
All the repositories over at AUR comes with a PKGBUILD file which contains the instructions for building this package. Yay has this nice feature where it shows you what has changed in the PKGBUILD file since the last time.
For now, I'll pick N for none and hit enter. Yay will now look for the dependencies and ask for your password to install them.
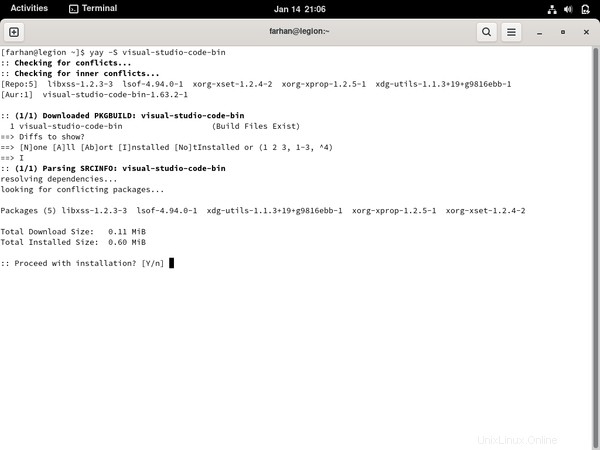
Confirm the installation and provide your password. Yay will then install the dependencies and start building the package. Once built, yay will install the package and prompt for your password where necessary.
After the installation finishes, search for Visual Studio Code in the application launcher:
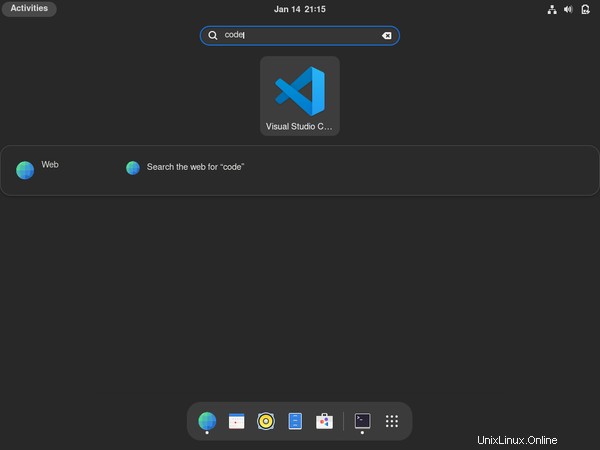
Congratulations on installing your first package from AUR. Yay commands are almost identical to pacman, so if you can do something with pacman, you should be able to do that with yay as well.
In fact, yay can also install packages from official Arch Linux repositories like pacman. But I would suggest you to use yay only for installing packages from AUR when necessary and pacman for everything else.
How To Install Packages Manually
Like I said in the previous section, the ArchWiki suggests avoiding any AUR helper and installing packages from AUR manually. I'll now show you how to do it.
Make sure you have git and base-devel packages installed. If not, use pacman to install them.
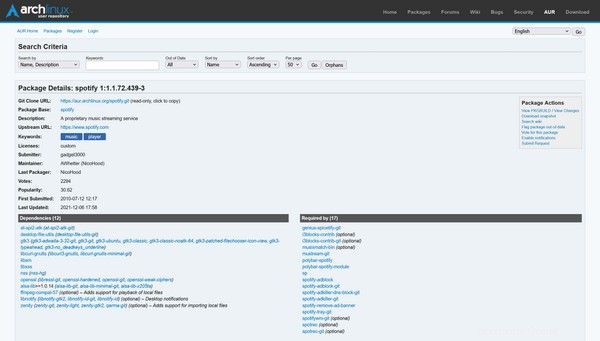
For the demonstration, let's install Spotify this time. First visit the AUR page for the spotify package - https://aur.archlinux.org/packages/spotify/ and copy the "Git Clone URL" from there.
The page even lists all the dependencies you'll need. Clone the repository to your machine:
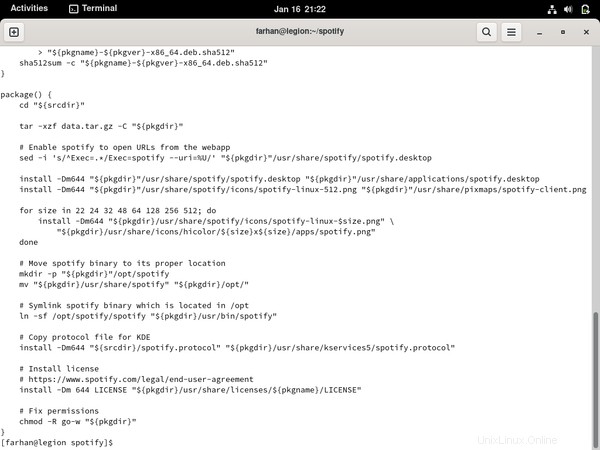
Every AUR repository comes with a PKGBUILD file containing the instructions for building the package. Whenever you're installing a package from AUR, it's a great idea to checkout the PKGBUILD file using something like the cat perintah:
Make sure there's nothing harmful in the file. Once you're satisfied, use makepkg to install any dependencies, build the package, and install it. Ideally there shouldn't be any issues but sometimes, things can take an unexpected turn.
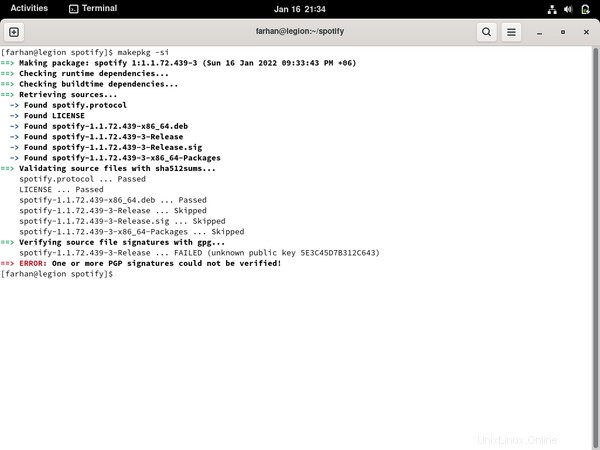
In these cases, go back to the corresponding AUR page and check the user comments. Like in this case, I found the following pinned comment:

Turns out the package requires you to add the Spotify for Linux gpg key to the user kyechain. This command downloads the gpg key using curl and pipes it as the input of the gpg --import perintah:
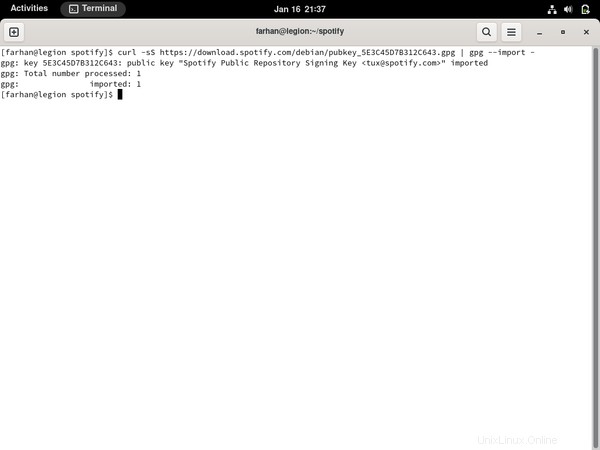
Try executing makepkg -si once again and everything should work fine this time:
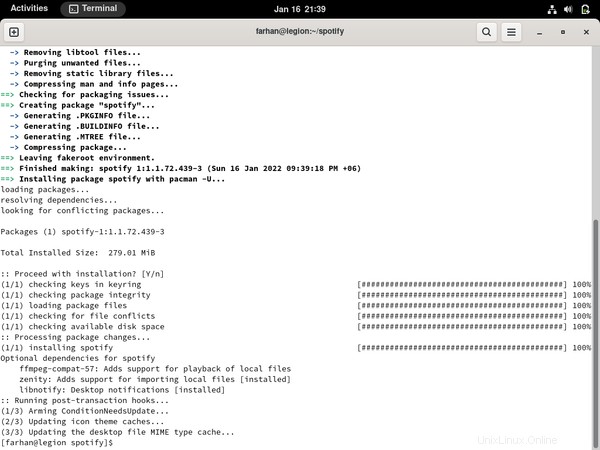
See, told ya! Manually installing packages often involves such troubleshooting but help is almost always around the comment corner. Let's enjoy some music now.
How To Troubleshoot Common Problems
Look, I've been using Arch as my primary on all my devices for some years now but I still run into issues. Fortunately there are some great places to look for help when you're stuck:
- ArchWiki
- Arch Linux Forum
- r/archlinux
For the most part, the wiki should have the information you're looking for. In fact, if you're on a laptop and having difficulty getting something to work, there is an entire wiki category dedicated to different laptops. So look around the wiki.
If the wiki fails to solve your problem, then ask other fellow users at the forum as well as the subreddit. But whenever you're doing that, make sure to do your research first and include as much description as you can in the post. It's really annoying if other users have to keep asking you for more information and it'll also lower the chance that you'll get an answer.
How To Use the Live Arch ISO as a Rescue Media
Whatever people may say, Arch Linux is very stable as long as you know what you're doing. If you go about installing every funky package you come across in the AUR or keep switching different kernels without knowing what they're for, your system may fail to boot.
In those cases, you can use your live USB drive as a rescue media. To do so, reconnect the bootable USB to your computer and boot into the live environment. Once there, configure the time, keymaps, and fonts if you want to.
Then use fdisk to list out all your partitions and locate the one holding your Arch Linux installation. In my case it's the /dev/sda2 partition. Mount the partition like you did before:
mount /dev/sda2 /mntNow use Arch-Chroot to log in as the root user.
arch-chroot /mntNow uninstall the bad package you installed or go back to a kernel version that used to work in the past and so on. Once done, exit the Arch-Chroot environment, unmount the partition, and reboot:
exit
umount -R /mnt
reboot
If the computer boots fine then congratulations. Otherwise try the wiki, forum, or the subreddit. If nothing works, you may have to do a fresh install.
Further Reading
If you've come this far then you've done a lot of reading already – but that's not all. This entire handbook was written by combining information from the wiki, forum, and subreddit. I'm listing out some wiki pages that I think you should read.
- Installation guide
- Network configuration
- General recommendation
- Desktop environment
- pacman
- Arch Build System
- makepkg
- List of applications
Couldn't think of any more at the moment but I'll keep this list updated.
Kesimpulan
I would like to thank you from the bottom of my heart for the time you've spent on reading this article. I hope you've enjoyed your time and have learned a lot about not only Arch but Linux in general
Apart from this one, I've written full-length handbooks on other complicated topics available for free on freeCodeCamp.
These handbooks are part of my mission to simplify hard to understand technologies for everyone. Each of these handbooks takes a lot of time and effort to write.
If you've enjoyed my writing and want to keep me motivated, consider leaving starts on GitHub and endorse me for relevant skills on LinkedIn.
I'm always open to suggestions and discussions on Twitter or LinkedIn. Hit me with direct messages.
In the end, consider sharing the resources with others, because
In open source, we feel strongly that to really do something well, you have to get a lot of people involved. — Linus Torvalds
Till the next one, stay safe and keep learning.