
Pada artikel ini, kami akan menjelaskan langkah-langkah yang diperlukan untuk menginstal HestiaCP di Ubuntu 20.04 LTS. Sebelum melanjutkan tutorial ini, pastikan Anda login sebagai pengguna dengan sudo hak istimewa. Semua perintah dalam tutorial ini harus dijalankan sebagai pengguna non-root.
HestiaCP didasarkan pada proyek sumber terbuka lain yang disebut panel Kontrol Vesta. HestiaCP menyediakan antarmuka web dan baris perintah yang mudah digunakan yang memungkinkan administrator server web mengelola nama domain, ruang web, akun email, dan zona DNS dari lokasi terpusat dengan mudah dan tanpa perlu mengedit file konfigurasi secara manual.
Prasyarat:
- Sistem Operasi dengan Ubuntu 20.04
- Alamat IPv4 Server dengan Hak Pengguna Super (Akses Root)
- Terminal Gnome untuk Desktop Linux
- Klien Putty SSH untuk Windows atau macOS
- Powershell untuk Windows 10/11
- Familiar dengan Perintah APT
Instal HestiaCP di Ubuntu 20.04
Langkah 1. Pertama, sebelum Anda mulai menginstal paket apa pun di server Ubuntu Anda, kami selalu menyarankan untuk memastikan bahwa semua paket sistem telah diperbarui.
sudo apt update
sudo apt upgrade
sudo apt install ca-certificates
Langkah 2. Instal HestiaCP di Ubuntu.
Menginstal HestiaCP di sistem Linux Ubuntu Anda sangatlah mudah, Sekarang kami menambahkan kunci repositori untuk HestiaCP agar dapat mengunduh paket yang diperlukan:
sudo wget -qO - https://gpg.hestiacp.com/deb_signing.key | sudo apt-key add -
Selanjutnya, unduh skrip instalasi HestiaCP stabil terbaru:
sudo wget https://raw.githubusercontent.com/hestiacp/hestiacp/release/install/hst-install.sh
Kemudian, jalankan skrip instalasi dan ikuti petunjuk di layar untuk menginstal HestiaCP pada instans Anda:
bash hst-install.sh
Keluaran:
_   _           _   _        ____ ____
| | | | ___  ___| |_(_) __ _ / ___|  _ \
| |_| |/ _ \/ __| __| |/ _` | |   | |_) |
|  _  |  __/\__ \ |_| | (_| | |___|  __/
|_| |_|\___||___/\__|_|\__,_|\____|_|

                      Hestia Control Panel
                                    v1.1.1
====================================================================
The following server components will be installed on your system:

  - NGINX Web / Proxy Server
  - Apache Web Server (as backend)
  - PHP-FPM Application Server
  - Bind DNS Server
  - Exim Mail Server + ClamAV + SpamAssassin
  - Dovecot POP3/IMAP Server
  - MariaDB Database Server
  - Vsftpd FTP Server
  - Firewall (Iptables) + Fail2Ban Access Monitor
====================================================================
Setelah instalasi selesai, Anda akan diberikan URL Admin, Nama Pengguna, dan Kata Sandi di output:
You have successfully installed Hestia Control Panel on your server.

Ready to get started? Log in using the following credentials:

    Admin URL:  https://your-ip-address:8083
    Username:   admin
    Password:   your_secure_password

Thank you for choosing Hestia Control Panel to power your full stack web server,
we hope that you enjoy using it as much as we do!

Please feel free to contact us at any time if you have any questions,
or if you encounter any bugs or problems:

E-mail:  example@unixlinux.online
Web:     https://www.hestiacp.com/
Forum:   https://forum.hestiacp.com/
GitHub:  https://www.github.com/hestiacp/hestiacp

Note: Automatic updates are enabled by default. If you would like to disable them,
please log in and navigate to Server > Updates to turn them off.

Help support the Hestia Contol Panel project by donating via PayPal:
https://www.hestiacp.com/donate
--
Sincerely yours,
The Hestia Control Panel development team

Made with love & pride by the open-source community around the world.

(!) IMPORTANT: You must logout or restart the server before continuing.

Do you want to reboot now? [Y/N]
Setelah itu, aktifkan SSL di Hestia menggunakan perintah berikut:
v-add-letsencrypt-host
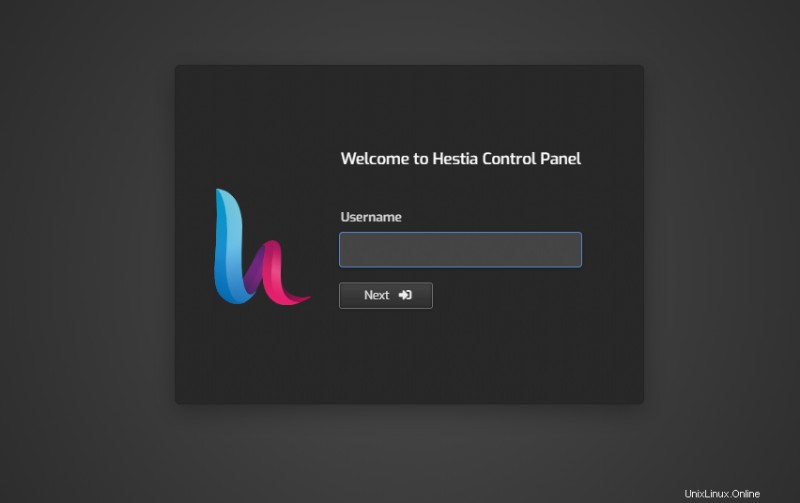
Langkah 3. Akses Web UI Hestia CPanel Admin.
Setelah instalasi selesai, Anda dapat masuk ke panel HestiaCP menggunakan IP server atau nama host Anda seperti di bawah ini:
https://your-IP-address:8083
Itu saja yang perlu Anda lakukan untuk menginstal HestiaCP di Ubuntu 20.04 LTS Focal Fossa. Saya harap Anda menemukan tip cepat ini bermanfaat. Untuk bacaan lebih lanjut tentang Instal panel kontrol server web Linux sumber terbuka HestiaCP, silakan merujuk ke basis pengetahuan resmi mereka. Jika Anda memiliki pertanyaan atau saran, jangan ragu untuk meninggalkan komentar di bawah.