LEMP stack adalah singkatan dari Linux, Nginx, MariaDB, dan PHP stack. Ini adalah tumpukan teknologi yang banyak digunakan untuk meng-host situs web dan blog.
Tutorial ini menunjukkan cara menginstal Nginx dengan dukungan PHP (melalui PHP-FPM) dan dukungan MySQL di Ubuntu 16.04.
Instal LEMP Stack
Instal Nginx
Unduh kunci penandatanganan dari situs web resmi.
wget http://nginx.org/keys/nginx_signing.key
Tambahkan untuk menghindari peringatan selama instalasi nginx.
sudo apt-key add nginx_signing.key
Tambahkan repositori Nginx dengan menempatkan informasi berikut.
echo "deb http://nginx.org/packages/mainline/ubuntu xenial nginx" | sudo tee /etc/apt/sources.list.d/nginx.list
Perbarui repositori.
sudo apt-get update
Instal Nginx menggunakan perintah berikut.
sudo apt-get install -y nginx
Mulai layanan Nginx setelah instalasi.
sudo systemctl start nginx
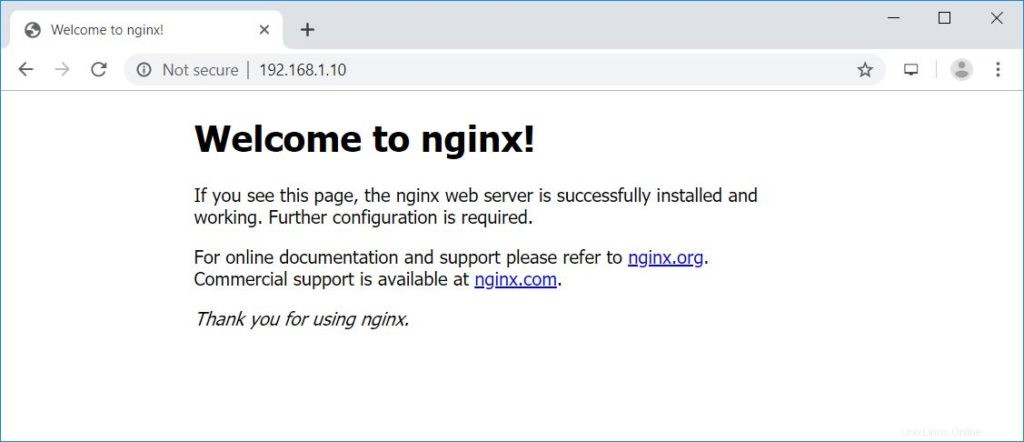
Buka browser web dan kunjungi http://your-ip-add-ress.
Anda akan melihat halaman berikut, dan halaman ini mengonfirmasi bahwa Nginx berhasil diinstal di server.

Root dokumen nginx default di Ubuntu 16.04 adalah /usr/share/nginx/html/. File konfigurasi berada di bawah direktori /etc/nginx.
Instal MariaDB
Ubuntu 16.04 mengirimkan MariaDB v10.0 yang sudah menjadi akhir dari kehidupan. Jadi, kita akan menginstal MariaDB v10.4 dari repositori resmi.
Tambahkan repositori MariaDB di sistem Anda.
sudo apt-get install -y software-properties-common

sudo apt-key adv --recv-keys --keyserver hkp://keyserver.ubuntu.com:80 0xF1656F24C74CD1D8

sudo add-apt-repository 'deb [arch=amd64,arm64,i386,ppc64el] http://nyc2.mirrors.digitalocean.com/mariadb/repo/10.4/ubuntu xenial main'

sudo apt-get update
Instal MariaDB menggunakan perintah di bawah ini.
sudo apt-get install -y mariadb-server mariadb-client
Selanjutnya, amankan instalasi MariaDB dengan perintah mysql_secure_installation.
NOTE: RUNNING ALL PARTS OF THIS SCRIPT IS RECOMMENDED FOR ALL MariaDB
      SERVERS IN PRODUCTION USE!  PLEASE READ EACH STEP CAREFULLY!

In order to log into MariaDB to secure it, we'll need the current
password for the root user. If you've just installed MariaDB, and
haven't set the root password yet, you should just press enter here.

Enter current password for root (enter for none):  << No Password - Press Enter
OK, successfully used password, moving on...

Setting the root password or using the unix_socket ensures that nobody
can log into the MariaDB root user without the proper authorisation.

You already have your root account protected, so you can safely answer 'n'.

Switch to unix_socket authentication [Y/n] N << Disabling Unix Socket login and enabling password Login
 ... skipping.

You already have your root account protected, so you can safely answer 'n'.

Change the root password? [Y/n] Y  << Change MariaDB root password
New password:  << Enter Password
Re-enter new password:  << Re-Enter Password
Password updated successfully!
Reloading privilege tables..
 ... Success!


By default, a MariaDB installation has an anonymous user, allowing anyone
to log into MariaDB without having to have a user account created for
them.  This is intended only for testing, and to make the installation
go a bit smoother.  You should remove them before moving into a
production environment.

Remove anonymous users? [Y/n] Y  << Remove Anonymous users
 ... Success!

Normally, root should only be allowed to connect from 'localhost'.  This
ensures that someone cannot guess at the root password from the network.

Disallow root login remotely? [Y/n] Y  << Disallow root login remotely
 ... Success!

By default, MariaDB comes with a database named 'test' that anyone can
access.  This is also intended only for testing, and should be removed
before moving into a production environment.

Remove test database and access to it? [Y/n] Y  << Remove test database
 - Dropping test database...
 ... Success!
 - Removing privileges on test database...
 ... Success!

Reloading the privilege tables will ensure that all changes made so far
will take effect immediately.

Reload privilege tables now? [Y/n] Y  << Reload privilege
 ... Success!

Cleaning up...

All done!  If you've completed all of the above steps, your MariaDB
installation should now be secure.

Thanks for using MariaDB!
Instal PHP
Selanjutnya adalah menginstal PHP melalui PHP-FPM (PHP-FPM (FastCGI Process Manager), ini merupakan alternatif implementasi PHP FastCGI yang memiliki beberapa fitur tambahan yang berguna untuk situs dari berbagai ukuran, terutama situs yang lebih sibuk).
Ubuntu 16.04 mengirimkan PHP-FPM v7.0 yang sudah menjadi akhir dari kehidupan. Jadi, kita akan menginstal PHP-FPM v7.3 dari repositori Ondřej Surý.
BACA: Cara Menginstal PHP 7.3/7.2/7.1 di Ubuntu 16.04
Tambahkan repositori.
sudo add-apt-repository ppa:ondrej/php

sudo apt-get update
Instal PHP-FPM v7.3 dengan menggunakan perintah berikut.
sudo apt-get install -y php7.3-fpm php7.3-mysql php7.3-cli
Edit file di bawah ini untuk mengonfigurasi PHP-FPM agar menggunakan koneksi TCP alih-alih soket Unix.
sudo nano /etc/php/7.3/fpm/pool.d/www.conf
Ubah parameter listen yang ditampilkan seperti di bawah ini.
listen = 127.0.0.1:9000
Uji Tumpukan LAMP
Mari kita buat host virtual berbasis nama di server Nginx untuk detail berikut.
Nama Server: server.itzgeek.local
Akar Dokumen: /usr/share/nginx/html/server.itzgeek.local
Buat file konfigurasi bernama virtual.conf di bawah direktori /etc/nginx/conf.d/.
sudo nano /etc/nginx/conf.d/virtual.conf
Tambahkan konten berikut.
server {
   server_name server.itzgeek.local;
   root /usr/share/nginx/html/server.itzgeek.local;

   location / {
       index index.html index.htm index.php;
   }

   location ~ \.php$ {
      include        /etc/nginx/fastcgi_params;
      fastcgi_pass   127.0.0.1:9000;
      fastcgi_index  index.php;
      fastcgi_param SCRIPT_FILENAME $document_root$fastcgi_script_name;
   }
}
Buat direktori root dokumen.
sudo mkdir -p /usr/share/nginx/html/server.itzgeek.local
Untuk menguji PHP, tempatkan file PHP ke root dokumen dari host virtual yang dibuat.
Di terminal salin/tempel baris berikut:
echo "<?php phpinfo(); ?>" | sudo tee /usr/share/nginx/html/server.itzgeek.local/index.php
Mulai ulang layanan.
sudo systemctl restart nginx

sudo systemctl restart php7.3-fpm
Satu sistem klien Anda, buat entri host untuk domain Anda (server.itzgeek.local) di file /etc/hosts jika lingkungan Anda tidak memiliki server DNS.
sudo nano /etc/hosts
Entri host akan seperti di bawah ini
192.168.1.10 server.itzgeek.local
Sekarang buka browser web Anda dan ketik domain Anda di alamat web:
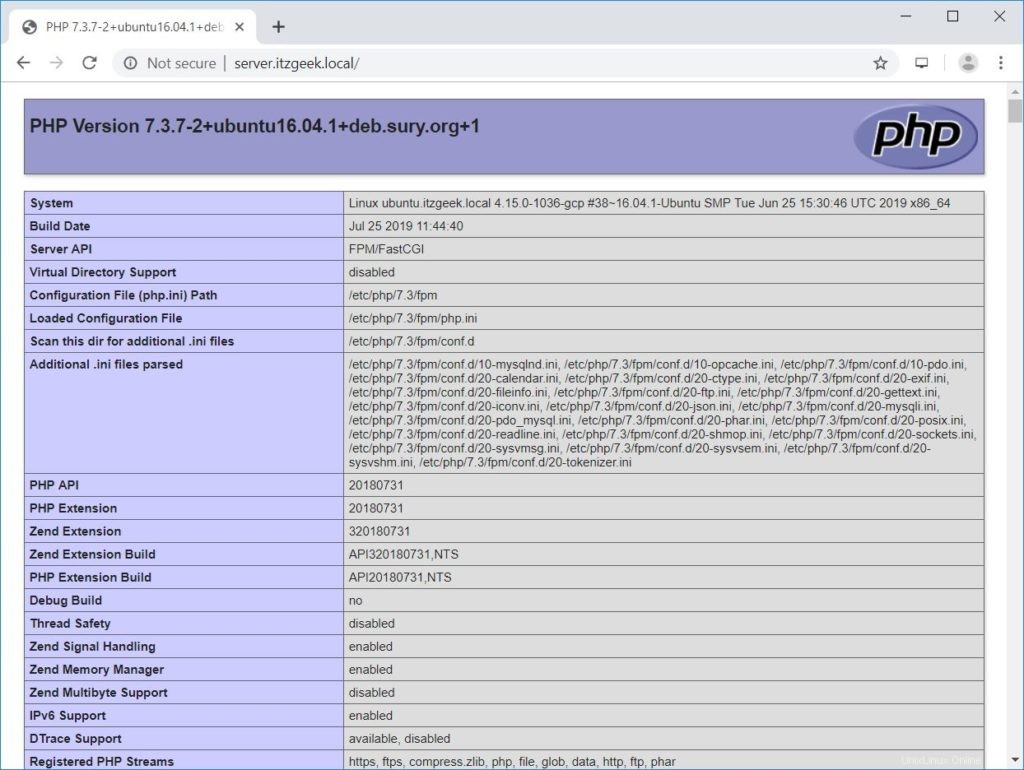
http://server.itzgeek.localHalamannya akan terlihat seperti di bawah ini:
Dari tangkapan layar di atas, PHP berfungsi, dan bekerja melalui FPM/FastCGI, seperti yang ditunjukkan pada baris Server API.

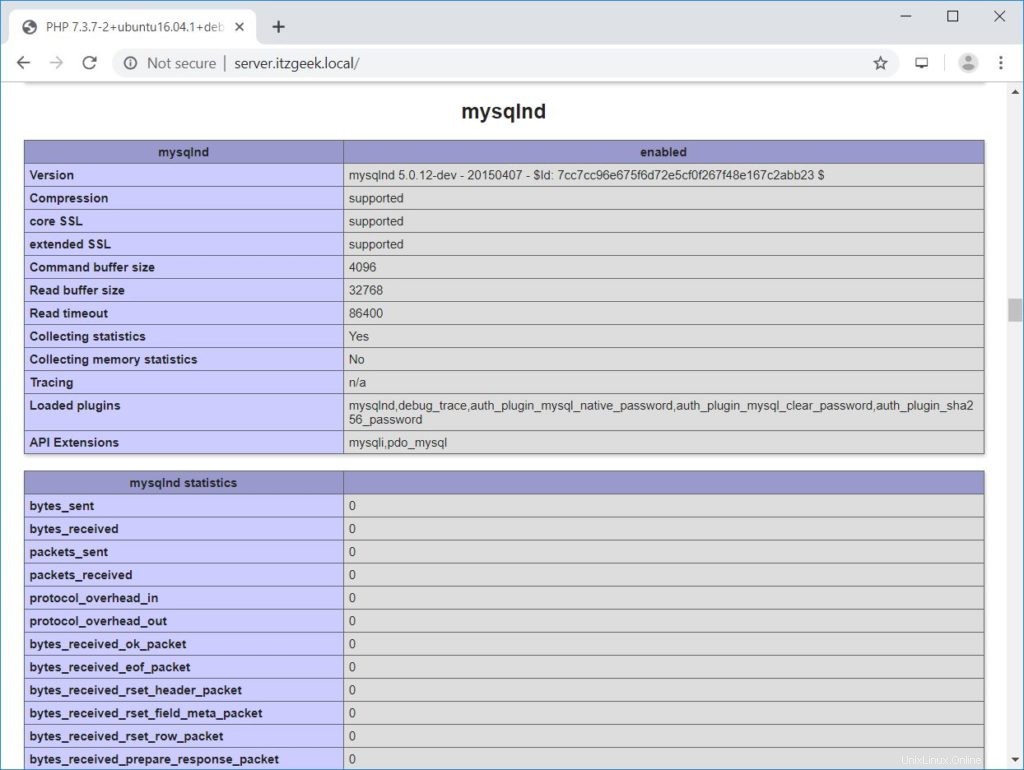
Jika Anda menggulir lebih jauh ke bawah, Anda akan melihat semua modul yang diaktifkan di PHP. Tangkapan layar di bawah ini menunjukkan informasi modul MySQL.

Kesimpulan
Itu saja. Saya harap Anda telah belajar cara Menginstal LEMP Stack di Ubuntu 16.04. Pertimbangkan untuk menyiapkan sertifikat Let's Encrypt untuk domain Anda guna meningkatkan keamanan. Silakan bagikan tanggapan Anda di bagian komentar.