Polr adalah penyingkat URL sumber terbuka dan gratis yang ditulis dalam PHP. Ini menyediakan antarmuka yang sederhana dan ramah pengguna untuk membuat dan mengelola tautan. Anda dapat menghosting penyingkat URL Anda sendiri, memberi merek pada URL Anda, dan mendapatkan kendali atas data Anda. Ini menyediakan banyak fitur termasuk, API yang kuat, penerusan URL, izin penyesuaian, tema, dan banyak lagi.
Dalam posting ini, kami akan menunjukkan cara menginstal Polr dengan Apache dan Let's Encrypt SSL di Ubuntu 20.04.
Prasyarat
- Server yang menjalankan Ubuntu 20.04.
- Nama domain valid yang ditunjukkan dengan IP server Anda.
- Kata sandi root dikonfigurasi di server.
Memulai
Pertama, perbarui paket sistem ke versi yang diperbarui dengan menjalankan perintah berikut:
apt-get update -y
Setelah semua paket diperbarui, Anda dapat melanjutkan ke langkah berikutnya.
Instal Apache, MariaDB, dan PHP
Pertama, Anda perlu menginstal server Apache, database MariaDB, PHP, dan ekstensi PHP lainnya ke server Anda. Anda dapat menginstal semuanya dengan perintah berikut:
apt-get install apache2 mariadb-server php libapache2-mod-php libapache2-mod-wsgi php-gd php-curl php-xml php-xmlrpc php-curl php-imagick php-mbstring php-zip php-intl -y
Setelah semua paket terinstal, Anda dapat melanjutkan ke langkah berikutnya.
Buat Database untuk Polr
Polr menggunakan MariaDB/MySQL sebagai backend database. Jadi, Anda perlu membuat database dan pengguna untuk Polr.
Pertama, login ke MariaDB dengan perintah berikut:
mysql
Setelah login, buat database dan user dengan perintah berikut:
MariaDB [(none)]> CREATE DATABASE polrdb;
MariaDB [(none)]> GRANT ALL ON polrdb.* TO 'polr' IDENTIFIED BY 'password';
Selanjutnya, flush hak istimewa dan keluar dari MariaDB dengan perintah berikut:
MariaDB [(none)]> FLUSH PRIVILEGES;
MariaDB [(none)]> EXIT;
Setelah selesai, Anda dapat melanjutkan ke langkah berikutnya.
Instal Komposer
Selanjutnya, Anda perlu menginstal Composer di server Anda untuk menginstal dependensi PHP yang diperlukan untuk Polr.
Jalankan perintah berikut untuk menginstal Komposer:
curl -sS https://getcomposer.org/installer | php
Anda akan mendapatkan output berikut:
All settings correct for using Composer
Downloading...

Composer (version 2.1.3) successfully installed to: /root/composer.phar
Use it: php composer.phar
Selanjutnya, pindahkan biner Composer ke lokasi sistem menggunakan perintah berikut:
mv composer.phar /usr/local/bin/composer
Selanjutnya, verifikasi versi Composer menggunakan perintah berikut:
composer -V
Anda akan melihat output berikut:
Do not run Composer as root/super user! See https://getcomposer.org/root for details
Continue as root/super user [yes]? yes
Composer version 2.1.3 2021-06-09 16:31:20
Instal Polr
Selanjutnya, Anda perlu mengunduh versi terbaru Polr dari repositori Git. Anda dapat mengunduhnya dengan perintah berikut:
git clone https://github.com/cydrobolt/polr.git --depth=1 /var/www/html/polr
Setelah unduhan selesai, ubah direktori ke Polr dan instal semua dependensi yang diperlukan dengan perintah berikut:
cd /var/www/html/polr
composer install --no-dev -o
Selanjutnya, salin file lingkungan sampel dengan perintah berikut:
cp .env.setup .env
Selanjutnya, atur izin yang tepat ke direktori Polr dengan perintah berikut:
chown -R www-data:www-data /var/www/html/polr
chmod -R 755 /var/www/html/polr
Setelah selesai, Anda dapat melanjutkan ke langkah berikutnya.
Konfigurasi Apache untuk Polr
Selanjutnya, Anda perlu membuat file konfigurasi host virtual Apache untuk Polr. Anda dapat membuatnya dengan perintah berikut:
nano /etc/apache2/sites-available/polr.conf
Tambahkan baris berikut:
<VirtualHost *:80>
ServerAdmin [email protected]
DocumentRoot /var/www/html/polr/public
ServerName polr.example.com
<Directory /var/www/html/polr/public/>
Options FollowSymLinks
AllowOverride All
Order allow,deny
allow from all
</Directory>
ErrorLog /var/log/apache2/polr-error_log
CustomLog /var/log/apache2/polr-access_log common
</VirtualHost>
Simpan dan tutup file kemudian aktifkan file virtual host Apache dan tulis ulang modul dengan perintah berikut:
a2enmod rewrite
a2ensite polr.conf
Selanjutnya, restart layanan Apache untuk menerapkan perubahan:
systemctl restart apache2
Anda sekarang dapat memverifikasi status layanan Apache menggunakan perintah berikut:
systemctl status apache2
Anda akan mendapatkan output berikut:
? apache2.service - The Apache HTTP Server
     Loaded: loaded (/lib/systemd/system/apache2.service; enabled; vendor preset: enabled)
     Active: active (running) since Thu 2021-06-17 12:09:42 UTC; 16s ago
       Docs: https://httpd.apache.org/docs/2.4/
    Process: 27602 ExecStart=/usr/sbin/apachectl start (code=exited, status=0/SUCCESS)
   Main PID: 27617 (apache2)
      Tasks: 6 (limit: 2353)
     Memory: 26.6M
     CGroup: /system.slice/apache2.service
             ??27617 /usr/sbin/apache2 -k start
             ??27618 /usr/sbin/apache2 -k start
             ??27619 /usr/sbin/apache2 -k start
             ??27620 /usr/sbin/apache2 -k start
             ??27621 /usr/sbin/apache2 -k start
             ??27622 /usr/sbin/apache2 -k start

Jun 17 12:09:42 ubuntu2004 systemd[1]: Starting The Apache HTTP Server...
Akses Antarmuka Web Polr
Sekarang Anda dapat mengakses antarmuka web Polr menggunakan URL http://polr.example.com.
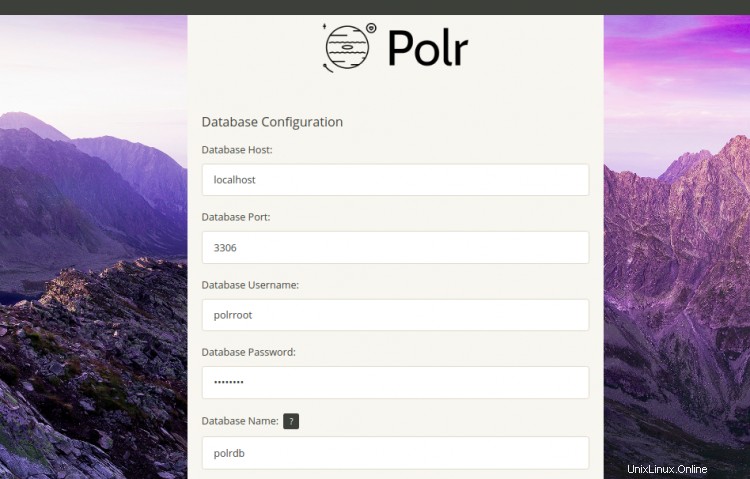
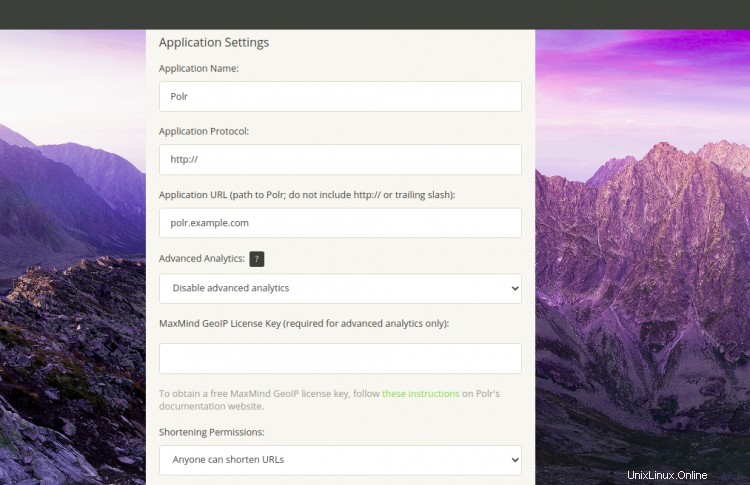
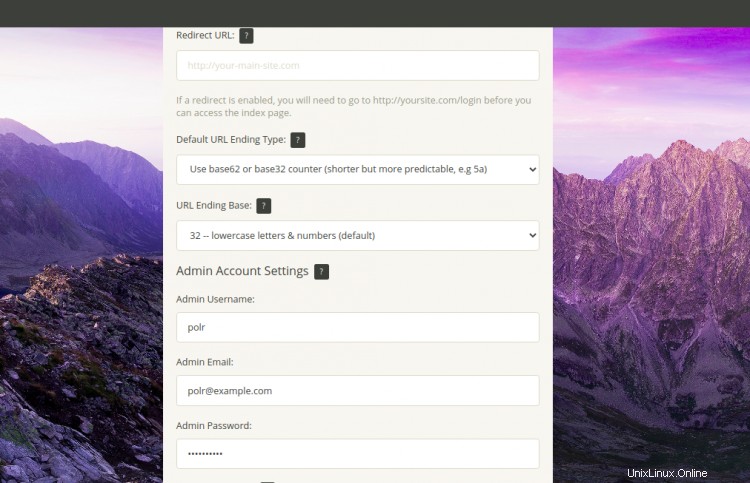
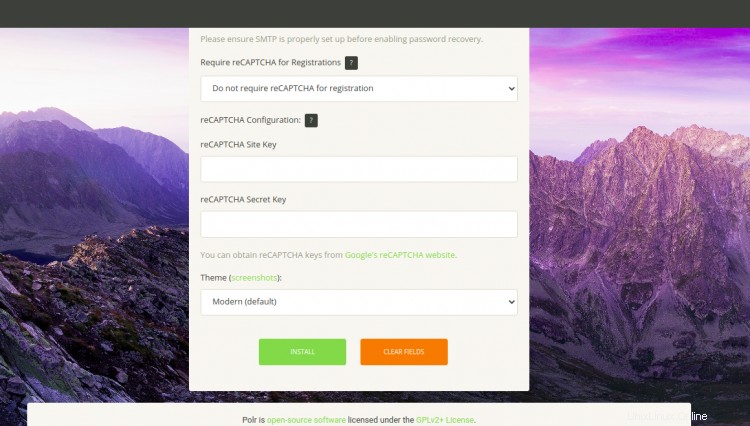
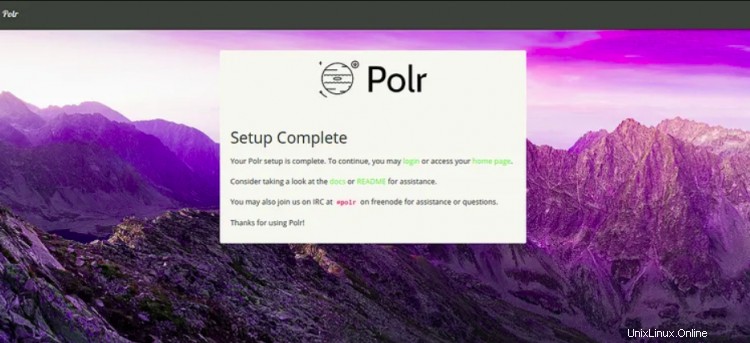
Berikan nama database Anda, nama pengguna, kata sandi, pengaturan aplikasi, URL Polr, nama pengguna admin, email, kata sandi dan klik tombol Instal tombol. Setelah Polr diinstal, Anda akan mendapatkan layar berikut:
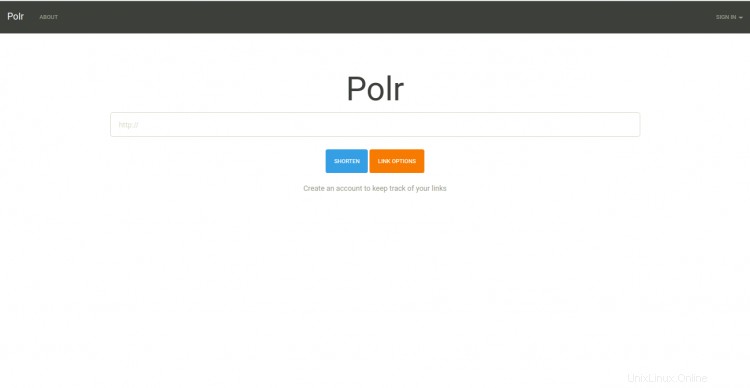
Klik pada halaman rumah. Anda akan melihat dasbor Polr pada layar berikut:
Amankan Polr dengan Let's Encrypt Free SSL
Pertama, Anda perlu menginstal klien Certbot Let's Encrypt untuk mengunduh dan menginstal sertifikat SSL untuk domain Anda.
Anda dapat menginstalnya dengan perintah berikut:
apt-get install python3-certbot-apache -y
Setelah terinstal, Anda dapat menjalankan perintah berikut untuk menginstal Let's Encrypt Certificate untuk domain Anda polr.example.com.
certbot --apache -d polr.example.com
Selama instalasi, Anda akan diminta untuk memberikan alamat email Anda dan menerima persyaratan layanan seperti yang ditunjukkan di bawah ini:
Saving debug log to /var/log/letsencrypt/letsencrypt.log
Plugins selected: Authenticator apache, Installer apache
Enter email address (used for urgent renewal and security notices) (Enter 'c' to
cancel): [email protected]

- - - - - - - - - - - - - - - - - - - - - - - - - - - - - - - - - - - - - - - -
Please read the Terms of Service at
https://letsencrypt.org/documents/LE-SA-v1.2-November-15-2017.pdf. You must
agree in order to register with the ACME server at
https://acme-v02.api.letsencrypt.org/directory
- - - - - - - - - - - - - - - - - - - - - - - - - - - - - - - - - - - - - - - -
(A)gree/(C)ancel: A

- - - - - - - - - - - - - - - - - - - - - - - - - - - - - - - - - - - - - - - -
Would you be willing to share your email address with the Electronic Frontier
Foundation, a founding partner of the Let's Encrypt project and the non-profit
organization that develops Certbot? We'd like to send you email about our work
encrypting the web, EFF news, campaigns, and ways to support digital freedom.

- - - - - - - - - - - - - - - - - - - - - - - - - - - - - - - - - - - - - - - -
(Y)es/(N)o: Y
Obtaining a new certificate
Performing the following challenges:
http-01 challenge for polr.example.com
Enabled Apache rewrite module
Waiting for verification...
Cleaning up challenges
Created an SSL vhost at /etc/apache2/sites-available/polr-le-ssl.conf
Deploying Certificate to VirtualHost /etc/apache2/sites-available/polr-le-ssl.conf
Enabling available site: /etc/apache2/sites-available/polr-le-ssl.conf

Please choose whether or not to redirect HTTP traffic to HTTPS, removing HTTP access.
- - - - - - - - - - - - - - - - - - - - - - - - - - - - - - - - - - - - - - - -
1: No redirect - Make no further changes to the webserver configuration.
2: Redirect - Make all requests redirect to secure HTTPS access. Choose this for
new sites, or if you're confident your site works on HTTPS. You can undo this
change by editing your web server's configuration.
- - - - - - - - - - - - - - - - - - - - - - - - - - - - - - - - - - - - - - - -
Select the appropriate number [1-2] then [enter] (press 'c' to cancel): 2
Selanjutnya, ketik 2 dan tekan Enter untuk mengunduh dan memasang sertifikat SSL gratis untuk domain Anda. Setelah instalasi selesai dengan sukses. Anda akan mendapatkan output berikut:
Enabled Apache rewrite module
Redirecting vhost in /etc/apache2/sites-enabled/polr.conf to ssl vhost in /etc/apache2/sites-available/
polr-le-ssl.conf

- - - - - - - - - - - - - - - - - - - - - - - - - - - - - - - - - - - - - - - -
Congratulations! You have successfully enabled https://polr.example.com

You should test your configuration at:
https://www.ssllabs.com/ssltest/analyze.html?d=polr.example.com
- - - - - - - - - - - - - - - - - - - - - - - - - - - - - - - - - - - - - - - -
Situs web Polr Anda sekarang diamankan dengan Let's Encrypt SSL gratis. Anda dapat mengaksesnya menggunakan URL https://polr.example.com.
Kesimpulan
Dalam panduan di atas, Anda mempelajari cara menginstal Polr dengan Apache dan Let's Encrypt SSL di server Ubuntu 20.04. Anda sekarang dapat meng-host penyingkat tautan Anda sendiri menggunakan Polr. Jangan ragu untuk bertanya kepada saya jika Anda memiliki pertanyaan.