Chef adalah platform otomatisasi yang mengonfigurasi dan mengelola infrastruktur Anda. Ini mengubah infrastruktur menjadi kode. Ini adalah alat manajemen konfigurasi berbasis Ruby. Platform otomatisasi ini terdiri dari stasiun kerja Chef, server Chef, dan klien chef yang merupakan node yang dikelola oleh server Chef. Semua file konfigurasi koki, resep, buku masak, templat, dll dibuat dan diuji di stasiun kerja Chef dan diunggah ke Server Chef, kemudian didistribusikan ke setiap node yang mungkin terdaftar dalam organisasi. Ini adalah kerangka kerja otomatisasi yang ideal untuk Ceph dan OpenStack. Tidak hanya memberi kita kontrol penuh tetapi juga sangat mudah untuk digunakan.
Dalam artikel ini, saya menjelaskan langkah-langkah yang saya ikuti untuk menerapkan lingkungan otomatisasi Chef di server CentOS 7 saya.
Prasyarat
- Disarankan untuk memiliki nama host FQDN
- Chef hanya mendukung arsitektur 64 bit
- Disarankan konfigurasi jaringan/Firewall/host yang tepat
Bagaimana cara kerja Koki?
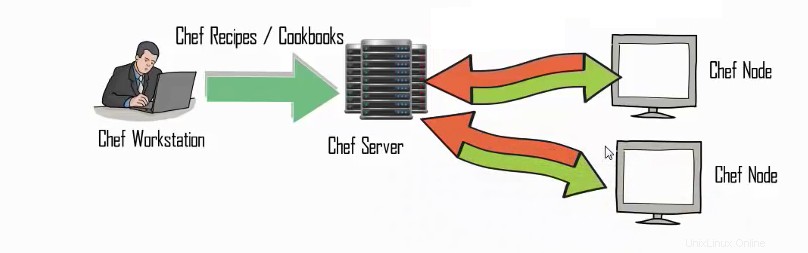
Chef terdiri dari workstation yang dikonfigurasi untuk mengembangkan resep dan buku masak. Itu juga dikonfigurasi untuk menjalankan pisau dan menyinkronkan dengan chef-repo agar tetap mutakhir. Ini membantu dalam mengonfigurasi kebijakan organisasi, termasuk menentukan peran &lingkungan dan memastikan bahwa data penting disimpan dalam kantong data. Setelah resep/buku masak ini diuji di workstation, kami dapat mengunggahnya ke server Chef kami. Server koki menyimpan resep ini dan menetapkan ke node tergantung pada kebutuhan mereka. Pada dasarnya node berkomunikasi hanya dengan server chef dan mengambil instruksi dan resep dari sana.
Dalam pengaturan demo saya, saya memiliki tiga server yaitu
- chefserver.test20.com - Server Chef
- chefwork.test20.com - Stasiun Kerja Koki
- chefnode.test20.com - Chef Node
Mari kita mulai dengan membangun Workstation.
Menyiapkan Stasiun Kerja
Pertama-tama, login ke server kami chefwork, kemudian unduh paket pengembangan Chef. Setelah paket diunduh, kita dapat menginstal paket menggunakan perintah rpm.
root@chefwork ~]# wget https://packages.chef.io/stable/el/7/chefdk-0.14.25-1.el7.x86_64.rpm
--2016-05-20 03:47:31-- https://packages.chef.io/stable/el/7/chefdk-0.14.25-1.el7.x86_64.rpm
Resolving packages.chef.io (packages.chef.io)... 75.126.118.188, 108.168.243.150
Connecting to packages.chef.io (packages.chef.io)|75.126.118.188|:443... connected.
HTTP request sent, awaiting response... 302
Location: https://akamai.bintray.com/87/879656c7736ef2a061937c1f45c623e99fd57aaa2f6d802e9799d333d7e5342f?__gda__=exp=1463716772~hmac=ef9ce287129ab2f035449b76a1adc32b7bf8cae37f018f59da5a642d3e2650fc&response-content-disposition=attachment%3Bfilename%3D%22chefdk-0.14.25-1.el7.x86_64.rpm%22&response-content-type=application%2Foctet-stream [following]
--2016-05-20 03:47:32-- https://akamai.bintray.com/87/879656c7736ef2a061937c1f45c623e99fd57aaa2f6d802e9799d333d7e5342f?__gda__=exp=1463716772~hmac=ef9ce287129ab2f035449b76a1adc32b7bf8cae37f018f59da5a642d3e2650fc&response-content-disposition=attachment%3Bfilename%3D%22chefdk-0.14.25-1.el7.x86_64.rpm%22&response-content-type=application%2Foctet-stream
Resolving akamai.bintray.com (akamai.bintray.com)... 104.123.250.232
Connecting to akamai.bintray.com (akamai.bintray.com)|104.123.250.232|:443... connected.
HTTP request sent, awaiting response... 200 OK
Length: 143927478 (137M) [application/octet-stream]
Saving to: ‘chefdk-0.14.25-1.el7.x86_64.rpm’

100%[====================================================================================================>] 14,39,27,478 2.52MB/s in 55s

2016-05-20 03:48:29 (2.49 MB/s) - ‘chefdk-0.14.25-1.el7.x86_64.rpm’ saved [143927478/143927478]

[root@chefwork ~]# rpm -ivh chefdk-0.14.25-1.el7.x86_64.rpm
warning: chefdk-0.14.25-1.el7.x86_64.rpm: Header V4 DSA/SHA1 Signature, key ID 83ef826a: NOKEY
Preparing... ################################# [100%]
Updating / installing...
1:chefdk-0.14.25-1.el7 ################################# [100%]
Thank you for installing Chef Development Kit!
Apa itu ChefDK?
Chef Development Kit berisi segalanya untuk memulai dengan Chef, bersama dengan alat yang penting untuk pengelolaan kode.
- Berisi alat baris perintah baru, "koki"
- Manajer ketergantungan buku masak Berkshelf
- Kerangka pengujian integrasi Test Kitchen.
- ChefSpec untuk menguji sintaks buku masak
- Foodcritic, alat untuk melakukan analisis kode statis pada buku masak.
- Ini juga memiliki semua alat Chef seperti Chef Client, Knife, Ohai, dan Chef Zero
Mari kita mulai dengan membuat beberapa resep di Workstation dan mengujinya secara lokal untuk memastikannya berfungsi.
Buat folder bernama chef-repo di /root/ dan di dalam folder itu kita bisa membuat resep kita.
[root@chefwork ~]# mkdir chef-repo
[root@chefwork ~]# cd chef-repo

Creating a recipe called hello.rb.
[root@chefwork chef-repo]# vim hello.rb
[root@chefwork chef-repo]#
[root@chefwork chef-repo]# cat hello.rb
file '/etc/motd' do
content 'Welcome to Chef'
end
Resep ini hello.rb membuat file bernama /etc/motd dengan konten "Selamat datang di Koki". Resep ini menggunakan file sumber daya untuk menyempurnakan tugas ini. Sekarang kita dapat menjalankan resep ini untuk memeriksa kerjanya.
[root@chefwork chef-repo]# chef-apply hello.rb
Recipe: (chef-apply cookbook)::(chef-apply recipe)
* file[/etc/motd] action create (up to date)

Confirm the recipe execution:

[root@chefwork chef-repo]# cat /etc/motd
Welcome to Chef
Menghapus file
Kita dapat memodifikasi file resep kita untuk menghapus file yang dibuat dan menjalankannya menggunakan perintah chef-apply seperti di bawah ini:
[root@chefwork chef-repo]# cat hello.rb
file '/etc/motd' do
action :delete
end

[root@chefwork chef-repo]# chef-apply hello.rb
Recipe: (chef-apply cookbook)::(chef-apply recipe)
* file[/etc/motd] action delete
- delete file /etc/motd
Menginstal paket
Kami sedang memodifikasi file resep kami untuk menginstal paket httpd di server kami dan menyalin file index.html ke root dokumen default untuk mengonfirmasi instalasi. Paket dan sumber daya layanan digunakan untuk mengimplementasikan ini. Tindakan default untuk sumber daya paket adalah penginstalan, oleh karena itu kita tidak perlu menentukan tindakan itu secara terpisah.
[root@chefwork chef-conf]# cat hello.rb
package 'httpd'
service 'httpd' do
action [:enable, :start]
end

file '/var/www/html/index.html' do
content 'Welcome to Apache in Chef'
end
[root@chefwork chef-conf]# chef-apply hello.rb
Recipe: (chef-apply cookbook)::(chef-apply recipe)
* yum_package[httpd] action install
 - install version 2.4.6-40.el7.centos.1 of package httpd
 * service[httpd] action enable
 - enable service service[httpd]
 * service[httpd] action start
 - start service service[httpd]
 * file[/var/www/html/index.html] action create (up to date)
Eksekusi perintah dengan jelas menjelaskan setiap contoh dalam resep. Itu menginstal paket Apache, mengaktifkan dan memulai layanan httpd di server. Dan itu membuat file index.html di root dokumen default dengan konten "Selamat datang di Apache di Chef". Jadi kita bisa memverifikasinya dengan menjalankan IP server di browser.

Membuat Buku Masak
Sekarang kita dapat membuat buku masak pertama kita, buat folder bernama chef-repo di bawah direktori /root dan jalankan perintah "chef generate cookbook [nama buku masak]" untuk membuat buku masak kita.
root@chefwork chef-repo]# mkdir cookbooks
[root@chefwork chef-repo]# cd cookbooks/
[root@chefwork cookbooks]# chef generate cookbook httpd_deploy
Installing Cookbook Gems:
Compiling Cookbooks...
Recipe: code_generator::cookbook
* directory[/root/chef-repo/cookbook/httpd_deploy] action create
- create new directory /root/chef-repo/cookbook/httpd_deploy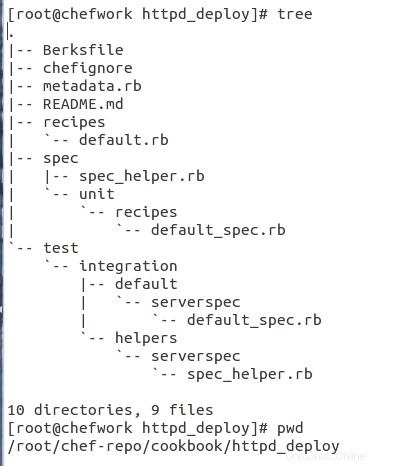
Ini adalah struktur file buku resep yang dibuat, mari kita lihat penggunaan file/folder ini di dalam buku resep satu per satu.
Berksfile :Ini adalah file konfigurasi, yang terutama memberi tahu BerkShelf apa dependensi buku masak, yang dapat ditentukan secara langsung di dalam file ini atau secara tidak langsung melalui metadata.rb. Itu juga memberi tahu Berkshelf di mana ia harus mencari dependensi tersebut.
Chefignore :Ini memberi tahu Chef semua file mana yang harus diabaikan saat mengunggah buku masak ke server Chef.
metadata.rb :Ini berisi informasi meta tentang buku masak Anda, seperti nama, kontak, atau deskripsi. Itu juga dapat menyatakan dependensi buku masak.
BACA.md :Ini berisi titik masuk dokumentasi untuk repo.
Resep :Berisi resep buku masak. Dimulai dengan mengeksekusi file default.rb.
default.rb :Format resep default.
spesifikasi :Ini akan menyimpan kasus uji unit perpustakaan Anda.
uji :Ini akan menyimpan kasus uji unit resep Anda.
Membuat template
Selanjutnya kita akan membuat file template untuk diri kita sendiri. Sebelumnya, kami membuat file dengan beberapa konten, tetapi itu tidak cocok dengan resep dan struktur buku masak kami. jadi mari kita lihat bagaimana kita bisa membuat template.
[root@chefwork cookbook]# chef generate template httpd_deploy index.html
Installing Cookbook Gems:
Compiling Cookbooks...
Recipe: code_generator::template
* directory[./httpd_deploy/templates/default] action create
- create new directory ./httpd_deploy/templates/default
* template[./httpd_deploy/templates/default/index.html.erb] action create
- create new file ./httpd_deploy/templates/default/index.html.erb
- update content in file ./httpd_deploy/templates/default/index.html.erb from none to e3b0c4
(diff output suppressed by config)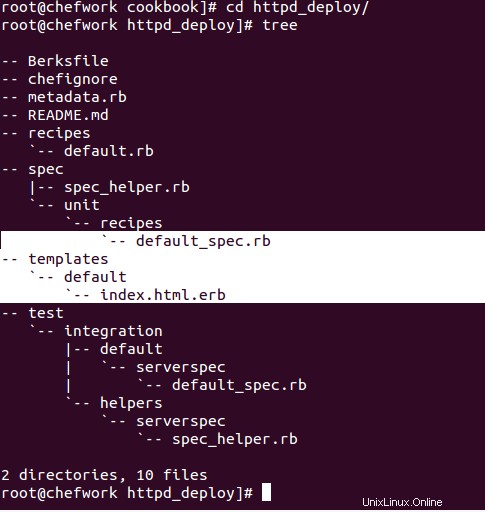
Sekarang jika Anda melihat struktur file buku resep kami, ada folder yang dibuat dengan template nama dengan index.html.erb mengajukan. Kita dapat mengedit file template index.html.erb dan menambahkan resep kita seperti di bawah ini:
root@chefwork default]# cat index.html.erb
Welcome to Chef Apache Deployment
[root@chefwork default]# pwd
/root/chef-repo/cookbook/httpd_deploy/templates/default
Membuat resep dengan template ini
[root@chefwork recipes]# pwd
/root/chef-repo/cookbook/httpd_deploy/recipes
[root@chefwork recipes]# cat default.rb
#
# Cookbook Name:: httpd_deploy
# Recipe:: default
#
# Copyright (c) 2016 The Authors, All Rights Reserved.
package 'httpd'
service 'httpd' do
action [:enable, :start]
end

template '/var/www/html/index.html' do
 source 'index.html.erb'
end
Sekarang kembali ke folder chef-repo kami dan jalankan/uji resep kami di Workstation kami.
[root@chefwork chef-repo]# chef-client --local-mode --runlist 'recipe[httpd_deploy]'
[2016-05-20T05:44:40+00:00] WARN: No config file found or specified on command line, using command line options.
Starting Chef Client, version 12.10.24
resolving cookbooks for run list: ["httpd_deploy"]
Synchronizing Cookbooks:
- httpd_deploy (0.1.0)
Installing Cookbook Gems:
Compiling Cookbooks...
Converging 3 resources
Recipe: httpd_deploy::default
* yum_package[httpd] action install
 - install version 2.4.6-40.el7.centos.1 of package httpd
 * service[httpd] action enable
 - enable service service[httpd]
 * service[httpd] action start
 - start service service[httpd]
* template[/var/www/html/index.html] action create
 - update content in file /var/www/html/index.html from 152204 to 748cbd
 --- /var/www/html/index.html 2016-05-20 04:18:38.553231745 +0000
 +++ /var/www/html/.chef-index.html20160520-20425-1bez4qs 2016-05-20 05:44:47.344848833 +0000
 @@ -1,2 +1,2 @@
 -Welcome to Apache in Chef
 +Welcome to Chef Apache Deployment

Running handlers:
Running handlers complete
Chef Client finished, 4/4 resources updated in 06 seconds

[root@chefwork chef-repo]# cat /var/www/html/index.html
Welcome to Chef Apache Deployment
Menurut resep kami, Apache diinstal pada workstation kami, layanan sedang dimulai dan diaktifkan saat boot. Dan file template telah dibuat di root dokumen default kami.
Sekarang kami telah menguji Workstation kami. Saatnya menyiapkan server Chef.
Menyiapkan Server Koki
Pertama-tama login ke server Chef kami "chefserver.test20.com" dan unduh paket server chef yang dapat digunakan dengan versi OS kami.
[root@chefserver ~]# wget https://packages.chef.io/stable/el/7/chef-server-core-12.6.0-1.el7.x86_64.rpm
--2016-05-20 07:23:46-- https://packages.chef.io/stable/el/7/chef-server-core-12.6.0-1.el7.x86_64.rpm
Resolving packages.chef.io (packages.chef.io)... 75.126.118.188, 108.168.243.150
Connecting to packages.chef.io (packages.chef.io)|75.126.118.188|:443... connected.
HTTP request sent, awaiting response... 302
Location: https://akamai.bintray.com/5a/5a36d0ffa692bf788e90315171582a758d4c5d8033a892dca9a81d3c03c44d14?__gda__=exp=1463729747~hmac=86e28bf2d5197154c84b571330b4c897006c2cb7f14cc9fc386c62d8b6e34c2d&response-content-disposition=attachment%3Bfilename%3D%22chef-server-core-12.6.0-1.el7.x86_64.rpm%22&response-content-type=application%2Foctet-stream [following]
--2016-05-20 07:23:47-- https://akamai.bintray.com/5a/5a36d0ffa692bf788e90315171582a758d4c5d8033a892dca9a81d3c03c44d14?__gda__=exp=1463729747~hmac=86e28bf2d5197154c84b571330b4c897006c2cb7f14cc9fc386c62d8b6e34c2d&response-content-disposition=attachment%3Bfilename%3D%22chef-server-core-12.6.0-1.el7.x86_64.rpm%22&response-content-type=application%2Foctet-stream
Resolving akamai.bintray.com (akamai.bintray.com)... 23.15.249.68
Connecting to akamai.bintray.com (akamai.bintray.com)|23.15.249.68|:443... connected.
HTTP request sent, awaiting response... 200 OK
Length: 481817688 (459M) [application/octet-stream]
Saving to: ‘chef-server-core-12.6.0-1.el7.x86_64.rpm’

100%[====================================================================================================>] 48,18,17,688 2.90MB/s in 3m 53s

[root@chefserver ~]# rpm -ivh chef-server-core-12.6.0-1.el7.x86_64.rpm
warning: chef-server-core-12.6.0-1.el7.x86_64.rpm: Header V4 DSA/SHA1 Signature, key ID 83ef826a: NOKEY
Preparing... ################################# [100%]
Updating / installing...
1:chef-server-core-12.6.0-1.el7 ################################# [100%]
Sekarang server Chef kami sudah terpasang. Tetapi kita perlu mengkonfigurasi ulang server Chef untuk mengaktifkan dan memulai semua layanan yang ada di server Chef. Kita dapat menjalankan perintah ini untuk mengkonfigurasi ulang.
root@chefserver ~]# chef-server-ctl reconfigure
Starting Chef Client, version 12.10.26
resolving cookbooks for run list: ["private-chef::default"]
Synchronizing Cookbooks:
- enterprise (0.10.0)
- apt (2.9.2)
- yum (3.10.0)
- openssl (4.4.0)
- chef-sugar (3.3.0)
- packagecloud (0.0.18)
- runit (1.6.0)
- private-chef (0.1.0)
Installing Cookbook Gems:
Compiling Cookbooks...
[2016-05-19T02:38:37+00:00] WARN: Chef::Provider::AptRepository already exists! Cannot create deprecation class for LWRP provider apt_repository from cookbook apt
Chef Client finished, 394/459 resources updated in 04 minutes 05 seconds
Chef Server Reconfigured!
Harap konfirmasi status layanan dan pidnya dengan menjalankan perintah ini.
[root@chefserver ~]# chef-server-ctl status
run: bookshelf: (pid 6140) 162s; run: log: (pid 6156) 162s
run: nginx: (pid 6051) 165s; run: log: (pid 6295) 156s
run: oc_bifrost: (pid 5987) 167s; run: log: (pid 6022) 167s
run: oc_id: (pid 6038) 165s; run: log: (pid 6042) 165s
run: opscode-erchef: (pid 6226) 159s; run: log: (pid 6214) 161s
run: opscode-expander: (pid 6102) 162s; run: log: (pid 6133) 162s
run: opscode-solr4: (pid 6067) 164s; run: log: (pid 6095) 163s
run: postgresql: (pid 5918) 168s; run: log: (pid 5960) 168s
run: rabbitmq: (pid 5876) 168s; run: log: (pid 5869) 169s
run: redis_lb: (pid 5795) 290s; run: log: (pid 6280) 156s
Hore!! Server Chef kami sudah siap :). Sekarang kita dapat menginstal konsol manajemen untuk mendapatkan antarmuka web untuk mengelola server Chef kita.
Memasang Konsol Manajemen untuk Server Chef
Kita dapat menginstal konsol manajemen hanya dengan menjalankan perintah ini "chef-server-ctl install chef-manag e" dari server koki.
[root@chefserver ~]# chef-server-ctl install chef-manage
Starting Chef Client, version 12.10.26
resolving cookbooks for run list: ["private-chef::add_ons_wrapper"]
Synchronizing Cookbooks:
- enterprise (0.10.0)
- apt (2.9.2)
- yum (3.10.0)
- openssl (4.4.0)
- runit (1.6.0)
- chef-sugar (3.3.0)
- packagecloud (0.0.18)
- private-chef (0.1.0)
Installing Cookbook Gems:
Compiling Cookbooks...
Converging 4 resources
Recipe: private-chef::add_ons_wrapper
* ruby_block[addon_install_notification_chef-manage] action nothing (skipped due to action :nothing)
* remote_file[/var/opt/opscode/local-mode-cache/chef-manage-2.3.0-1.el7.x86_64.rpm] action create
- create new file /var/opt/opscode/local-mode-cache/chef-manage-2.3.0-1.el7.x86_64.rpm
- update content in file /var/opt/opscode/local-mode-cache/chef-manage-2.3.0-1.el7.x86_64.rpm from none to 098cc4
(file sizes exceed 10000000 bytes, diff output suppressed)
* ruby_block[locate_addon_package_chef-manage] action run
- execute the ruby block locate_addon_package_chef-manage
* yum_package[chef-manage] action install
- install version 2.3.0-1.el7 of package chef-manage
* ruby_block[addon_install_notification_chef-manage] action create
- execute the ruby block addon_install_notification_chef-manage

Running handlers:
-- Installed Add-On Package: chef-manage
- #<Class:0x00000006032b80>::AddonInstallHandler
Running handlers complete
Chef Client finished, 4/5 resources updated in 02 minutes 39 seconds
Setelah menginstal konsol manajemen, kita perlu mengkonfigurasi ulang server koki untuk memulai ulang server koki dan layanannya untuk memperbarui perubahan ini.
[root@chefserver ~]# opscode-manage-ctl reconfigure
To use this software, you must agree to the terms of the software license agreement.
Press any key to continue.
Type 'yes' to accept the software license agreement, or anything else to cancel.
yes
Starting Chef Client, version 12.4.1
resolving cookbooks for run list: ["omnibus-chef-manage::default"]
Synchronizing Cookbooks:
- omnibus-chef-manage
- chef-server-ingredient
- enterprise
Recipe: omnibus-chef-manage::default
* private_chef_addon[chef-manage] action create (up to date)
Recipe: omnibus-chef-manage::config
Running handlers:
Running handlers complete
Chef Client finished, 62/79 resources updated in 44.764229437 seconds
chef-manage Reconfigured!

[root@chefserver ~]# chef-server-ctl reconfigure
Sekarang konsol Manajemen kami sudah siap, kami perlu mengatur pengguna admin kami untuk mengelola Server Chef kami.
Membuat pengguna/Organisasi Admin
Saya telah membuat pengguna admin bernama chefadmin dengan linox organisasi di server chef saya untuk mengelolanya. Kita dapat membuat pengguna menggunakan perintah chef chef-server-ctl user-create dan organisasi menggunakan perintah chef-server-ctl org-create.
root@chefserver ~]# chef-server-ctl user-create chefadmin saheetha shameer saheetha@gmail.com 'chef123' --filename /root/.chef/chefadmin.pem
[root@chefserver ~]#

[root@chefserver .chef]# chef-server-ctl org-create linox Chef Linoxide --association_user chefadmin --filename /root/.chef/linoxvalidator.pem
Kunci kami disimpan di dalam folder /root/.chef folder. Kami perlu menyalin kunci ini dari server Chef ke stasiun Kerja untuk memulai komunikasi antara server Chef dan stasiun kerja kami.
Menyalin Kunci
Saya menyalin kunci pengguna dan validator saya dari server Chef ke workstation untuk meningkatkan koneksi antar server.
[root@chefserver .chef]# scp chefadmin.pem root@139.162.35.39:/root/chef-repo/.chef/
The authenticity of host '139.162.35.39 (139.162.35.39)' can't be established.
ECDSA key fingerprint is 5b:0b:07:85:9a:fb:b6:59:51:07:7f:14:1b:07:07:f0.
Are you sure you want to continue connecting (yes/no)? yes
Warning: Permanently added '139.162.35.39' (ECDSA) to the list of known hosts.
root@139.162.35.39's password:
chefadmin.pem 100% 1678 1.6KB/s 00:00
[root@chefserver .chef]#

[root@chefserver .chef]# scp linoxvalidator.pem root@139.162.35.39:/root/chef-repo/.chef/
The authenticity of host '139.162.35.39 (139.162.35.39)' can't be established.
ECDSA key fingerprint is 5b:0b:07:85:9a:fb:b6:59:51:07:7f:14:1b:07:07:f0.
Are you sure you want to continue connecting (yes/no)? yes
Warning: Permanently added '139.162.35.39' (ECDSA) to the list of known hosts.
root@139.162.35.39's password:
linoxvalidator.pem 100% 1678 1.6KB/s 00:00
[root@chefserver .chef]#

Now login to our Management console for our Chef server with the user/password  "chefadmin" created.
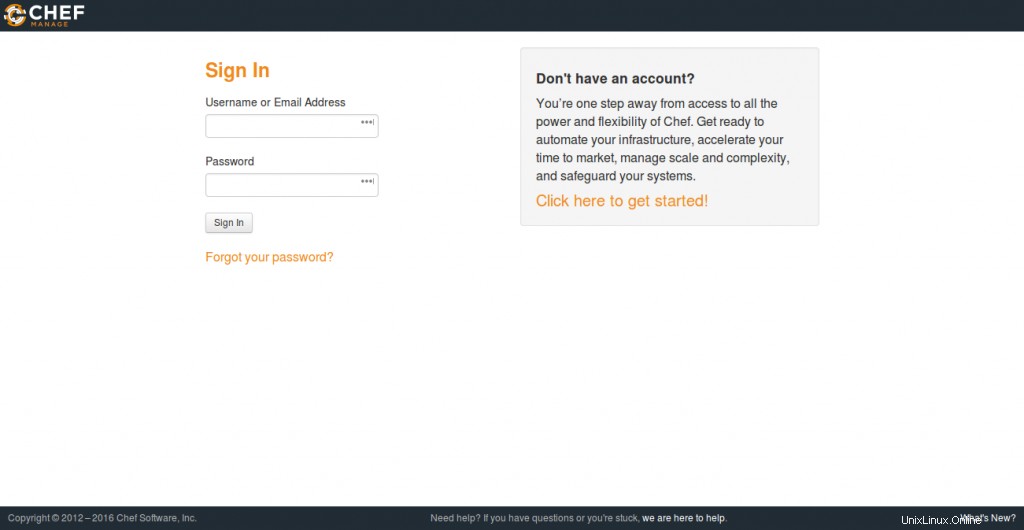
Itu akan meminta untuk membuat organisasi dari Panel saat Mendaftar. Buat saja yang berbeda.
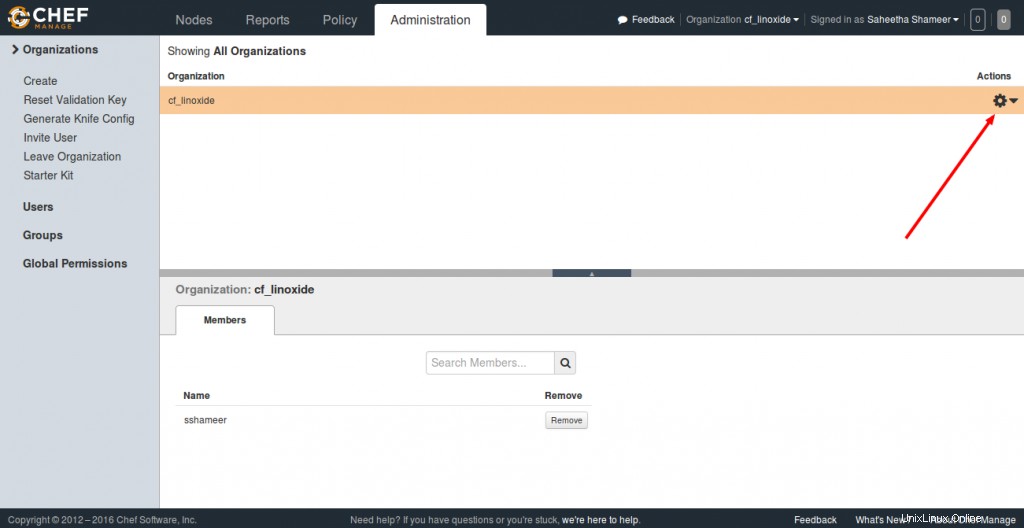
Unduh Starter Kit untuk WorkStation
Pilih salah satu organisasi Anda dan unduh Starter Kit dari Chef Server ke Work Station kami.
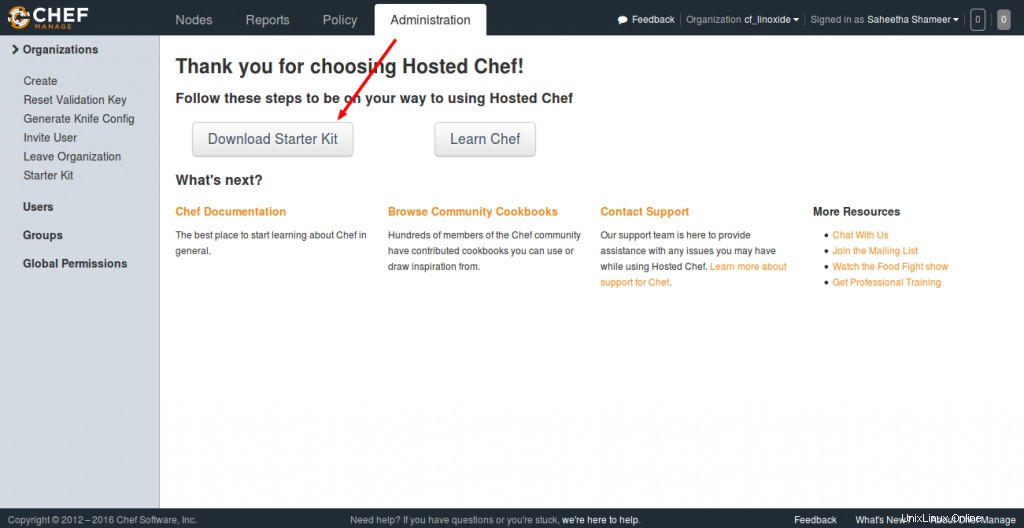
Setelah mengunduh kit ini. Pindahkan folder Workstation / root Anda dan ekstrak. Ini memberi Anda Starter Kit default untuk memulai dengan server Chef Anda. Ini termasuk chef-repo.
root@chefwork ~]# ls
chef-starter.zip hello.rb
[root@chefwork~]# unzip chef-starter.zip
Archive: chef-starter.zip
creating: chef-repo/cookbooks/
creating: chef-repo/cookbooks/starter/
creating: chef-repo/cookbooks/starter/recipes/
inflating: chef-repo/cookbooks/starter/recipes/default.rb
creating: chef-repo/cookbooks/starter/files/
creating: chef-repo/cookbooks/starter/files/default/
inflating: chef-repo/cookbooks/starter/files/default/sample.txt
creating: chef-repo/cookbooks/starter/templates/
creating: chef-repo/cookbooks/starter/templates/default/
inflating: chef-repo/cookbooks/starter/templates/default/sample.erb
inflating: chef-repo/cookbooks/starter/metadata.rb
creating: chef-repo/cookbooks/starter/attributes/
inflating: chef-repo/cookbooks/starter/attributes/default.rb
inflating: chef-repo/cookbooks/chefignore
inflating: chef-repo/README.md
inflating: chef-repo/.gitignore
creating: chef-repo/.chef/
creating: chef-repo/roles/
inflating: chef-repo/.chef/knife.rb
inflating: chef-repo/roles/starter.rb
inflating: chef-repo/.chef/chefadmin.pem
inflating: chef-repo/.chef/ln_blog-validator.pem
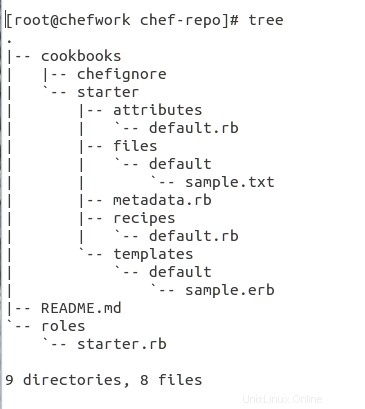
Ini adalah struktur file untuk repositori Chef yang diunduh. Ini berisi semua struktur file yang diperlukan untuk memulai.
SuperMarket Buku Masak
Buku masak Chef tersedia di Cookbook Super Market, kita bisa ke Chef SuperMarket disini. Unduh buku masak yang diperlukan dari sana. Saya mengunduh salah satu buku masak untuk menginstal Apache dari sana.
root@chefwork chef-repo]# knife cookbook site download learn_chef_httpd
Downloading learn_chef_httpd from Supermarket at version 0.2.0 to /root/chef-repo/learn_chef_httpd-0.2.0.tar.gz
Cookbook saved: /root/chef-repo/learn_chef_httpd-0.2.0.tar.gz

Extract this cookbook inside the "cookbooks" folder.

[root@chefwork chef-repo]# tar -xvf learn_chef_httpd-0.2.0.tar.gz

Semua file yang diperlukan secara otomatis dibuat di bawah buku masak ini. Kami tidak perlu melakukan modifikasi apa pun. Mari kita periksa deskripsi resep kami di dalam folder resep kami.
[root@chefwork recipes]# cat default.rb
#
# Cookbook Name:: learn_chef_httpd
# Recipe:: default
#
# Copyright (C) 2014
#
#
#
package 'httpd'

service 'httpd' do
 action [:enable, :start]
end

template '/var/www/html/index.html' do
 source 'index.html.erb'
end

service 'iptables' do
 action :stop
end
[root@chefwork recipes]#
[root@chefwork recipes]# pwd
/root/chef-repo/cookbooks/learn_chef_httpd/recipes
[root@chefwork recipes]#
Jadi kami hanya perlu mengunggah buku masak ini ke server Chef kami karena terlihat sempurna.
Memvalidasi Koneksi b/w Server dan Workstation
Sebelum mengupload buku masak, kita perlu memeriksa dan mengkonfirmasi koneksi antara server Chef kita dan Workstation. Pertama-tama, pastikan Anda memiliki file konfigurasi Knife yang tepat.
[root@chefwork .chef]# cat knife.rb
current_dir = File.dirname(__FILE__)
log_level :info
log_location STDOUT
node_name "chefadmin"
client_key "#{current_dir}/chefadmin.pem"
validation_client_name "linox-validator"
validation_key "#{current_dir}/linox-validator.pem"
chef_server_url "https://chefserver.test20.com:443/organizations/linox"

cookbook_path ["#{current_dir}/../cookbooks"]
File konfigurasi ini berada di /root/chef-repo/.chef map. Porsi yang disorot adalah hal utama yang harus diperhatikan. Sekarang Anda dapat menjalankan perintah ini untuk memeriksa koneksi.
root@chefwork .chef]# knife client list
ERROR: SSL Validation failure connecting to host: chefserver.test20.com - SSL_connect returned=1 errno=0 state=error: certificate verify failed
ERROR: Could not establish a secure connection to the server.
Use `knife ssl check` to troubleshoot your SSL configuration.
If your Chef Server uses a self-signed certificate, you can use
`knife ssl fetch` to make knife trust the server's certificates.

Original Exception: OpenSSL::SSL::SSLError: SSL Error connecting to https://chefserver.test20.com/clients - SSL_connect returned=1 errno=0 state=error: certificate verify failed
Anda dapat melihat pelaporan kesalahan SSL. Untuk memperbaiki kesalahan ini, kita perlu mengambil sertifikat SSL untuk Server Chef kita dan menyimpannya di dalam folder /root/.chef/trusted_certs. Kita dapat melakukannya dengan menjalankan perintah ini.
root@chefwork .chef]# knife ssl fetch
WARNING: Certificates from chefserver.test20.com will be fetched and placed in your trusted_cert
directory (/root/chef-repo/.chef/trusted_certs).

Knife has no means to verify these are the correct certificates. You should
verify the authenticity of these certificates after downloading.

Adding certificate for chefserver.test20.com in /root/chef-repo/.chef/trusted_certs/chefserver_test20_com.crt

Verifying the SSL:

[root@chefwork .chef]# knife ssl check
Connecting to host chefserver.test20.com:443
Successfully verified certificates from `chefserver.test20.com'

[root@chefwork .chef]# knife client list
chefnode
linox-validator
[root@chefwork .chef]# knife user list
chefadmin
Mengunggah Buku Masak
Kami dapat mengunggah buku masak kami ke server koki kami dari stasiun kerja menggunakan perintah pisau seperti di bawah ini:
Unggah #knife buku masak learn_chef_httpd
[root@chefwork cookbooks]# knife cookbook upload learn_chef_httpd
Uploading learn_chef_httpd [0.2.0]
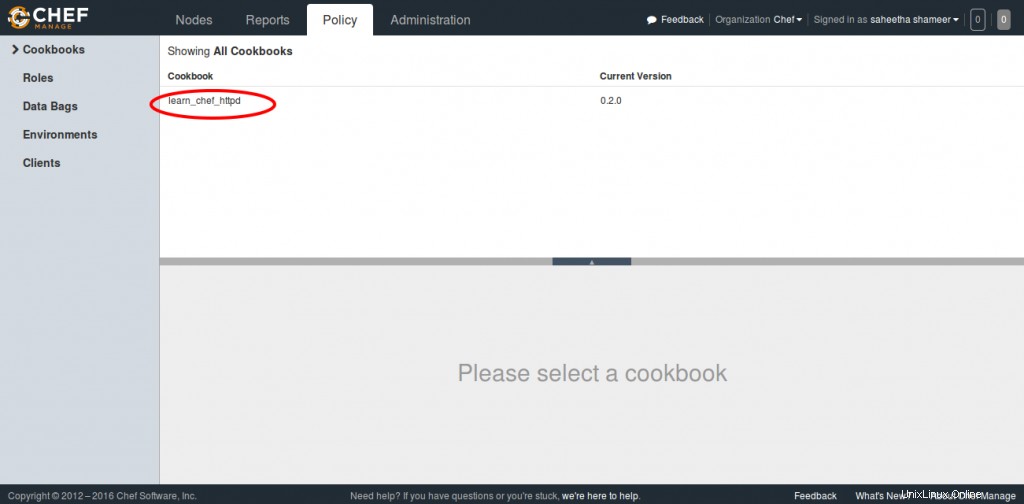
Uploaded 1 cookbook.Verifikasi buku masak dari konsol Manajemen Server Chef.
Menambahkan Node
Ini adalah langkah terakhir dalam implementasi Chef. Kami telah menyiapkan workstation, server Chef dan kemudian sekarang kami perlu menambahkan klien kami ke server Chef untuk otomatisasi. Saya menambahkan chefnode my ke server menggunakan perintah bootstrap pisau seperti di bawah ini:
[root@chefwork cookbooks]# knife bootstrap 45.33.76.60 --ssh-user root --ssh-password dkfue@321 --node-name chefnode
Creating new client for chefnode
Creating new node for chefnode
Connecting to 45.33.76.60
45.33.76.60 -----> Installing Chef Omnibus (-v 12)
45.33.76.60 downloading https://omnitruck-direct.chef.io/chef/install.sh
45.33.76.60 to file /tmp/install.sh.5457/install.sh
45.33.76.60 trying wget...
45.33.76.60 el 7 x86_64
45.33.76.60 Getting information for chef stable 12 for el...
45.33.76.60 downloading https://omnitruck-direct.chef.io/stable/chef/metadata?v=12&p=el&pv=7&m=x86_64
45.33.76.60 to file /tmp/install.sh.5466/metadata.txt
45.33.76.60 trying wget...
45.33.76.60 sha1 4def83368a1349959fdaf0633c4d288d5ae229ce
45.33.76.60 sha256 6f00c7bdf96a3fb09494e51cd44f4c2e5696accd356fc6dc1175d49ad06fa39f
45.33.76.60 url https://packages.chef.io/stable/el/7/chef-12.10.24-1.el7.x86_64.rpm
45.33.76.60 version 12.10.24
45.33.76.60 downloaded metadata file looks valid...
45.33.76.60 downloading https://packages.chef.io/stable/el/7/chef-12.10.24-1.el7.x86_64.rpm
45.33.76.60 to file /tmp/install.sh.5466/chef-12.10.24-1.el7.x86_64.rpm
45.33.76.60 trying wget...
45.33.76.60 Comparing checksum with sha256sum...
45.33.76.60 Installing chef 12
45.33.76.60 installing with rpm...
45.33.76.60 warning: /tmp/install.sh.5466/chef-12.10.24-1.el7.x86_64.rpm: Header V4 DSA/SHA1 Signature, key ID 83ef826a: NOKEY
45.33.76.60 Preparing... ################################# [100%]
45.33.76.60 Updating / installing...
45.33.76.60 1:chef-12.10.24-1.el7 ################################# [100%]
45.33.76.60 Thank you for installing Chef!
45.33.76.60 Starting the first Chef Client run...
45.33.76.60 Starting Chef Client, version 12.10.24
45.33.76.60 resolving cookbooks for run list: []
45.33.76.60 Synchronizing Cookbooks:
45.33.76.60 Installing Cookbook Gems:
45.33.76.60 Compiling Cookbooks...
45.33.76.60 [2016-05-20T15:36:41+00:00] WARN: Node chefnode has an empty run list.
45.33.76.60 Converging 0 resources
45.33.76.60
45.33.76.60 Running handlers:
45.33.76.60 Running handlers complete
45.33.76.60 Chef Client finished, 0/0 resources updated in 08 seconds
[root@chefwork chef-repo]#
Perintah ini juga akan menginisialisasi instalasi Chef-client di node Chef. Anda dapat memverifikasinya dari CLI di workstation menggunakan perintah pisau di bawah ini:
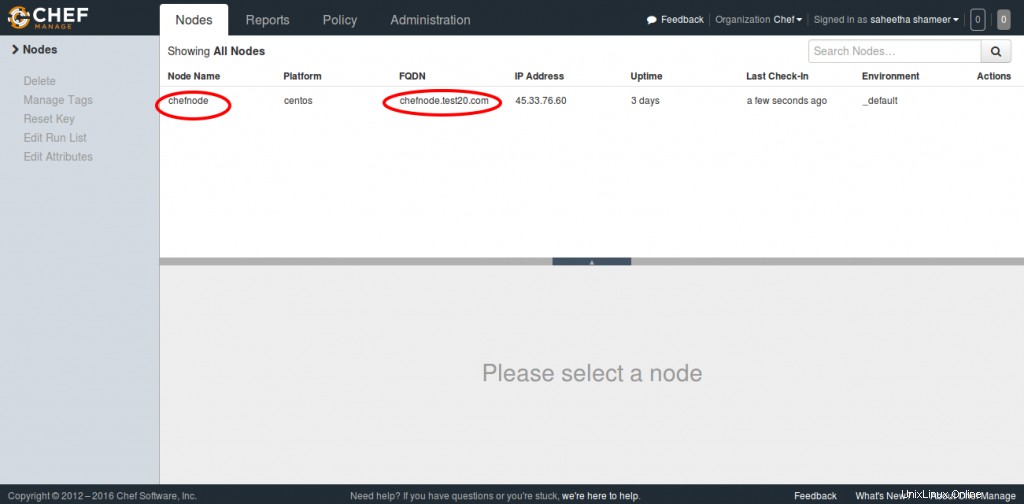
[root@chefwork chef-repo]# knife node list
chefnode

[root@chefwork chef-repo]# knife node show chefnode
Node Name: chefnode
Environment: _default
FQDN: chefnode.test20.com
IP: 45.33.76.60
Run List: recipe[learn_chef_httpd]
Roles:
Recipes:
Platform: centos 7.2.1511
Tags:
Verifying it from the Management console.
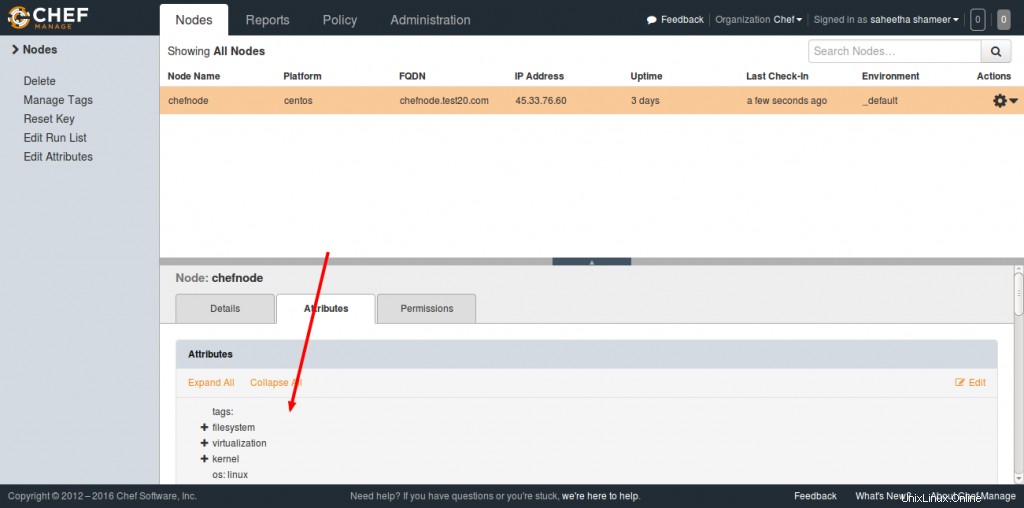
We can get more information regarding the added node by selecting the node and viewing the Attributes section.
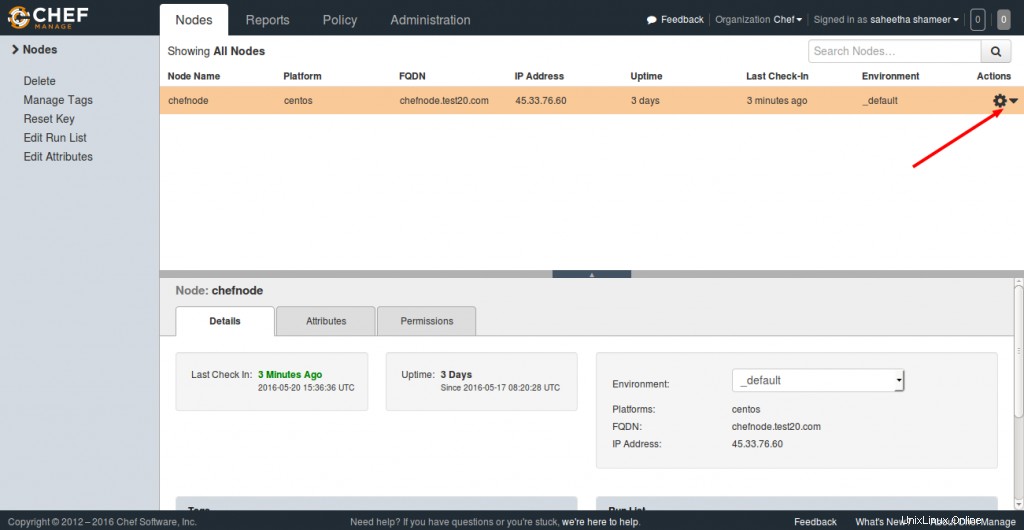
Managing Node Run List
Let's see how we can add a cookbook to the node and manage its runlist from the Chef server. As you see in the screenshot, you can click the Actions tab and select the Edit Runlist option to manage the runlist.
In the Available Recipes, you can see our learn_chef_httpd recipe, you can drag that from the available packages to the current run list and save the runlist.
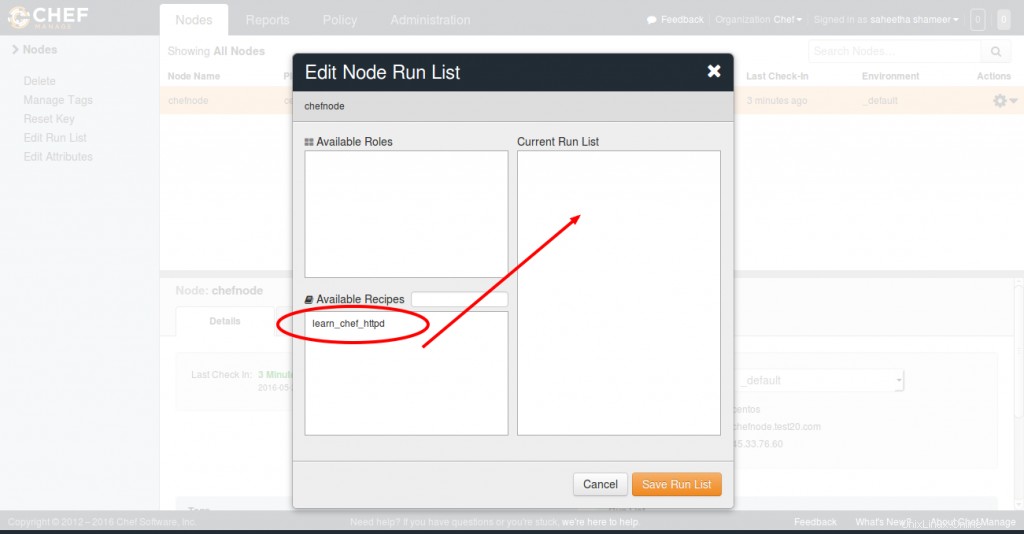
Now login to your node and just run the command chef-client to execute your runlist.
root@chefnode ~]# chef-client
Starting Chef Client, version 12.10.24
resolving cookbooks for run list: ["learn_chef_httpd"]
Synchronizing Cookbooks:
- learn_chef_httpd (0.2.0)
Installing Cookbook Gems:
Compiling Cookbooks...
Converging 4 resources
Recipe: learn_chef_httpd::default
* yum_package[httpd] action install
Similarly, we can add any number of nodes to your Chef Server depending on its configuration and hardware. I hope this article provided you with the basic understanding of Chef implementation. I would recommend your valuable comments and suggestions on this. Thank you for reading this :)
Happy Automation with Chef!!