Dalam tutorial sebelumnya, saya menunjukkan cara menerapkan Ansible AWX melalui buruh pelabuhan. Sementara itu, saya telah menemukan dua proyek yang membuat paket rpm untuk AWX. Jadi dalam tutorial ini, saya akan menunjukkan cara menginstal Ansible AWX dari file RPM di CentOS 7. Ansible AWX adalah versi OpenSource dari software Ansible Tower.
Saya akan menggunakan 3 server dengan penginstalan minimal CentOS 7 dan SELinux dalam mode permisif.
- Server AWX 192.168.1.25
- 192.168.1.21 klien1
- 192.168.1.22 klien2
Persyaratan Sistem Minimum untuk Server AWX
- Memori minimal 4GB
- Setidaknya 2 inti cpu
- Minimal 20 GB ruang
- Menjalankan Docker, Openshift, atau Kubernetes
Periksa konfigurasi SELinux.
[[email protected] ~]# sestatus
SELinux status:                 enabled
SELinuxfs mount:                /sys/fs/selinux
SELinux root directory:         /etc/selinux
Loaded policy name:             targeted
Current mode:                   permissive
Mode from config file:          permissive
Policy MLS status:              enabled
Policy deny_unknown status:     allowed
Max kernel policy version:      28
[[email protected] ~]#
Tambahkan entri host di
/etc/hosts
[[email protected] ~]# cat /etc/hosts
192.168.1.25    awx.sunil.cc awx
192.168.1.21    client1.sunil.cc client1
192.168.1.22    client2.sunil.cc client2
[[email protected] ~]#
Tambahkan aturan firewall
[[email protected] ~]# systemctl enable firewalld
Created symlink from /etc/systemd/system/dbus-org.fedoraproject.FirewallD1.service to /usr/lib/systemd/system/firewalld.service.
Created symlink from /etc/systemd/system/multi-user.target.wants/firewalld.service to /usr/lib/systemd/system/firewalld.service.
[[email protected] ~]# systemctl start firewalld
[[email protected] ~]# firewall-cmd --add-service=http --permanent;firewall-cmd --add-service=https --permanent
success
success
[[email protected] ~]# systemctl restart firewalld
[[email protected] ~]#
Aktifkan repositori CentOS EPEL.
[[email protected] ~]# yum install -y epel-release
Kami membutuhkan postgresql 9.6 untuk instalasi AWX.
Aktifkan repo postgreSQL.
[[email protected] ~]# yum install -y https://download.postgresql.org/pub/repos/yum/9.6/redhat/rhel-7-x86_64/pgdg-centos96-9.6-3.noarch.rpm
Menginstal postgreSQL.
[[email protected] ~]# yum install postgresql96-server -y
Menginstal rpm lain yang diperlukan.
[[email protected] ~]# yum install -y rabbitmq-server wget memcached nginx ansible
Menginstal AWX yang Mungkin
Menambahkan repo AWX.
[[email protected] ~]# wget -O /etc/yum.repos.d/awx-rpm.repo https://copr.fedorainfracloud.org/coprs/mrmeee/awx/repo/epel-7/mrmeee-awx-epel-7.repo
Memasang rpm
[[email protected] ~]# yum install -y awx
Menginisialisasi database
[[email protected] ~]# /usr/pgsql-9.6/bin/postgresql96-setup initdb
Initializing database ... OK

[[email protected] ~]#
Memulai Layanan Rabbitmq
[[email protected] ~]# systemctl start rabbitmq-server
[[email protected] ~]# systemctl enable rabbitmq-server
Created symlink from /etc/systemd/system/multi-user.target.wants/rabbitmq-server.service to /usr/lib/systemd/system/rabbitmq-server.service.
[[email protected] ~]#
Memulai Layanan PostgreSQL
[[email protected] ~]# systemctl enable postgresql-9.6
Created symlink from /etc/systemd/system/multi-user.target.wants/postgresql-9.6.service to /usr/lib/systemd/system/postgresql-9.6.service.
[[email protected] ~]# systemctl start postgresql-9.6
Memulai Layanan Memcached
[[email protected] ~]# systemctl enable memcached
Created symlink from /etc/systemd/system/multi-user.target.wants/memcached.service to /usr/lib/systemd/system/memcached.service.
[[email protected] ~]# systemctl start memcached
Membuat pengguna Postgres
[[email protected] ~]# sudo -u postgres createuser -S awx
could not change directory to "/root": Permission denied
[[email protected] ~]#
abaikan kesalahan
Membuat database
[[email protected] ~]# sudo -u postgres createdb -O awx awx
could not change directory to "/root": Permission denied
[[email protected] ~]#
abaikan kesalahan
Mengimpor data ke dalam Basis Data
[[email protected] ~]# sudo -u awx /opt/awx/bin/awx-manage migrate
Menginisialisasi konfigurasi untuk AWX
[[email protected] ~]# echo "from django.contrib.auth.models import User; User.objects.create_superuser('admin', '[email protected]', 'password')" | sudo -u awx /opt/awx/bin/awx-manage shell
[[email protected] ~]# sudo -u awx /opt/awx/bin/awx-manage create_preload_data
Default organization added.
Demo Credential, Inventory, and Job Template added.
[[email protected] ~]# sudo -u awx /opt/awx/bin/awx-manage provision_instance --hostname=$(hostname)
Successfully registered instance awx.sunil.cc
(changed: True)
[[email protected] ~]# sudo -u awx /opt/awx/bin/awx-manage register_queue --queuename=tower --hostnames=$(hostname)
Creating instance group tower
Added instance awx.sunil.cc to tower
(changed: True)
[[email protected] ~]#
Konfigurasi Nginx
Ambil cadangan nginx.conf
[[email protected] ~]# cd /etc/nginx/
[[email protected] nginx]# pwd
/etc/nginx
[[email protected] nginx]# cp nginx.conf nginx.conf.bkp
Ganti file conf nginx
[[email protected] nginx]# wget -O /etc/nginx/nginx.conf https://raw.githubusercontent.com/sunilsankar/awx-build/master/nginx.conf
Aktifkan dan mulai layanan nginx
[[email protected] ~]# systemctl start nginx
[[email protected] ~]# systemctl enable nginx
Mulai layanan awx
[[email protected] ~]# systemctl start awx-cbreceiver
[[email protected] ~]# systemctl start awx-celery-beat
[[email protected] ~]# systemctl start awx-celery-worker
[[email protected] ~]# systemctl start awx-channels-worker
[[email protected] ~]# systemctl start awx-daphne
[[email protected] ~]# systemctl start awx-web
Pastikan layanan dimulai saat restart
[[email protected] ~]# systemctl enable awx-cbreceiver
Created symlink from /etc/systemd/system/multi-user.target.wants/awx-cbreceiver.service to /usr/lib/systemd/system/awx-cbreceiver.service.
[[email protected] ~]# systemctl enable awx-celery-beat
Created symlink from /etc/systemd/system/multi-user.target.wants/awx-celery-beat.service to /usr/lib/systemd/system/awx-celery-beat.service.
[[email protected] ~]# systemctl enable awx-celery-worker
Created symlink from /etc/systemd/system/multi-user.target.wants/awx-celery-worker.service to /usr/lib/systemd/system/awx-celery-worker.service.
[[email protected] ~]# systemctl enable awx-channels-worker
Created symlink from /etc/systemd/system/multi-user.target.wants/awx-channels-worker.service to /usr/lib/systemd/system/awx-channels-worker.service.
[[email protected] ~]# systemctl enable awx-daphne
Created symlink from /etc/systemd/system/multi-user.target.wants/awx-daphne.service to /usr/lib/systemd/system/awx-daphne.service.
[[email protected] ~]# systemctl enable awx-web
Created symlink from /etc/systemd/system/multi-user.target.wants/awx-web.service to /usr/lib/systemd/system/awx-web.service.
[[email protected] ~]#
Konfigurasikan login tanpa kata sandi dari server AWX
Buat pengguna di semua 3 host.
Di sini, di tutorial ini, saya membuat pengguna mungkin di semua 3 server.
[[email protected] ~]# useradd ansible
[[email protected] ~]# useradd ansible
[[email protected] ~]# useradd ansible
Membuat kunci ssh di server awx
[[email protected] nginx]# su - ansible
[[email protected] ~]$ ssh-keygen
Generating public/private rsa key pair.
Enter file in which to save the key (/home/ansible/.ssh/id_rsa):
Created directory '/home/ansible/.ssh'.
Enter passphrase (empty for no passphrase):
Enter same passphrase again:
Your identification has been saved in /home/ansible/.ssh/id_rsa.
Your public key has been saved in /home/ansible/.ssh/id_rsa.pub.
The key fingerprint is:
SHA256:RW/dhTsxcyGicleRI0LpLm+LyhAVinm0xktapodc8gY [email protected]
The key's randomart image is:
+---[RSA 2048]----+
|   . .  ..o. +ooo|
|  = o .  +.oo+*.o|
| E @ . ..oo.+ o*.|
|. # o   oo..  o  |
| = *    S      . |
|  o .  . .       |
|   .    o        |
|    o   .o       |
|     o.....      |
+----[SHA256]-----+
[[email protected] ~]$
Menambahkan entri sudoers di ketiga server sebagai entri terakhir ke file
[[email protected] nginx]# visudo
ansible ALL=(ALL) NOPASSWD: ALL
Salin konten id_rsa.pub ke otor_keys di semua 3 server
[[email protected] .ssh]$ cat id_rsa.pub
ssh-rsa AAAAB3NzaC1yc2EAAAADAQABAAABAQDStB8JGsVsSLppwYWdnEPLE4xwFqRDn7xE/d3hjBQ6A0JGm1t+GtHB3GPIEjANFTnxQwHpR+cRttbL3mlQvpIYqCZOMZds9XA7VI5qgs0aSGUU8cNYKjmmrMpJa9sB4WVtj3M4u2fEXt9FKKCtjMMpOfiQxIkEhYZ+2GoAX5sHXan7TPcgwb5r7WW6j43aaPc6g9XWN63nonQz6KeMSFZ/y0o2HJMh1FEkktZw6A1HVfn+JNWoQb1glyqGjO1ync+Sok8yXpqakEEWpXNQSQYs4eBEwfkKql5EuolQMIbF9VYhpEcR9LfbMvYdq/RPKWN3mmRMWfPZ2dTZl515XBdV [email protected]
[[email protected] .ssh]$
[[email protected] .ssh]$ cat authorized_keys
ssh-rsa AAAAB3NzaC1yc2EAAAADAQABAAABAQDStB8JGsVsSLppwYWdnEPLE4xwFqRDn7xE/d3hjBQ6A0JGm1t+GtHB3GPIEjANFTnxQwHpR+cRttbL3mlQvpIYqCZOMZds9XA7VI5qgs0aSGUU8cNYKjmmrMpJa9sB4WVtj3M4u2fEXt9FKKCtjMMpOfiQxIkEhYZ+2GoAX5sHXan7TPcgwb5r7WW6j43aaPc6g9XWN63nonQz6KeMSFZ/y0o2HJMh1FEkktZw6A1HVfn+JNWoQb1glyqGjO1ync+Sok8yXpqakEEWpXNQSQYs4eBEwfkKql5EuolQMIbF9VYhpEcR9LfbMvYdq/RPKWN3mmRMWfPZ2dTZl515XBdV [email protected]
[[email protected] .ssh]$ chmod 600 authorized_keys
Klien1
[[email protected] ~]# su - ansible
[[email protected] ~]$ mkdir .ssh
[[email protected] ~]$ chmod 700 .ssh
[[email protected] ~]$ cat .ssh/authorized_keys
ssh-rsa AAAAB3NzaC1yc2EAAAADAQABAAABAQDStB8JGsVsSLppwYWdnEPLE4xwFqRDn7xE/d3hjBQ6A0JGm1t+GtHB3GPIEjANFTnxQwHpR+cRttbL3mlQvpIYqCZOMZds9XA7VI5qgs0aSGUU8cNYKjmmrMpJa9sB4WVtj3M4u2fEXt9FKKCtjMMpOfiQxIkEhYZ+2GoAX5sHXan7TPcgwb5r7WW6j43aaPc6g9XWN63nonQz6KeMSFZ/y0o2HJMh1FEkktZw6A1HVfn+JNWoQb1glyqGjO1ync+Sok8yXpqakEEWpXNQSQYs4eBEwfkKql5EuolQMIbF9VYhpEcR9LfbMvYdq/RPKWN3mmRMWfPZ2dTZl515XBdV [email protected]
[[email protected] ~]$ chmod 600 .ssh/authorized_keys
Klien2
[[email protected] ~]# su - ansible
[[email protected] ~]$ mkdir .ssh
[[email protected] ~]$ chmod 700 .ssh
[[email protected] ~]$ cat .ssh/authorized_keys
ssh-rsa AAAAB3NzaC1yc2EAAAADAQABAAABAQDStB8JGsVsSLppwYWdnEPLE4xwFqRDn7xE/d3hjBQ6A0JGm1t+GtHB3GPIEjANFTnxQwHpR+cRttbL3mlQvpIYqCZOMZds9XA7VI5qgs0aSGUU8cNYKjmmrMpJa9sB4WVtj3M4u2fEXt9FKKCtjMMpOfiQxIkEhYZ+2GoAX5sHXan7TPcgwb5r7WW6j43aaPc6g9XWN63nonQz6KeMSFZ/y0o2HJMh1FEkktZw6A1HVfn+JNWoQb1glyqGjO1ync+Sok8yXpqakEEWpXNQSQYs4eBEwfkKql5EuolQMIbF9VYhpEcR9LfbMvYdq/RPKWN3mmRMWfPZ2dTZl515XBdV [email protected]
[[email protected] ~]$ chmod 600 .ssh/authorized_keys
Periksa login tanpa sandi dari server AWX.
[[email protected] ~]$ ssh client1
Last login: Sun Mar 11 13:14:06 2018 from 192.168.1.25
[[email protected] ~]$ exit
logout
Connection to client1 closed.
[[email protected] ~]$ ssh client2
Last login: Sun Mar 11 12:50:14 2018 from 192.168.1.25
[[email protected] ~]$
Validasi Login:
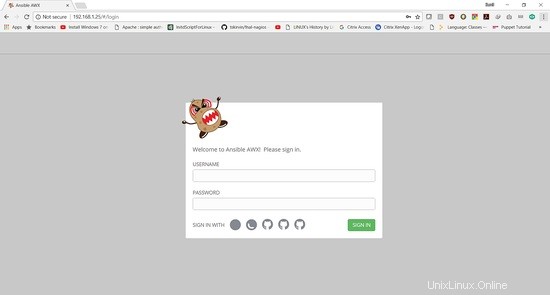
Detail Login adalah:
Nama pengguna:"admin "
Sandi:"sandi "
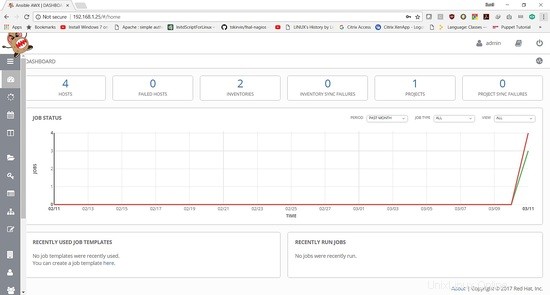
Pada tutorial selanjutnya akan ditampilkan cara menambahkan playbook dan menjalankan job.