oVirt adalah perangkat lunak virtualisasi sumber terbuka dan gratis yang digunakan di Linux seperti sistem operasi seperti Fedora, CentOS, dan RHEL. Dengan kata lain kita dapat mengatakan oVirt adalah alternatif dari VMware vSphere di Linux. Komunitas Ovirt didirikan dan didukung oleh Red Hat dan dianggap sebagai proyek upstream untuk Red Hat Enterprise Virtualization (RHEV ).
oVirt terdiri dari dua komponen utama :
- Mesin oVirt
- Node Virt
Mesin oVirt adalah antarmuka pengguna grafis atau kita dapat mengatakan itu adalah portal administrator Web tempat kita dapat mengelola mesin virtual, komputasi, jaringan, dan sumber daya penyimpanan.
simpul oVirt adalah Server RHEL / CentOS atau Fedora tempat layanan vdsm aktif dan berjalan. Node Ovirt akan bertindak sebagai Hypervisor (KVM) di mana semua mesin Virtual akan dibuat.
Pada artikel ini kita akan menginstal versi terbaru oVirt 4.0.3 pada CentOS 7 / RHEL 7 . Kami akan menggunakan dua server satu akan bertindak sebagai mesin ovirt dan lainnya akan bertindak sebagai node ovirt. Berikut detailnya :
oVirt Engine :ovirtengine.example.com (192.168.1.30 )
oVirt Node :ovirtnode.example.com (192.168.1.40)
Perbarui entri di bawah di file /etc/hosts jika Anda tidak memiliki server dns lokal.
192.168.1.30  ovirtengine.example.com
192.168.1.40  ovirtnode.example.com
Langkah-Langkah Instalasi oVirt Engine pada CentOS 7 / RHEL 7
Berikut adalah persyaratan minimal untuk ovirt-engine :
- OS Minimal ( CentOS 7.x / RHEL 7.x )
- Server inti ganda
- RAM 4 GB
- Ruang Disk 25 GB
- Kartu Lan 1-Gbps
Lakukan langkah-langkah berikut satu demi satu untuk menginstal mesin ovirt.
Langkah:1 Perbarui server menggunakan perintah yum
Instal pembaruan terbaru di server menggunakan perintah di bawah yum.
[[email protected] ~]# yum update -y
Setelah pembaruan diinstal, reboot server.
Langkah:2 Aktifkan Repositori oVirt 4.0.3
paket mesin ovirt tidak tersedia di repositori CentOS dan RHEL yum. Jalankan perintah di bawah ini untuk mengatur dan mengaktifkan perbendaharaan ovirt 4.0
[[email protected] ~]# yum install http://resources.ovirt.org/pub/yum-repo/ovirt-release40.rpm
Langkah:3 Instal Paket Mesin oVirt menggunakan perintah yum
Jalankan perintah yum berikut untuk menginstal mesin ovirt.
[[email protected] ~]# yum install ovirt-engine -y
Langkah:4 Mulai penginstal mesin ovirt
Jalankan perintah ‘engine-setu p' dari konsol, itu akan memulai penginstal mesin ovirt dan secara interaktif akan mengajukan serangkaian pertanyaan selama instalasi dan akan menyimpan semua jawaban ke file jawaban. File jawaban dapat digunakan kembali untuk mengotomatiskan penginstalan.
[[email protected] ~]# engine-setup --generate-answer=/root/answer.txt
[ INFO ] Stage: Initializing
[ INFO ] Stage: Environment setup
 Configuration files: ['/etc/ovirt-engine-setup.conf.d/10-packaging-jboss.conf', '/etc/ovirt-engine-setup.conf.d/10-packaging.conf']
 Log file: /var/log/ovirt-engine/setup/ovirt-engine-setup-20160918040600-2gbi6m.log
 Version: otopi-1.5.2 (otopi-1.5.2-1.el7.centos)
[ INFO ] Stage: Environment packages setup
[ INFO ] Yum Downloading: base/7/x86_64 (0%)
[ INFO ] Yum Downloading: updates/7/x86_64 (0%)
[ INFO ] Stage: Programs detection
[ INFO ] Stage: Environment setup
[ INFO ] Stage: Environment customization

 --== PRODUCT OPTIONS ==--

 Configure Engine on this host (Yes, No) [Yes]: Yes
 Configure Image I/O Proxy on this host? (Yes, No) [Yes]: Yes
 Configure WebSocket Proxy on this host (Yes, No) [Yes]: Yes
 Please note: Data Warehouse is required for the engine. If you choose to not configure it on this host, you have to configure it on a remote host, and then configure the engine on this host so that it can access the database of the remote Data Warehouse host.
 Configure Data Warehouse on this host (Yes, No) [Yes]: Yes
 Configure VM Console Proxy on this host (Yes, No) [Yes]: Yes

 --== PACKAGES ==--

[ INFO ] Checking for product updates...
[ INFO ] No product updates found

 --== NETWORK CONFIGURATION ==--

 Host fully qualified DNS name of this server [ovirtengine.example.com]: ovirtengine.example.com
[WARNING] Failed to resolve ovirtengine.example.com using DNS, it can be resolved only locally
 Setup can automatically configure the firewall on this system.
 Note: automatic configuration of the firewall may overwrite current settings.
 Do you want Setup to configure the firewall? (Yes, No) [Yes]: No

 --== DATABASE CONFIGURATION ==--

 Where is the DWH database located? (Local, Remote) [Local]: Local
 Setup can configure the local postgresql server automatically for the DWH to run. This may conflict with existing applications.
 Would you like Setup to automatically configure postgresql and create DWH database, or prefer to perform that manually? (Automatic, Manual) [Automatic]: Automatic
 Where is the Engine database located? (Local, Remote) [Local]: Local
 Setup can configure the local postgresql server automatically for the engine to run. This may conflict with existing applications.
 Would you like Setup to automatically configure postgresql and create Engine database, or prefer to perform that manually? (Automatic, Manual) [Automatic]: Automatic

 --== OVIRT ENGINE CONFIGURATION ==--

 Engine admin password:
 Confirm engine admin password:
[WARNING] Password is weak: it is too simplistic/systematic
 Use weak password? (Yes, No) [No]: Yes
 Application mode (Virt, Gluster, Both) [Both]: Both

 --== STORAGE CONFIGURATION ==--

 Default SAN wipe after delete (Yes, No) [No]: No

 --== PKI CONFIGURATION ==--

 Organization name for certificate [example.com]: example.com

 --== APACHE CONFIGURATION ==--

 Setup can configure the default page of the web server to present the application home page. This may conflict with existing applications.
 Do you wish to set the application as the default page of the web server? (Yes, No) [Yes]: Yes
 Setup can configure apache to use SSL using a certificate issued from the internal CA.
 Do you wish Setup to configure that, or prefer to perform that manually? (Automatic, Manual) [Automatic]: Automatic

 --== SYSTEM CONFIGURATION ==--

 Configure an NFS share on this server to be used as an ISO Domain? (Yes, No) [No]: No

 --== MISC CONFIGURATION ==--

 Please choose Data Warehouse sampling scale:
 (1) Basic
 (2) Full
 (1, 2)[1]: 1

 --== END OF CONFIGURATION ==--

[ INFO ] Stage: Setup validation
[WARNING] Warning: Not enough memory is available on the host. Minimum requirement is 4096MB, and 16384MB is recommended.
 Do you want Setup to continue, with amount of memory less than recommended? (Yes, No) [No]: Yes

 --== CONFIGURATION PREVIEW ==--

 Application mode : both
 Default SAN wipe after delete : False
 Update Firewall : False
 Host FQDN : ovirtengine.example.com
 Engine database secured connection : False
 Engine database host : localhost
 Engine database user name : engine
 Engine database name : engine
 Engine database port : 5432
 Engine database host name validation : False
 DWH database secured connection : False
 DWH database host : localhost
 DWH database user name : ovirt_engine_history
 DWH database name : ovirt_engine_history
 DWH database port : 5432
 DWH database host name validation : False
 Engine installation : True
 PKI organization : example.com
 Configure local Engine database : True
 Set application as default page : True
 Configure Apache SSL : True
 DWH installation : True
 Configure local DWH database : True
 Engine Host FQDN : ovirtengine.example.com
 Configure Image I/O Proxy : True
 Configure VMConsole Proxy : True
 Configure WebSocket Proxy : True

 Please confirm installation settings (OK, Cancel) [OK]: OK

[ INFO ] Stage: Transaction setup
[ INFO ] Stopping engine service
[ INFO ] Stopping ovirt-fence-kdump-listener service
[ INFO ] Stopping dwh service
[ INFO ] Stopping Image I/O Proxy service
[ INFO ] Stopping websocket-proxy service
[ INFO ] Stage: Misc configuration
[ INFO ] Stage: Package installation
[ INFO ] Stage: Misc configuration
[ INFO ] Upgrading CA
[ INFO ] Initializing PostgreSQL
[ INFO ] Creating PostgreSQL 'engine' database
[ INFO ] Configuring PostgreSQL
[ INFO ] Creating PostgreSQL 'ovirt_engine_history' database
[ INFO ] Configuring PostgreSQL
[ INFO ] Creating CA
[ INFO ] Creating/refreshing Engine database schema
[ INFO ] Creating/refreshing DWH database schema
[ INFO ] Configuring Image I/O Proxy
[ INFO ] Setting up ovirt-vmconsole proxy helper PKI artifacts
[ INFO ] Setting up ovirt-vmconsole SSH PKI artifacts
[ INFO ] Configuring WebSocket Proxy
[ INFO ] Creating/refreshing Engine 'internal' domain database schema
[ INFO ] Generating post install configuration file '/etc/ovirt-engine-setup.conf.d/20-setup-ovirt-post.conf'
[ INFO ] Stage: Transaction commit
[ INFO ] Stage: Closing up
[ INFO ] Starting engine service
[ INFO ] Starting dwh service
[ INFO ] Restarting ovirt-vmconsole proxy service

 --== SUMMARY ==--

[ INFO ] Restarting httpd
 In order to configure firewalld, copy the files from
 /etc/ovirt-engine/firewalld to /etc/firewalld/services
 and execute the following commands:
 firewall-cmd --permanent --add-service ovirt-postgres
 firewall-cmd --permanent --add-service ovirt-https
 firewall-cmd --permanent --add-service ovirt-fence-kdump-listener
 firewall-cmd --permanent --add-service ovirt-imageio-proxy
 firewall-cmd --permanent --add-service ovirt-websocket-proxy
 firewall-cmd --permanent --add-service ovirt-http
 firewall-cmd --permanent --add-service ovirt-vmconsole-proxy
 firewall-cmd --reload
 The following network ports should be opened:
 tcp:2222
 tcp:443
 tcp:5432
 tcp:54323
 tcp:6100
 tcp:80
 udp:7410
 An example of the required configuration for iptables can be found at:
 /etc/ovirt-engine/iptables.example
 Please use the user '[email protected]' and password specified in order to login
 Web access is enabled at:
 http://ovirtengine.example.com:80/ovirt-engine
 https://ovirtengine.example.com:443/ovirt-engine
 Internal CA E2:96:0B:A0:6C:1E:B5:0D:BB:7B:B5:29:4D:88:92:5A:DA:1E:95:BC
 SSH fingerprint: 1f:7b:59:12:01:8c:b5:d7:21:49:3b:e9:e4:d1:72:da
[WARNING] Warning: Not enough memory is available on the host. Minimum requirement is 4096MB, and 16384MB is recommended.

 --== END OF SUMMARY ==--

[ INFO ] Stage: Clean up
 Log file is located at /var/log/ovirt-engine/setup/ovirt-engine-setup-20160918040600-2gbi6m.log
[ INFO ] Generating answer file '/var/lib/ovirt-engine/setup/answers/20160918041930-setup.conf'
[ INFO ] Generating answer file '/root/answer.txt'
[ INFO ] Stage: Pre-termination
[ INFO ] Stage: Termination
[ INFO ] Execution of setup completed successfully
[[email protected] ~]#
Jika firewall diaktifkan di server Anda , lalu jalankan langkah-langkah yang disebutkan dalam output di atas.
Langkah:5 Akses portal Administrator Web oVirt Engine.
Buka browser web dan ketik URL :
https://ovirtengine.example.com
atau
https://IP_Address
Ganti nama domain atau alamat IP sesuai pengaturan Anda.
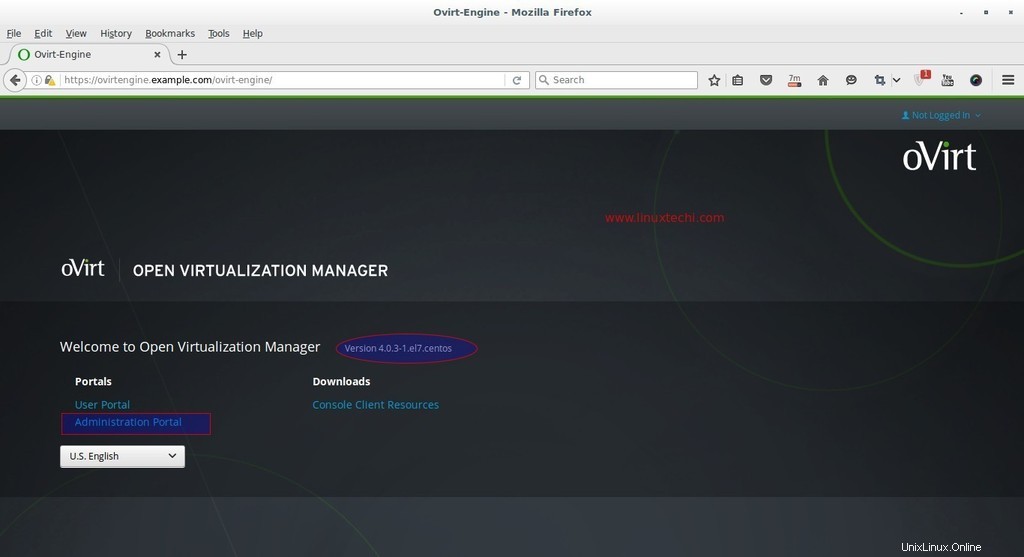
Klik Portal Administrator.
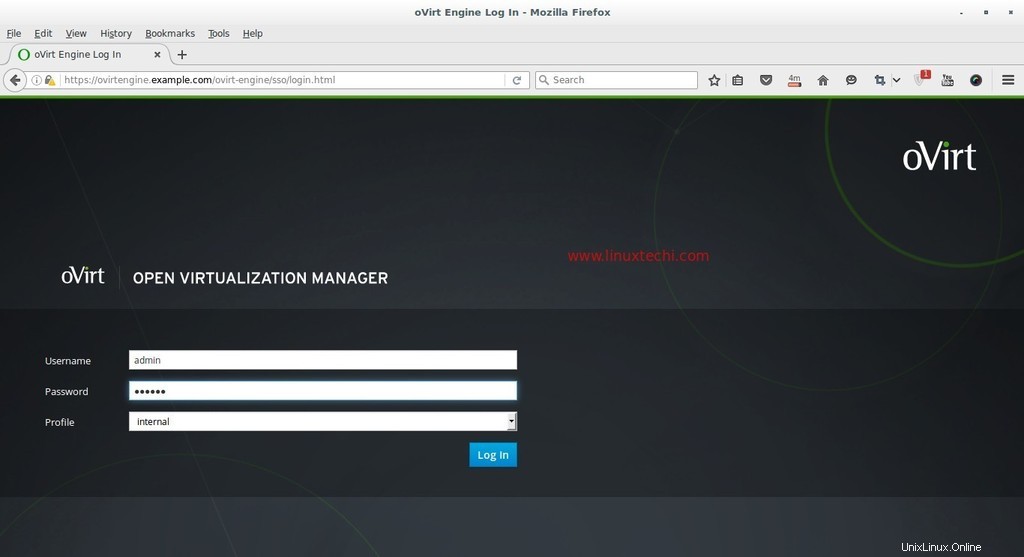
Masukkan nama pengguna sebagai ‘admin ' dan kata sandi yang kami sebutkan selama instalasi dan Profil sebagai internal.
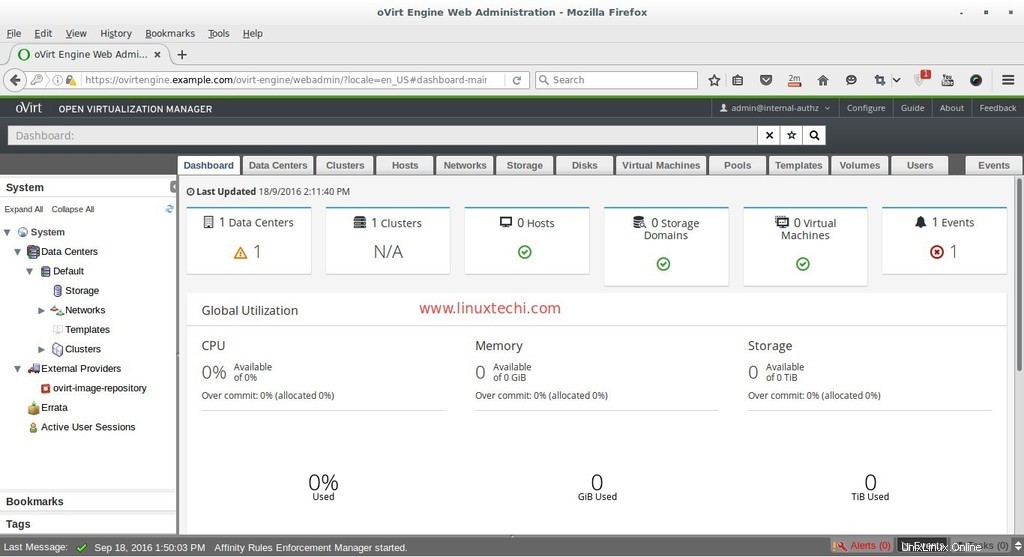
Pada titik ini instalasi mesin ovirt selesai, sekarang instal node ovirt.
Langkah-Langkah Instalasi oVirt Node (Hypervisor)
oVirt Node dapat dikonfigurasi dalam dua metode yang berbeda , Metode pertama adalah kita dapat mengunduh hypervisor atau ovirt-node iso file dari situs web resminya dan instal server dari file iso yang diunduh.
Metode kedua adalah kita dapat membuat CentOS yang sudah ada , RHEL dan Fedora server sebagai node ovirt dengan menginstal paket vdsm di atasnya dan kemudian kita akan menambahkan host atau server tersebut secara manual dari portal administrator mesin ovirt.
Persyaratan minimum untuk oVirt Node adalah :
- Sistem Inti Ganda
- RAM Fisik 10 GB
- Ruang Disk 10 GB
- Kartu Lan 1-Gbps
Dalam tutorial ini saya akan menggunakan metode pertama, saya sudah mengunduh oVirt 4.0 Node iso mengajukan. Bakar file iso yang diunduh ke dalam DVD atau drive USB dan Boot server boot dengan DVD/USB ikuti petunjuk Layar.

Pilih opsi pertama ‘Install oVirt Node 4.0.3 ‘
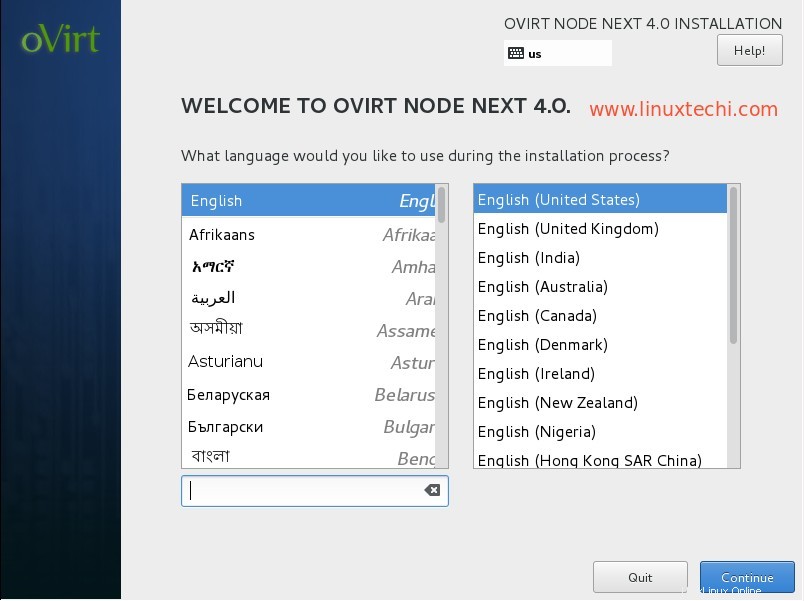
Pilih Bahasa dan Klik Lanjutkan …
Pada Langkah Selanjutnya lakukan langkah-langkah berikut :
- Konfigurasikan Jaringan
- Tetapkan Nama Inang
- Pilih disk untuk penginstalan OS
- Tanggal dan Waktu sesuai penyiapan
- Tata Letak Keyboard
Dalam Kasus saya, Hostname adalah “ovirtnode.example.com ” dan alamat IP adalah 192.168.1.40
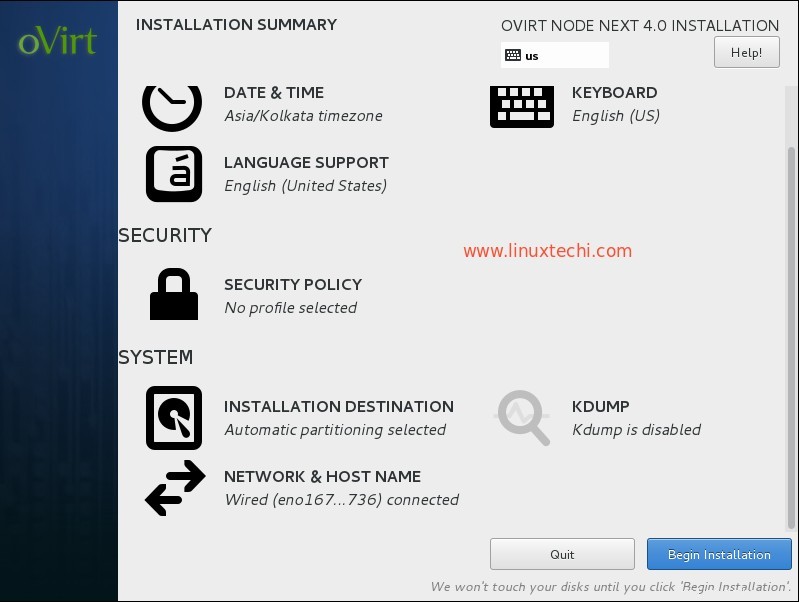
Klik Mulai Instalasi
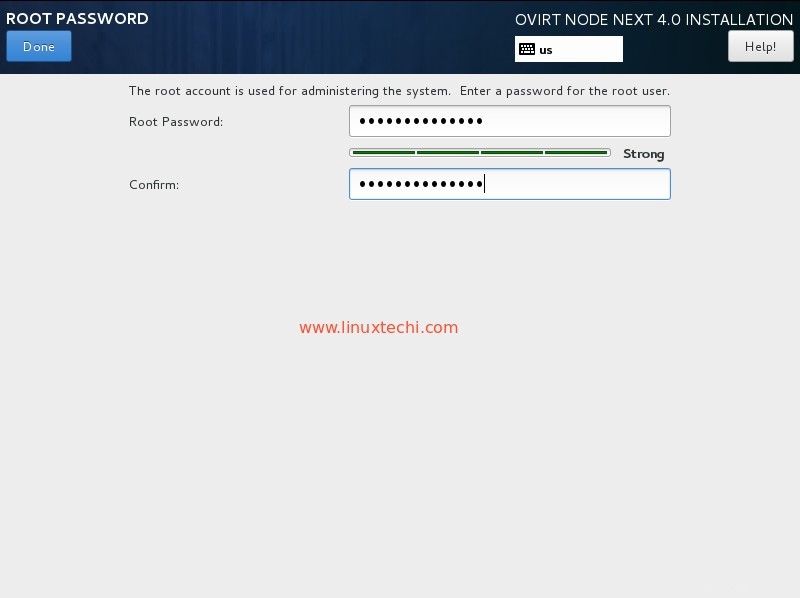
Setel kata sandi root dan klik selesai
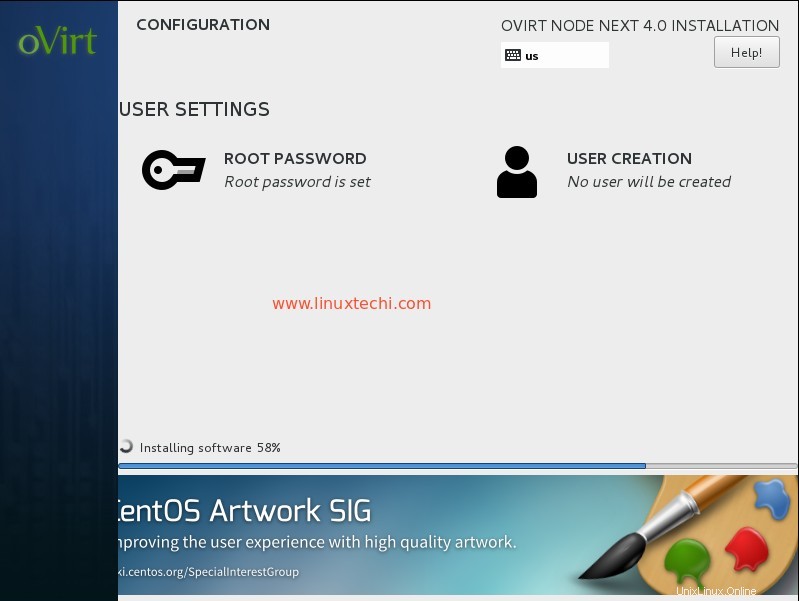
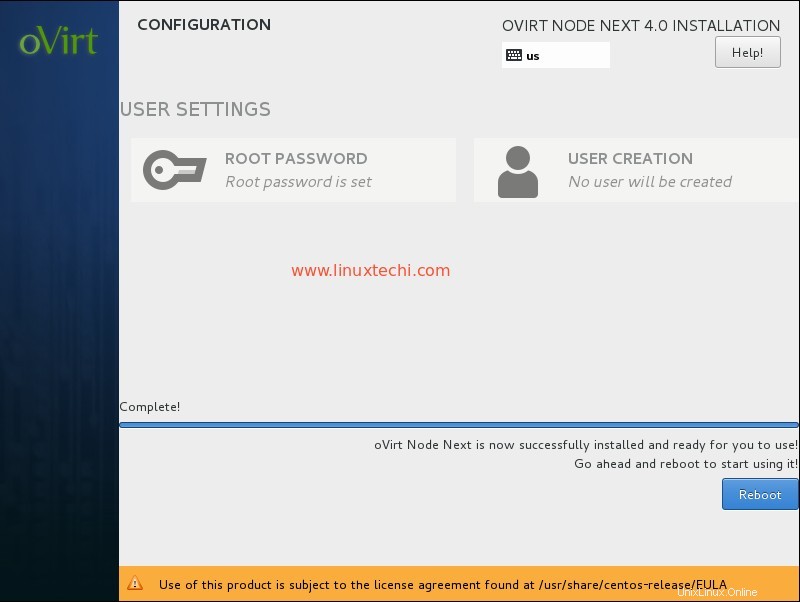
oVirt 4.0.3 Instalasi node sedang berlangsung.
Setelah penginstalan selesai, reboot server Anda.
Tambahkan ovirt Node (ovirtnode.example) di mesin ovirt dari Portal Administrator Web.
Masuk ke Portal Administrator , Buka Tab Host —> klik Baru
Tentukan detail node ovirt.
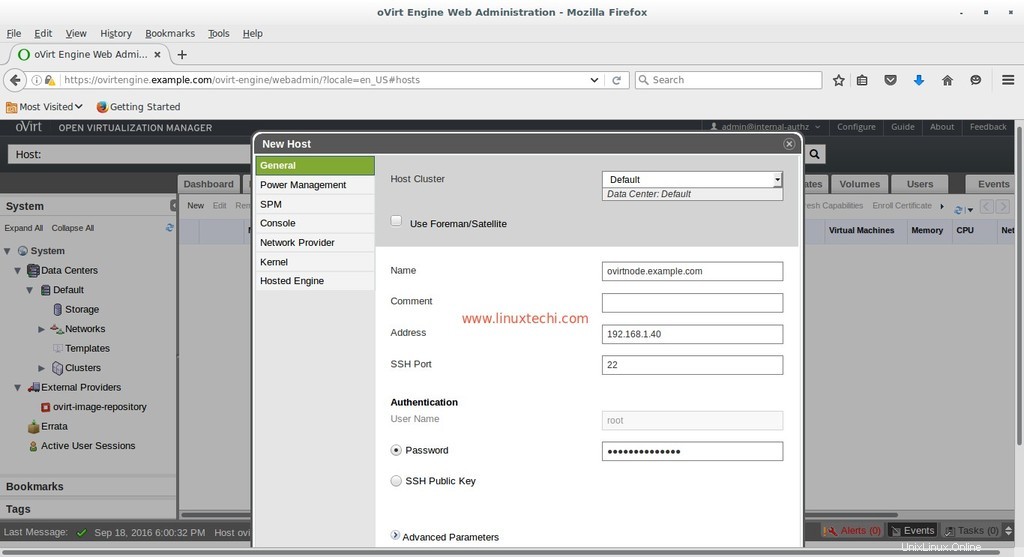
Setelah selesai dengan entri, klik OK.

Saat saya melakukan penyiapan ini di lab saya, saya tidak akan "Mengonfigurasi Manajemen Daya “. Klik Oke
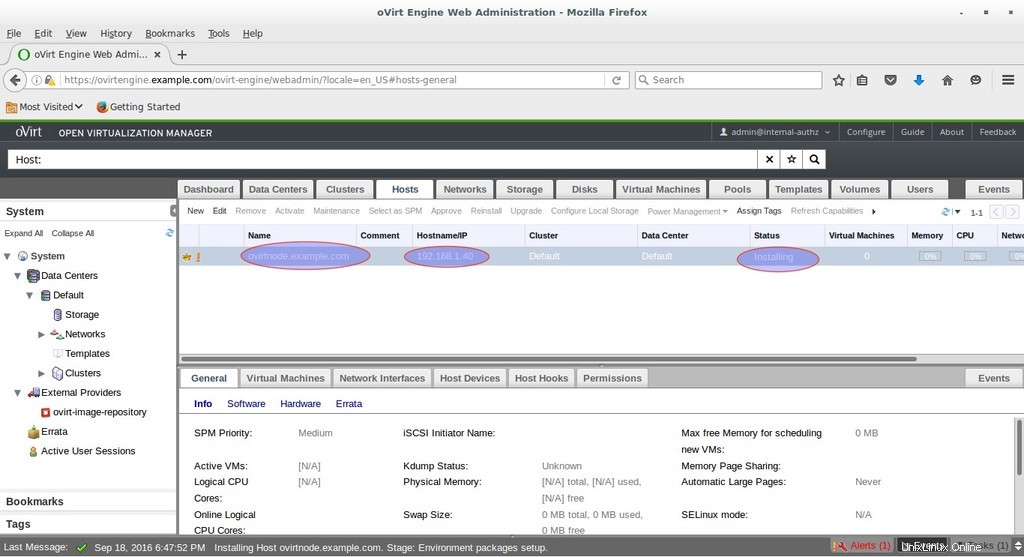
Seperti yang dapat kita lihat di bawah bahwa mesin ovirt sedang menginstal perangkat lunak pada node ovirt. Jika host tidak diaktifkan setelah menginstal perangkat lunak, lalu pilih Host dan Klik Aktifkan
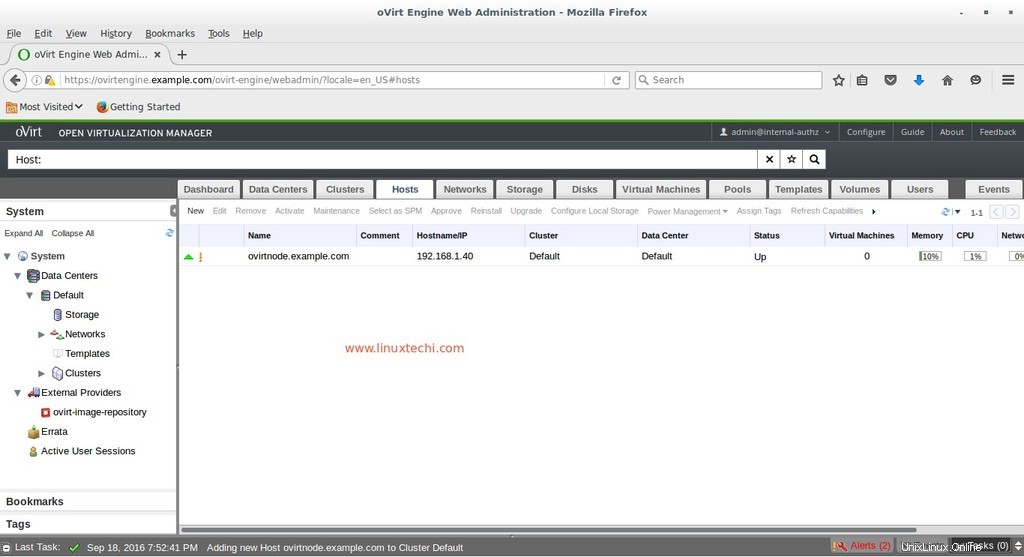
Seperti yang kita lihat, Host sudah diaktifkan sekarang.
Itu saja. Semoga Anda menyukai langkah-langkah instalasi dan Konfigurasi oVirt 4.0.3. Pada artikel mendatang kita akan membahas cara membuat pusat data, cluster, dan mesin Virtual.