Sandstorm adalah platform sumber terbuka dan gratis untuk aplikasi web dan server. Anda dapat menerapkan banyak aplikasi termasuk WordPress, GitLab, MediaWiki, Apache Wave, dan email web RoundCube menggunakan Sandstorm. Muncul dengan antarmuka web yang sederhana dan ramah pengguna yang membantu Anda menginstal dan mengelola aplikasi di server Anda. Dibandingkan dengan platform lain, Sandstorm dirancang dari awal agar lebih mudah digunakan.
Dalam postingan ini, kami akan menunjukkan cara menginstal Sandstorm di VPS CentOS 8.
Prasyarat
- Server CentOS 8 baru di Atlantic.Net Cloud Platform
- Kata sandi root yang dikonfigurasi di server Anda
Langkah 1 – Buat Server Cloud Atlantic.Net
Pertama, masuk ke Server Cloud Atlantic.Net Anda. Buat server baru, pilih CentOS 8 sebagai sistem operasi dengan setidaknya 2GB RAM. Hubungkan ke Server Cloud Anda melalui SSH dan masuk menggunakan kredensial yang disorot di bagian atas halaman.
Setelah Anda masuk ke server CentOS 8 Anda, jalankan perintah berikut untuk memperbarui sistem dasar Anda dengan paket terbaru yang tersedia.
dnf update -y
Langkah 2 – Siapkan Nama Inang
Sebelum memulai, Anda perlu menetapkan nama host yang memenuhi syarat untuk server Anda. Anda dapat mengaturnya menggunakan perintah berikut:
hostnamectl set-hostname sandstorm.example.com
Setelah selesai, Anda dapat melanjutkan ke langkah berikutnya.
Langkah 3 – Instal Badai Pasir
Sandstorm menyediakan skrip penginstalan otomatis yang memudahkan pemasangan Sandstorm di server Anda.
Anda dapat mengunduh skrip instalasi Sandstorm menggunakan perintah berikut:
curl https://install.sandstorm.io >install.sh
Setelah skrip diunduh, jalankan skrip yang diunduh untuk memulai instalasi:
bash install.sh
Anda akan diminta untuk memilih opsi instalasi seperti yang ditunjukkan di bawah ini:
Sandstorm makes it easy to run web apps on your own server. You can have:

1. A typical install, to use Sandstorm (press enter to accept this default)
2. A development server, for working on Sandstorm itself or localhost-based app development
Tekan enter untuk memilih opsi default. Anda akan melihat output berikut:
How are you going to use this Sandstorm install? [1]
We're going to:

* Install Sandstorm in /opt/sandstorm
* Automatically keep Sandstorm up-to-date
* Create a service user (sandstorm) that owns Sandstorm's files
* Configure Sandstorm to start on system boot (with systemd)
* Listen for inbound email on port 25.

Rest assured that Sandstorm itself won't run as root.
OK to continue? [yes]
Tekan enter untuk melanjutkan. Anda akan melihat output berikut:
NOTE: It looks like your system already has some other web server installed
      (port 80 and/or 443 are taken), so Sandstorm cannot act as your main
      web server.

      This script can set up Sandstorm to run on port 6080 instead,
      without HTTPS. This makes sense if you're OK with typing the port number
      into your browser whenever you access Sandstorm and you don't need
      security. This also makes sense if you are going to set up a reverse proxy;
      if so, see https://docs.sandstorm.io/en/latest/administering/reverse-proxy/

      If you want, you can quit this script with Ctrl-C now, and go uninstall
      your other web server, and then run this script again. It is also OK to
      proceed if you want.

OK to skip automatic HTTPS setup & bind to port 6080 instead? [yes]
Tekan enter untuk mengikat port Sandstorm ke 6080 . Anda akan melihat output berikut:
Note: Sandstorm's storage will only be accessible to the group 'sandstorm'.
As a Sandstorm user, you are invited to use a free Internet hostname as a subdomain of sandcats.io,
a service operated by the Sandstorm development team.
...
Sandcats.io protects your privacy and is subject to terms of use. By using it,
you agree to the terms of service & privacy policy available here:
https://sandcats.io/terms https://sandcats.io/privacy

Choose your desired Sandcats subdomain (alphanumeric, max 20 characters).
Type the word none to skip this step, or help for help.
What *.sandcats.io subdomain would you like? [] none
Ketik none dan tekan enter . Setelah instalasi selesai, Anda akan melihat output berikut:
URL users will enter in browser: [http://sandstorm.example.com:6080]
Sandstorm requires you to set up a wildcard DNS entry pointing at the server.
This allows Sandstorm to allocate new hosts on-the-fly for sandboxing purposes.
Please enter a DNS hostname containing a '*' which maps to your server. For
example, if you have mapped *.foo.example.com to your server, you could enter
"*.foo.example.com". You can also specify that hosts should have a special
prefix, like "ss-*.foo.example.com". Note that if your server's main page
is served over SSL, the wildcard address must support SSL as well, which
implies that you must have a wildcard certificate. For local-machine servers,
we have mapped *.local.sandstorm.io to 127.0.0.1 for your convenience, so you
can use "*.local.sandstorm.io" here. If you are serving off a non-standard
port, you must include it here as well.
Wildcard host: [*.sandstorm.example.com:6080]

Your server is now online! Visit this link to start using it:

  http://sandstorm.example.com:6080/setup/token/7f7f36c9e39f738a69564622123be64b373141a5

NOTE: This URL expires in 15 minutes. You can generate a new setup URL by running
'sudo sandstorm admin-token' from the command line.


To learn how to control the server, run:
  sandstorm help
Pada titik ini, Sandstorm diinstal dan mendengarkan pada port 6080. Anda dapat memeriksanya dengan perintah berikut:
ss -antpl | grep 6080
Anda akan melihat halaman berikut:
LISTEN 0 128 0.0.0.0:6080 0.0.0.0:* users:(("sandstorm/gtway",pid=28336,fd=7),("sandstorm/montr",pid=28265,fd=7),("sandstorm/top",pid=28262,fd=7))
Langkah 4 – Akses UI Web Badai Pasir
Sekarang, buka browser web Anda dan akses Badai Pasir menggunakan URL http://sandstorm.example.com:6080/setup/token/7f7f36c9e39f738a69564622123be64b373141a5 . Anda akan diarahkan ke halaman berikut:
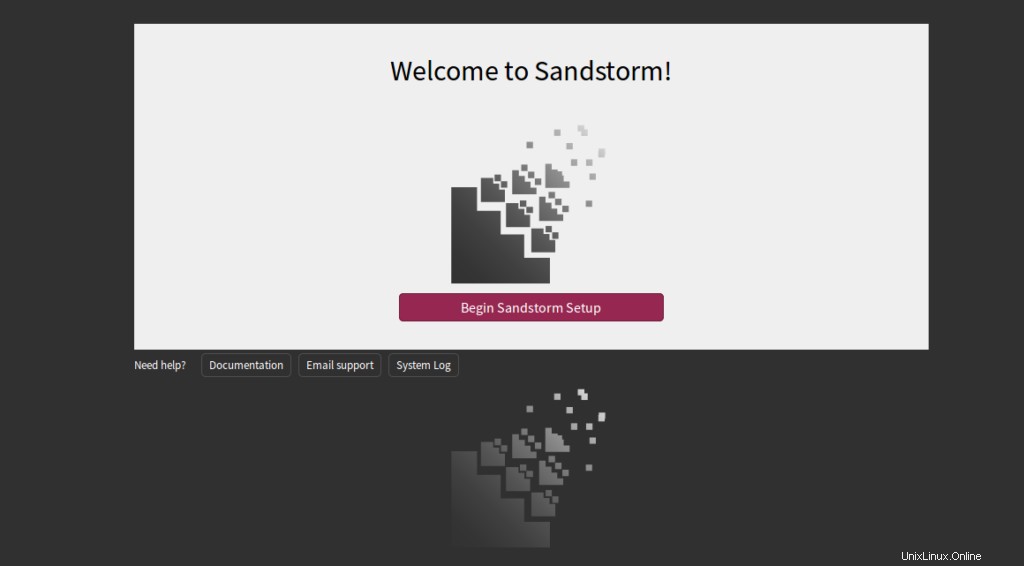
Klik Mulai Penyiapan Badai Pasir . Anda akan melihat halaman berikut:
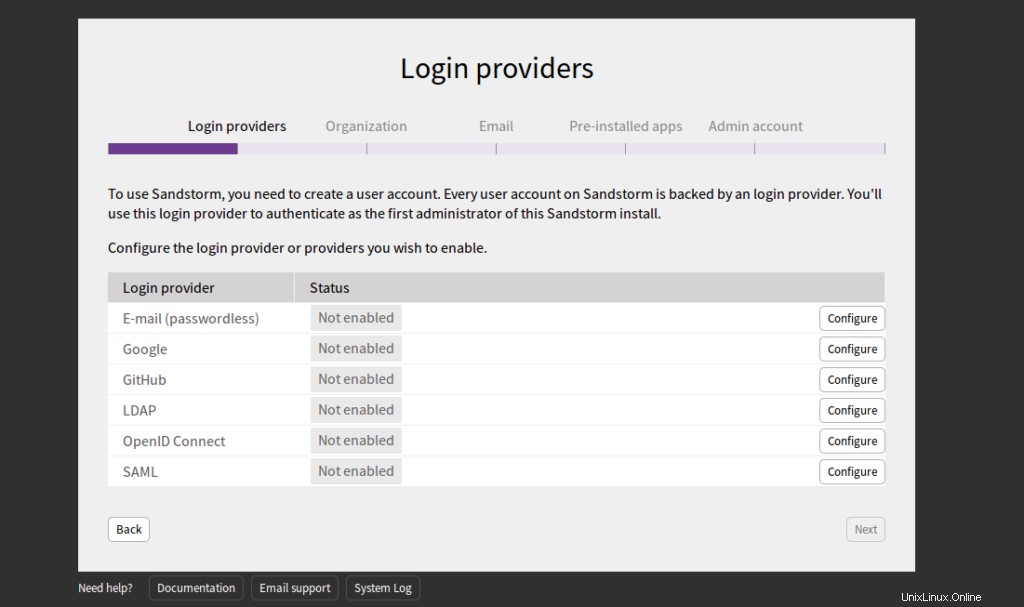
Pilih E-Mail dan klik Konfigurasikan tombol. Anda akan melihat halaman berikut:
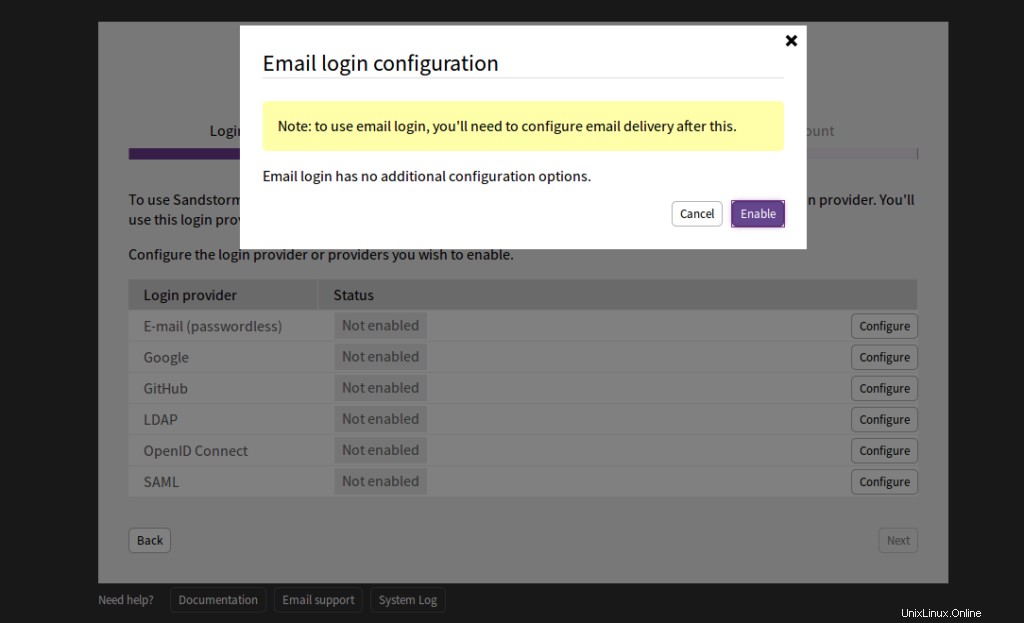
Klik Aktifkan . Anda akan melihat halaman berikut:
Berikan domain server email Anda dan klik Simpan dan lanjutkan tombol. Anda akan melihat halaman berikut:
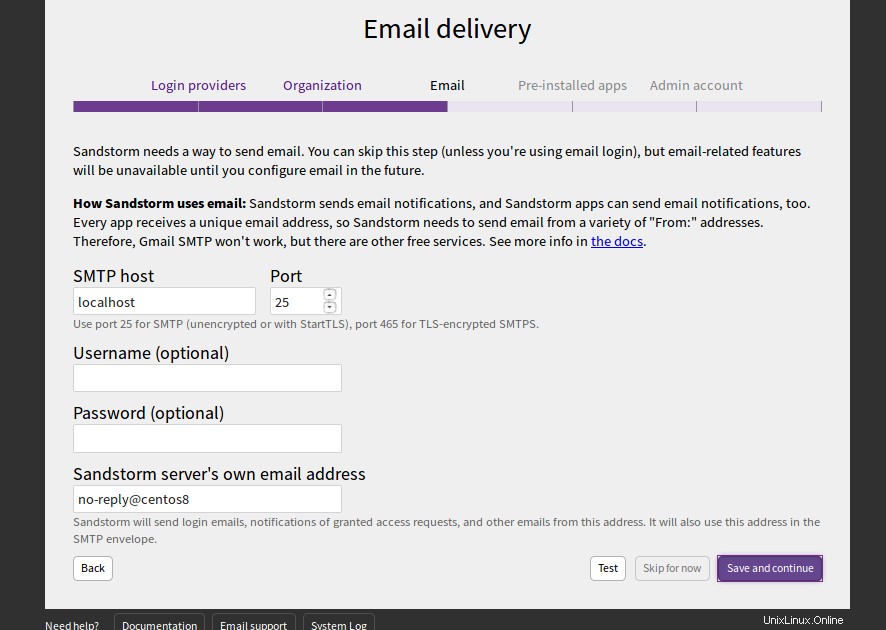
Berikan host SMTP, port, nama pengguna, dan kata sandi Anda dan klik Simpan dan lanjutkan tombol. Anda akan melihat halaman berikut:
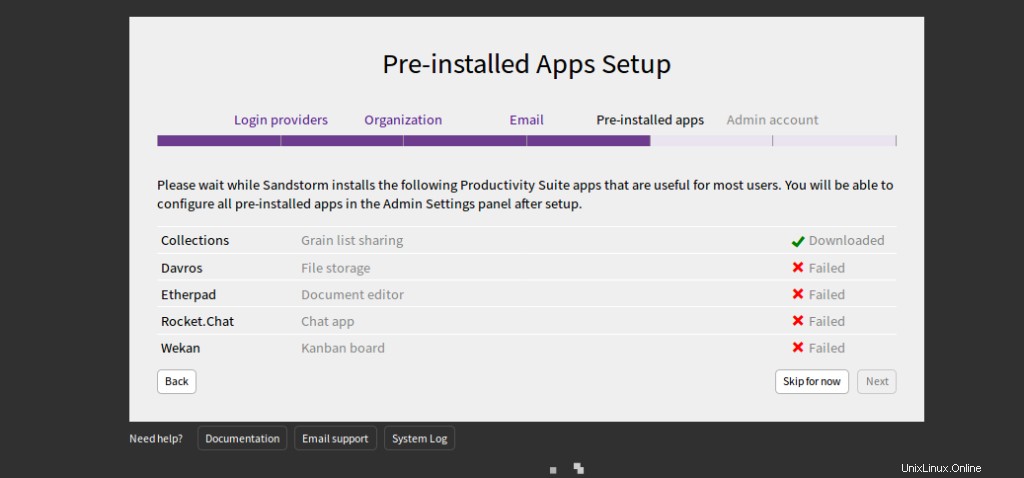
Klik Lewati sekarang . Anda akan melihat halaman berikut:
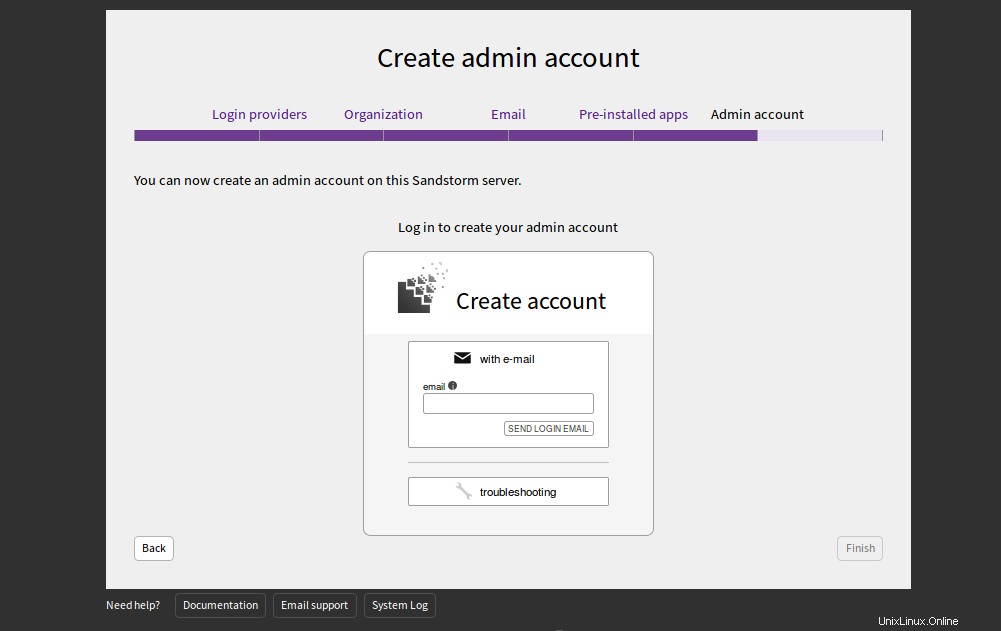
Berikan alamat email Anda dan klik KIRIM MASUK EMAIL. Anda akan menerima email dengan kredensial login. Anda dapat menggunakan kredensial tersebut untuk masuk ke server Sandstorm.
Kesimpulan
Selamat! Anda telah berhasil menginstal Sandstorm di CentOS 8 VPS. Sandstorm adalah alat yang sangat berguna bagi pengembang. Ini membantu mereka untuk menyebarkan aplikasi apa pun hanya dengan satu klik. Untuk informasi dan dokumentasi lebih lanjut tentang Sandstorm, kunjungi dokumentasi mereka.