Netcat (disingkat NC) adalah jaringan komputer yang kaya fitur, debugging dan utilitas investigasi yang mendukung berbagai perintah untuk mengelola jaringan dan memantau aliran data lalu lintas jaringan antara sistem menggunakan Transmission Control Protocol (TCP) dan User Datagram Protocol (UDP).
Netcat dapat menjadi alat yang sangat berguna bagi administrator jaringan dan sistem untuk mengenali dengan cepat bagaimana kinerja jaringan mereka dan jenis aktivitas jaringan apa yang terjadi dalam sistem.
Dalam artikel ini, kita akan membahas cara menginstal dan menggunakan utilitas netcat serbaguna ini untuk melakukan pemindaian port sederhana guna mengidentifikasi port yang terbuka di sistem Linux.
Instal Netcat di Linux
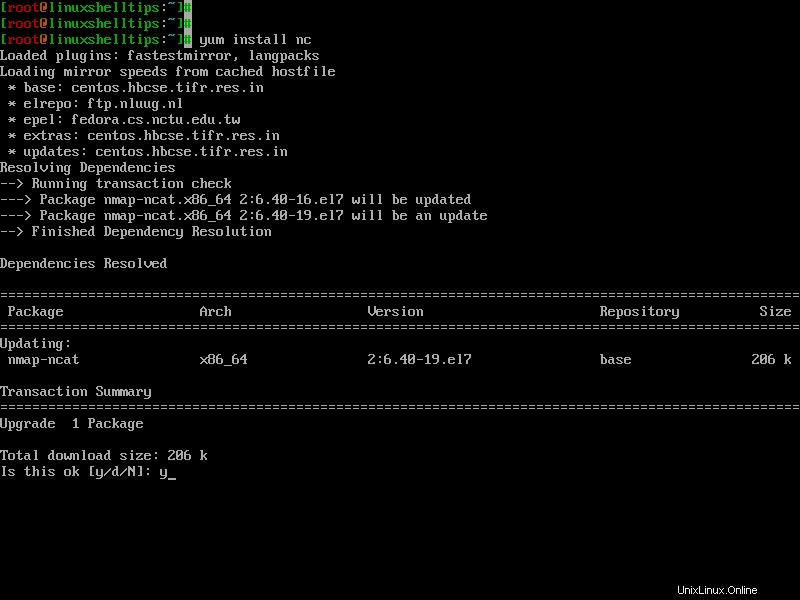
Netcat seharusnya dapat diperoleh di hampir semua distribusi Linux modern menggunakan manajer paket default seperti yang ditunjukkan.
$ sudo yum install nc         [On CentOS/RHEL/Rocky Linux/AlmaLinux]
$ sudo dnf install nc         [On Fedora 22+ and RHEL 8]
$ sudo apt install Netcat     [On Debian/Ubuntu]
Pemindaian Port Linux dengan Perintah Netcat
Setelah Anda menginstal utilitas Netcat di server Linux Anda, Anda dapat mulai melakukan pemindaian port jaringan, yang akan memeriksa status semua port pada domain atau alamat IP yang ditentukan sehingga Anda dapat mengetahui apakah firewall atau mekanisme pemblokiran lainnya aktif. tempat.
Misalnya, kami dapat memindai semua port hingga 1000 dengan menjalankan perintah berikut menggunakan -z opsi, yang hanya akan melakukan pemindaian alih-alih mencoba membuka koneksi, dan -v opsi untuk memberi tahu netcat untuk menghasilkan lebih banyak informasi verbose.
$ netcat -z -v google.com 1-1000
Or
$ nc -z -v google.com 1-1000
Outputnya akan terlihat seperti ini:
netcat: connect to google.com port 1 (tcp) failed: Connection timed out
netcat: connect to google.com port 1 (tcp) failed: Network is unreachable
netcat: connect to google.com port 2 (tcp) failed: Connection timed out
netcat: connect to google.com port 2 (tcp) failed: Network is unreachable
netcat: connect to google.com port 3 (tcp) failed: Connection timed out
netcat: connect to google.com port 3 (tcp) failed: Network is unreachable
netcat: connect to google.com port 4 (tcp) failed: Connection timed out
netcat: connect to google.com port 4 (tcp) failed: Network is unreachable
netcat: connect to google.com port 5 (tcp) failed: Connection timed out
netcat: connect to google.com port 5 (tcp) failed: Network is unreachable
....
Anda juga dapat melakukan pemindaian port untuk alamat IP menggunakan -n opsi untuk menentukan bahwa Anda tidak perlu menyelesaikan alamat IP menggunakan DNS.
$ netcat -z -n -v 192.168.0.173 1-1000
OR
$ nc -z -n -v 192.168.0.173 1-1000
Outputnya akan terlihat seperti ini:
netcat: connect to 192.168.0.173 port 1 (tcp) failed: Connection refused
netcat: connect to 192.168.0.173 port 2 (tcp) failed: Connection refused
netcat: connect to 192.168.0.173 port 3 (tcp) failed: Connection refused
netcat: connect to 192.168.0.173 port 4 (tcp) failed: Connection refused
netcat: connect to 192.168.0.173 port 5 (tcp) failed: Connection refused
netcat: connect to 192.168.0.173 port 6 (tcp) failed: Connection refused
netcat: connect to 192.168.0.173 port 7 (tcp) failed: Connection refused
netcat: connect to 192.168.0.173 port 8 (tcp) failed: Connection refused
netcat: connect to 192.168.0.173 port 9 (tcp) failed: Connection refused
netcat: connect to 192.168.0.173 port 10 (tcp) failed: Connection refused
netcat: connect to 192.168.0.173 port 11 (tcp) failed: Connection refused
netcat: connect to 192.168.0.173 port 12 (tcp) failed: Connection refused
netcat: connect to 192.168.0.173 port 13 (tcp) failed: Connection refused
netcat: connect to 192.168.0.173 port 14 (tcp) failed: Connection refused
netcat: connect to 192.168.0.173 port 15 (tcp) failed: Connection refused
netcat: connect to 192.168.0.173 port 16 (tcp) failed: Connection refused
netcat: connect to 192.168.0.173 port 17 (tcp) failed: Connection refused
netcat: connect to 192.168.0.173 port 18 (tcp) failed: Connection refused
netcat: connect to 192.168.0.173 port 19 (tcp) failed: Connection refused
netcat: connect to 192.168.0.173 port 20 (tcp) failed: Connection refused
netcat: connect to 192.168.0.173 port 21 (tcp) failed: Connection refused
Connection to 192.168.0.173 22 port [tcp/*] succeeded!
netcat: connect to 192.168.0.173 port 23 (tcp) failed: Connection refused
netcat: connect to 192.168.0.173 port 24 (tcp) failed: Connection refused
netcat: connect to 192.168.0.173 port 25 (tcp) failed: Connection refused
netcat: connect to 192.168.0.173 port 26 (tcp) failed: Connection refused
netcat: connect to 192.168.0.173 port 27 (tcp) failed: Connection refused
...
Dari output di atas, Anda dapat dengan jelas melihat bahwa port SSH tradisional terbuka di kisaran 1-1000 pada mesin jarak jauh.
Jika Anda hanya ingin mencetak port yang terbuka di layar, maka Anda perlu memfilter output dengan perintah grep seperti yang ditunjukkan.
$ netcat -z -n -v 192.168.0.173 1-1000 2>&1 | grep succeeded
OR
$ nc -z -n -v 192.168.0.173 1-1000 2>&1 | grep succeeded
Keluaran:
Connection to 192.168.0.173 22 port [tcp/*] succeeded!
Connection to 192.168.0.173 80 port [tcp/*] succeeded!
Anda juga dapat memindai port satu per satu.
$ nc -zv 192.168.0.173 80
$ nc -zv 192.168.0.173 22
Or
$ nc -zv 192.168.0.173 http
$ nc -zv 192.168.0.173 ssh
[ Anda mungkin juga menyukai:Cara Menemukan dan Menutup Port Terbuka di Linux ]
Untuk informasi dan penggunaan lebih lanjut, baca halaman manual netcat.