Tutorial ini adalah Hak Cipta (c) 2013 oleh Falko Timme. Ini berasal dari tutorial dari Christoph Haas yang dapat Anda temukan di http://workaround.org. Anda bebas menggunakan tutorial ini di bawah lisensi Creative Commons 2.5 atau versi yang lebih baru.
Dokumen ini menjelaskan cara menginstal server email Postfix yang didasarkan pada pengguna dan domain virtual, yaitu pengguna dan domain yang ada di database MySQL. Saya juga akan mendemonstrasikan instalasi dan konfigurasi Courier (Courier-POP3, Courier-IMAP), sehingga Courier dapat mengautentikasi terhadap database MySQL yang sama yang digunakan Postfix.
Server Postfix yang dihasilkan mampu SMTP-AUTH dan TLS dan kuota (kuota tidak ada di dalam Postfix secara default, saya akan menunjukkan cara menambal Postfix Anda dengan tepat). Kata sandi disimpan dalam terenkripsi formulir di database (sebagian besar dokumen yang saya temukan berurusan dengan kata sandi teks biasa yang merupakan risiko keamanan). Selain itu, tutorial ini mencakup instalasi Amavisd , Pembunuh Spam dan ClamAV sehingga email akan dipindai dari spam dan virus. Saya juga akan menunjukkan cara menginstal SquirrelMail sebagai antarmuka webmail sehingga pengguna dapat membaca dan mengirim email serta mengubah kata sandi mereka.
Keuntungan dari pengaturan "virtual" seperti itu (pengguna dan domain virtual dalam database MySQL) adalah kinerjanya jauh lebih baik daripada pengaturan yang didasarkan pada pengguna sistem "nyata". Dengan penyiapan virtual ini, server email Anda dapat menangani ribuan domain dan pengguna. Selain itu, lebih mudah untuk diadministrasikan karena Anda hanya perlu berurusan dengan database MySQL ketika Anda menambahkan pengguna/domain baru atau mengedit yang sudah ada. Tidak ada lagi perintah postmap untuk membuat file db, tidak ada lagi reload Postfix, dll. Untuk administrasi database MySQL Anda dapat menggunakan alat berbasis web seperti phpMyAdmin yang juga akan diinstal di howto ini. Keuntungan ketiga adalah pengguna memiliki alamat email sebagai nama pengguna (bukan nama pengguna + alamat email) yang lebih mudah dipahami dan diingat.
Howto ini dimaksudkan sebagai panduan praktis; itu tidak mencakup latar belakang teoretis. Mereka diperlakukan di banyak dokumen lain di web.
Dokumen ini datang tanpa jaminan apapun! Saya ingin mengatakan bahwa ini bukan satu-satunya cara untuk mengatur sistem seperti itu. Ada banyak cara untuk mencapai tujuan ini tetapi ini adalah cara yang saya ambil. Saya tidak memberikan jaminan apa pun bahwa ini akan berhasil untuk Anda!
1 Catatan Awal
Tutorial ini didasarkan pada Fedora 18 x86_64, jadi Anda harus menyiapkan instalasi server Fedora 18 dasar sebelum melanjutkan tutorial ini. Sistem harus memiliki alamat IP statis. Saya menggunakan 192.168.0.100 sebagai alamat IP saya dalam tutorial ini dan server1.example.com sebagai nama host.
Anda harus memastikan bahwa firewall dimatikan (setidaknya untuk saat ini).
Pastikan juga SELinux dinonaktifkan:
Edit /etc/selinux/config dan atur SELINUX=disabled:
vi /etc/selinux/config
# This file controls the state of SELinux on the system. # SELINUX= can take one of these three values: # enforcing - SELinux security policy is enforced. # permissive - SELinux prints warnings instead of enforcing. # disabled - No SELinux policy is loaded. SELINUX=disabled # SELINUXTYPE= can take one of these two values: # targeted - Targeted processes are protected, # minimum - Modification of targeted policy. Only selected processes are protected. # mls - Multi Level Security protection. SELINUXTYPE=targeted |
reboot
2 Instal Beberapa Perangkat Lunak
Pertama kita perbarui paket yang ada di sistem:
yum update
Sekarang kita install beberapa software yang kita perlukan nanti:
yum groupinstall 'Development Tools'
yum groupinstall 'Development Libraries'
3 Instal Apache, MySQL, phpMyAdmin
Ini semua dapat diinstal dengan satu perintah tunggal (termasuk paket yang kita perlukan untuk membangun Courier-IMAP):
yum install ntp httpd mod_ssl mysql-server php php-mysql php-mbstring rpm-build gcc mysql-devel openssl-devel cyrus-sasl-devel pkgconfig zlib-devel phpMyAdmin pcre-devel openldap-devel postgresql-devel expect libtool-ltdl-devel openldap-servers libtool gdbm-devel pam-devel gamin-devel libidn-devel sqlite-devel
4 Instal Courier-IMAP, Courier-Authlib, Dan Maildrop
Sayangnya tidak ada paket rpm untuk Courier-IMAP, Courier-Authlib, dan Maildrop, oleh karena itu kami harus membuatnya sendiri.
Paket RPM tidak boleh dibangun sebagai root; kurir-imap bahkan akan menolak untuk mengkompilasi jika mendeteksi bahwa kompilasi dijalankan sebagai pengguna root. Oleh karena itu kami membuat akun pengguna normal sekarang (falko dalam contoh ini) dan memberinya kata sandi:
useradd -m -s /bin/bash falko
passwd falko
Kita akan membutuhkan perintah sudo nanti agar falko pengguna dapat mengkompilasi dan menginstal paket rpm. Tapi pertama-tama, kita harus mengizinkan falko untuk menjalankan semua perintah menggunakan sudo:
Jalankan
visudo
Di file yang terbuka ada baris root ALL=(ALL) ALL. Tambahkan baris serupa untuk falko tepat di bawah baris itu:
[...] ## Allow root to run any commands anywhere root ALL=(ALL) ALL falko ALL=(ALL) ALL [...] |
Sekarang kita siap untuk membangun paket rpm kita. Pertama menjadi pengguna falko:
su falko
Selanjutnya kita buat lingkungan build kita:
mkdir $HOME/rpm
mkdir $HOME/rpm/SOURCES
mkdir $HOME/rpm/SPECS
mkdir $HOME/rpm/BUILD
mkdir $HOME/rpm/BUILDROOT
mkdir $HOME/rpm/SRPMS
mkdir $HOME/rpm/RPMS
mkdir $HOME/rpm/RPMS/i386
mkdir $HOME/rpm/RPMS/x86_64
echo "%_topdir $HOME/rpm" >> $HOME/.rpmmacros
Sekarang kita membuat direktori unduhan dan mengunduh file sumber dari http://www.courier-mta.org/download.php:
mkdir $HOME/downloads
cd $HOME/downloads
wget https://sourceforge.net/projects/courier/files/authlib/0.65.0/courier-authlib-0.65.0.tar.bz2
wget https://sourceforge.net/projects/courier/files/imap/4.12.0/courier-imap-4.12.0.tar.bz2
wget https://sourceforge.net/projects/courier/files/maildrop/2.6.0/maildrop-2.6.0.tar.bz2
Sekarang (masih dalam $HOME/downloads) kita dapat membangun authlib-kurir:
sudo rpmbuild -ta courier-authlib-0.65.0.tar.bz2
Setelah proses build, paket rpm dapat ditemukan di /root/rpmbuild/RPMS/x86_64 (/root/rpmbuild/RPMS/i386 jika Anda menggunakan sistem i386). Perintah
sudo ls -l /root/rpmbuild/RPMS/x86_64
menunjukkan kepada Anda paket rpm yang tersedia:
[[email protected] downloads]$ sudo ls -l /root/rpmbuild/RPMS/x86_64
total 616
-rw-r--r-- 1 root root 140580 Jan 31 17:14 courier-authlib-0.65.0-1.fc18.x86_64.rpm
-rw-r--r-- 1 root root 324148 Jan 31 17:14 courier-authlib-debuginfo-0.65.0-1.fc18.x86_64.rpm
-rw-r--r-- 1 root root  38928 Jan 31 17:14 courier-authlib-devel-0.65.0-1.fc18.x86_64.rpm
-rw-r--r-- 1 root root  18756 Jan 31 17:14 courier-authlib-ldap-0.65.0-1.fc18.x86_64.rpm
-rw-r--r-- 1 root root  13044 Jan 31 17:14 courier-authlib-mysql-0.65.0-1.fc18.x86_64.rpm
-rw-r--r-- 1 root root  14208 Jan 31 17:14 courier-authlib-pgsql-0.65.0-1.fc18.x86_64.rpm
-rw-r--r-- 1 root root   9356 Jan 31 17:14 courier-authlib-pipe-0.65.0-1.fc18.x86_64.rpm
-rw-r--r-- 1 root root  11696 Jan 31 17:14 courier-authlib-sqlite-0.65.0-1.fc18.x86_64.rpm
-rw-r--r-- 1 root root  37580 Jan 31 17:14 courier-authlib-userdb-0.65.0-1.fc18.x86_64.rpm
[[email protected] downloads]$
Pilih yang ingin Anda instal, dan instal seperti ini:
sudo rpm -ivh /root/rpmbuild/RPMS/x86_64/courier-authlib-0.65.0-1.fc18.x86_64.rpm /root/rpmbuild/RPMS/x86_64/courier-authlib-mysql-0.65.0-1.fc18.x86_64.rpm /root/rpmbuild/RPMS/x86_64/courier-authlib-devel-0.65.0-1.fc18.x86_64.rpm
Sekarang kita kembali ke direktori unduhan kita:
cd $HOME/downloads
Jalankan perintah berikut untuk membuat direktori yang diperlukan/mengubah izin direktori (karena jika tidak, proses pembuatan untuk Courier-Imap akan gagal):
sudo mkdir /var/cache/ccache/tmp
sudo chmod o+rwx /var/cache/ccache/
sudo chmod 777 /var/cache/ccache/tmp
Sekarang jalankan rpmbuild lagi, kali ini tanpa sudo, jika tidak, kompilasi akan gagal karena dijalankan sebagai root:
rpmbuild -ta courier-imap-4.12.0.tar.bz2
Setelah proses pembuatan, paket rpm dapat ditemukan di $HOME/rpm/RPMS/x86_64 ($HOME/rpm/RPMS/i386 jika Anda menggunakan sistem i386):
cd $HOME/rpm/RPMS/x86_64
Perintah
ls -l
menunjukkan kepada Anda paket rpm yang tersedia:
[[email protected] x86_64]$ ls -l
total 1256
-rw-rw-r-- 1 falko falko 344996 Jan 31 17:19 courier-imap-4.12.0-1.18.x86_64.rpm
-rw-rw-r-- 1 falko falko 934056 Jan 31 17:19 courier-imap-debuginfo-4.12.0-1.18.x86_64.rpm
[[email protected] x86_64]$
Anda dapat menginstal kurir-imap seperti ini:
sudo rpm -ivh courier-imap-4.12.0-1.18.x86_64.rpm
Sekarang kita kembali ke direktori unduhan kita:
cd $HOME/downloads
dan jalankan rpmbuild lagi, kali ini untuk membuat paket maildrop:
sudo rpmbuild -ta maildrop-2.6.0.tar.bz2
Setelah proses build, paket rpm dapat ditemukan di /root/rpmbuild/RPMS/x86_64 (/root/rpmbuild/RPMS/i386 jika Anda menggunakan sistem i386). Perintah
sudo ls -l /root/rpmbuild/RPMS/x86_64
menunjukkan kepada Anda paket rpm yang tersedia:
[[email protected] downloads]$ sudo ls -l /root/rpmbuild/RPMS/x86_64
total 1880
-rw-r--r-- 1 root root 140580 Jan 31 17:14 courier-authlib-0.65.0-1.fc18.x86_64.rpm
-rw-r--r-- 1 root root 324148 Jan 31 17:14 courier-authlib-debuginfo-0.65.0-1.fc18.x86_64.rpm
-rw-r--r-- 1 root root  38928 Jan 31 17:14 courier-authlib-devel-0.65.0-1.fc18.x86_64.rpm
-rw-r--r-- 1 root root  18756 Jan 31 17:14 courier-authlib-ldap-0.65.0-1.fc18.x86_64.rpm
-rw-r--r-- 1 root root  13044 Jan 31 17:14 courier-authlib-mysql-0.65.0-1.fc18.x86_64.rpm
-rw-r--r-- 1 root root  14208 Jan 31 17:14 courier-authlib-pgsql-0.65.0-1.fc18.x86_64.rpm
-rw-r--r-- 1 root root   9356 Jan 31 17:14 courier-authlib-pipe-0.65.0-1.fc18.x86_64.rpm
-rw-r--r-- 1 root root  11696 Jan 31 17:14 courier-authlib-sqlite-0.65.0-1.fc18.x86_64.rpm
-rw-r--r-- 1 root root  37580 Jan 31 17:14 courier-authlib-userdb-0.65.0-1.fc18.x86_64.rpm
-rw-r--r-- 1 root root 309340 Jan 31 17:23 maildrop-2.6.0-1.18.x86_64.rpm
-rw-r--r-- 1 root root 805928 Jan 31 17:23 maildrop-debuginfo-2.6.0-1.18.x86_64.rpm
-rw-r--r-- 1 root root 105756 Jan 31 17:23 maildrop-devel-2.6.0-1.18.x86_64.rpm
-rw-r--r-- 1 root root  66416 Jan 31 17:23 maildrop-man-2.6.0-1.18.x86_64.rpm
[[email protected] downloads]$
Sekarang Anda dapat menginstal maildrop seperti ini:
sudo rpm -ivh /root/rpmbuild/RPMS/x86_64/maildrop-2.6.0-1.18.x86_64.rpm
Setelah Anda mengkompilasi dan menginstal semua paket yang dibutuhkan, Anda dapat menjadi root kembali dengan mengetik
exit
5 Terapkan Patch Kuota Ke Postfix
Kita harus mendapatkan rpm source Postfix, menambalnya dengan patch kuota, membangun paket rpm Postfix baru dan menginstalnya.
cd /usr/src
wget http://ftp-stud.fht-esslingen.de/pub/Mirrors/fedora/linux/releases/18/Everything/source/SRPMS/p/postfix-2.9.4-3.fc18.src.rpm
rpm -ivh postfix-2.9.4-3.fc18.src.rpm
Perintah terakhir akan menampilkan beberapa peringatan yang dapat Anda abaikan:
warning: user mockbuild does not exist - using root
warning: group mockbuild does not exist - using root
cd /root/rpmbuild/SOURCES
wget http://vda.sourceforge.net/VDA/postfix-vda-v11-2.9.4.patch
cd /root/rpmbuild/SPECS/
Sekarang kita harus mengedit file postfix.spec:
vi postfix.spec
Tambahkan Patch0:postfix-vda-v11-2.9.4.patch ke bait # Patches, dan %patch0 -p1 -b .vda-v11 ke bait %setup -q:
[...] # Patches Patch0: postfix-vda-v11-2.9.4.patch Patch1: postfix-2.7.0-config.patch Patch2: postfix-2.6.1-files.patch Patch3: postfix-alternatives.patch Patch8: postfix-large-fs.patch Patch9: pflogsumm-1.1.3-datecalc.patch [...] %prep %setup -q # Apply obligatory patches %patch0 -p1 -b .vda-v11 %patch1 -p1 -b .config %patch2 -p1 -b .files %patch3 -p1 -b .alternatives %patch8 -p1 -b .large-fs [...] |
Sebelum kita membangun paket Postfix baru, kita perlu menginstal persyaratannya libdb-devel - dan karena libdb-devel bertentangan dengan db4-devel, kita harus menghapus paket itu terlebih dahulu:
yum remove db4-devel
yum install libdb-devel
Kemudian kami membangun paket rpm Postfix baru kami dengan kuota dan dukungan MySQL:
rpmbuild -ba postfix.spec
Paket rpm Postfix kami dibuat di /root/rpmbuild/RPMS/x86_64 (/root/rpmbuild/RPMS/i386 jika Anda menggunakan sistem i386), jadi kami pergi ke sana:
cd /root/rpmbuild/RPMS/x86_64
Perintah
ls -l
menunjukkan kepada Anda paket yang tersedia:
[[email protected] x86_64]# ls -l
total 10504
-rw-r--r-- 1 root root  140580 Jan 31 17:14 courier-authlib-0.65.0-1.fc18.x86_64.rpm
-rw-r--r-- 1 root root  324148 Jan 31 17:14 courier-authlib-debuginfo-0.65.0-1.fc18.x86_64.rpm
-rw-r--r-- 1 root root   38928 Jan 31 17:14 courier-authlib-devel-0.65.0-1.fc18.x86_64.rpm
-rw-r--r-- 1 root root   18756 Jan 31 17:14 courier-authlib-ldap-0.65.0-1.fc18.x86_64.rpm
-rw-r--r-- 1 root root   13044 Jan 31 17:14 courier-authlib-mysql-0.65.0-1.fc18.x86_64.rpm
-rw-r--r-- 1 root root   14208 Jan 31 17:14 courier-authlib-pgsql-0.65.0-1.fc18.x86_64.rpm
-rw-r--r-- 1 root root    9356 Jan 31 17:14 courier-authlib-pipe-0.65.0-1.fc18.x86_64.rpm
-rw-r--r-- 1 root root   11696 Jan 31 17:14 courier-authlib-sqlite-0.65.0-1.fc18.x86_64.rpm
-rw-r--r-- 1 root root   37580 Jan 31 17:14 courier-authlib-userdb-0.65.0-1.fc18.x86_64.rpm
-rw-r--r-- 1 root root  309340 Jan 31 17:23 maildrop-2.6.0-1.18.x86_64.rpm
-rw-r--r-- 1 root root  805928 Jan 31 17:23 maildrop-debuginfo-2.6.0-1.18.x86_64.rpm
-rw-r--r-- 1 root root  105756 Jan 31 17:23 maildrop-devel-2.6.0-1.18.x86_64.rpm
-rw-r--r-- 1 root root   66416 Jan 31 17:23 maildrop-man-2.6.0-1.18.x86_64.rpm
-rw-r--r-- 1 root root 2553200 Jan 31 17:30 postfix-2.9.4-3.fc18.x86_64.rpm
-rw-r--r-- 1 root root 6203284 Jan 31 17:30 postfix-debuginfo-2.9.4-3.fc18.x86_64.rpm
-rw-r--r-- 1 root root   66108 Jan 31 17:30 postfix-perl-scripts-2.9.4-3.fc18.x86_64.rpm
[[email protected] x86_64]#
Pilih paket Postfix dan instal seperti ini:
rpm -ivh postfix-2.9.4-3.fc18.x86_64.rpm
6 Mengatur Kata Sandi MySQL Dan Konfigurasi phpMyAdmin
Mulai MySQL:
systemctl enable mysqld.service
systemctl start mysqld.service
Kemudian atur kata sandi untuk akun root MySQL:
mysql_secure_installation
[[email protected] ~]# mysql_secure_installation
CATATAN: MENJALANKAN SEMUA BAGIAN SCRIPT INI DIREKOMENDASIKAN UNTUK SEMUA MySQL
SERVER DI PRODUKSI ! HARAP BACA SETIAP LANGKAH DENGAN SEKSAMA!
Untuk masuk ke MySQL guna mengamankannya, kami memerlukan kata sandi
saat ini untuk pengguna root. Jika Anda baru menginstal MySQL, dan
belum menyetel sandi root, sandi akan kosong,
jadi Anda cukup tekan enter di sini.
Enter sandi saat ini untuk root (masukkan untuk none): <-- ENTER
Oke, sandi berhasil digunakan, lanjutkan...
Menyetel sandi root memastikan bahwa tidak ada yang dapat masuk ke MySQL
root pengguna tanpa otorisasi yang benar.
Tetapkan sandi root? [Y/n] <-- ENTER
Sandi baru: <-- yourrootsqlpassword
Masukkan kembali sandi baru: <-- yourrootsqlpassword
Sandi berhasil diperbarui!
Memuat ulang tabel hak istimewa. .
... Berhasil!
Secara default, penginstalan MySQL memiliki pengguna anonim yang memungkinkan siapa saja
masuk ke MySQL tanpa harus memiliki akun pengguna dibuat untuk
mereka. Ini dimaksudkan hanya untuk pengujian, dan untuk membuat pemasangan
menjadi sedikit lebih lancar. Anda harus menghapusnya sebelum berpindah ke
lingkungan produksi.
Hapus pengguna anonim? [Y/n] <-- ENTER
... Berhasil!
Biasanya, root hanya diizinkan untuk terhubung dari 'localhost'. Ini
memastikan bahwa seseorang tidak dapat menebak kata sandi root dari jaringan.
Larang login root dari jarak jauh? [Y/n] <-- ENTER
... Sukses!
Secara default, MySQL dilengkapi dengan database bernama 'test' yang dapat
akses siapa saja. Ini juga dimaksudkan hanya untuk pengujian, dan harus dihapus
sebelum dipindahkan ke lingkungan produksi.
Hapus database pengujian dan akses ke sana? [Y/n] <-- MASUKKAN
- Menghapus basis data pengujian...
... Berhasil!
- Menghapus hak istimewa pada basis data pengujian...
... Berhasil !
Memuat ulang tabel hak istimewa akan memastikan bahwa semua perubahan yang dibuat sejauh ini
akan segera berlaku.
Muat ulang tabel hak istimewa sekarang? [Y/n] <-- ENTER
... Berhasil!
Membersihkan...
Selesai! Jika Anda telah menyelesaikan semua langkah di atas, penginstalan MySQL
Anda seharusnya sekarang aman.
Terima kasih telah menggunakan MySQL!
[[ email dilindungi] ~]#
Sekarang kita mengkonfigurasi phpMyAdmin. Kami mengubah konfigurasi Apache sehingga phpMyAdmin mengizinkan koneksi tidak hanya dari localhost (dengan mengomentari semua yang ada di bait
vi /etc/httpd/conf.d/phpMyAdmin.conf
# phpMyAdmin - Web based MySQL browser written in php
#
# Allows only localhost by default
#
# But allowing phpMyAdmin to anyone other than localhost should be considered
# dangerous unless properly secured by SSL

Alias /phpMyAdmin /usr/share/phpMyAdmin
Alias /phpmyadmin /usr/share/phpMyAdmin

<Directory /usr/share/phpMyAdmin/>
#   <IfModule mod_authz_core.c>
#     # Apache 2.4
#     <RequireAny>
#       Require ip 127.0.0.1
#       Require ip ::1
#     </RequireAny>
#   </IfModule>
#   <IfModule !mod_authz_core.c>
#     # Apache 2.2
#     Order Deny,Allow
#     Deny from All
#     Allow from 127.0.0.1
#     Allow from ::1
#   </IfModule>
   Require all granted
</Directory>

<Directory /usr/share/phpMyAdmin/setup/>
   <IfModule mod_authz_core.c>
     # Apache 2.4
     <RequireAny>
       Require ip 127.0.0.1
       Require ip ::1
     </RequireAny>
   </IfModule>
   <IfModule !mod_authz_core.c>
     # Apache 2.2
     Order Deny,Allow
     Deny from All
     Allow from 127.0.0.1
     Allow from ::1
   </IfModule>
</Directory>

# These directories do not require access over HTTP - taken from the original
# phpMyAdmin upstream tarball
#
<Directory /usr/share/phpMyAdmin/libraries/>
    Order Deny,Allow
    Deny from All
    Allow from None
</Directory>

<Directory /usr/share/phpMyAdmin/setup/lib/>
    Order Deny,Allow
    Deny from All
    Allow from None
</Directory>

<Directory /usr/share/phpMyAdmin/setup/frames/>
    Order Deny,Allow
    Deny from All
    Allow from None
</Directory>

# This configuration prevents mod_security at phpMyAdmin directories from
# filtering SQL etc.  This may break your mod_security implementation.
#
#<IfModule mod_security.c>
#    <Directory /usr/share/phpMyAdmin/>
#        SecRuleInheritance Off
#    </Directory>
#</IfModule> |
Kemudian kami membuat tautan startup sistem untuk Apache dan memulainya:
systemctl enable httpd.service
systemctl start httpd.service
Sekarang Anda dapat mengarahkan browser Anda ke http://server1.example.com/phpMyAdmin/ atau http://192.168.0.100/phpMyAdmin/ dan masuk dengan nama pengguna root dan kata sandi MySQL root Anda yang baru.
7 Membuat Database MySQL Untuk Postfix/Courier
Kami membuat database yang disebut email:
mysqladmin -u root -p create mail
Selanjutnya, kita pergi ke shell MySQL:
mysql -u root -p
Di shell MySQL, kami membuat pengguna mail_admin dengan passwort mail_admin_password (ganti dengan kata sandi Anda sendiri) yang memiliki hak istimewa SELECT,INSERT,UPDATE,DELETE pada database email. Pengguna ini akan digunakan oleh Postfix dan Courier untuk terhubung ke database email:
GRANT SELECT, INSERT, UPDATE, DELETE ON mail.* TO 'mail_admin'@'localhost' IDENTIFIED BY 'mail_admin_password';
GRANT SELECT, INSERT, UPDATE, DELETE ON mail.* TO 'mail_admin'@'localhost.localdomain' IDENTIFIED BY 'mail_admin_password';
FLUSH PRIVILEGES;
Masih di shell MySQL, kami membuat tabel yang dibutuhkan Postfix dan Courier:
USE mail;
CREATE TABLE domains (
domain varchar(50) NOT NULL,
PRIMARY KEY (domain) )
ENGINE=MyISAM;
CREATE TABLE forwardings (
source varchar(80) NOT NULL,
destination TEXT NOT NULL,
PRIMARY KEY (source) )
ENGINE=MyISAM;
CREATE TABLE users (
email varchar(80) NOT NULL,
password varchar(20) NOT NULL,
quota bigint(20) DEFAULT '10485760',
PRIMARY KEY (email)
) ENGINE=MyISAM;
CREATE TABLE transport (
domain varchar(128) NOT NULL default '',
transport varchar(128) NOT NULL default '',
UNIQUE KEY domain (domain)
) ENGINE=MyISAM;
quit;
Seperti yang mungkin Anda perhatikan, dengan quit; perintah kami telah meninggalkan shell MySQL dan kembali ke shell Linux.
domain tabel akan menyimpan setiap domain virtual tempat Postfix harus menerima email (mis. example.com ).
| domain |
| contoh.com |
Penerusan tabel adalah untuk aliasing satu alamat email ke yang lain, mis. teruskan email untuk [email protected] ke .
| sumber | tujuan |
| [dilindungi email] | [dilindungi email] |
pengguna tabel menyimpan semua pengguna virtual (yaitu alamat email, karena alamat email dan nama pengguna sama) dan kata sandi (dalam terenkripsi form!) dan nilai kuota untuk setiap kotak surat (dalam contoh ini nilai defaultnya adalah 10485760 byte yang berarti 10 MB).
| sandi | kuota | |
| [dilindungi email] | No9.E4skNvGa. ("rahasia" dalam bentuk terenkripsi) | 10485760 |
transportasi tabel adalah opsional, ini untuk pengguna tingkat lanjut. Ini memungkinkan untuk meneruskan email untuk pengguna tunggal, seluruh domain atau semua email ke server lain. Misalnya,
| domain | transportasi |
| contoh.com | smtp:[1.2.3.4] |
akan meneruskan semua email untuk example.com melalui protokol smtp ke server dengan alamat IP 1.2.3.4 (tanda kurung siku [] berarti "jangan mencari data MX DNS" (yang masuk akal untuk alamat IP...). Jika Anda menggunakan nama domain yang sepenuhnya memenuhi syarat (FQDN), Anda tidak akan menggunakan tanda kurung siku.).
8 Konfigurasi Postfix
Sekarang kita harus memberitahu Postfix di mana ia dapat menemukan semua informasi dalam database. Oleh karena itu kita harus membuat enam file teks. Anda akan melihat bahwa saya memberi tahu Postfix untuk terhubung ke MySQL pada alamat IP 127.0.0.1 bukannya localhost . Ini karena Postfix berjalan di chroot jail dan tidak memiliki akses ke soket MySQL yang akan coba disambungkan jika saya memberi tahu Postfix untuk menggunakan localhost . Jika saya menggunakan 127.0.0.1 Postfix menggunakan jaringan TCP untuk terhubung ke MySQL yang tidak menjadi masalah bahkan dalam chroot jail (alternatifnya adalah memindahkan soket MySQL ke dalam chroot jail yang menyebabkan beberapa masalah lain).
Sekarang mari kita buat enam file teks kita.
vi /etc/postfix/mysql-virtual_domains.cf
user = mail_admin password = mail_admin_password dbname = mail query = SELECT domain AS virtual FROM domains WHERE domain='%s' hosts = 127.0.0.1 |
vi /etc/postfix/mysql-virtual_forwardings.cf
user = mail_admin password = mail_admin_password dbname = mail query = SELECT destination FROM forwardings WHERE source='%s' hosts = 127.0.0.1 |
vi /etc/postfix/mysql-virtual_mailboxes.cf
user = mail_admin password = mail_admin_password dbname = mail query = SELECT CONCAT(SUBSTRING_INDEX(email,'@',-1),'/',SUBSTRING_INDEX(email,'@',1),'/') FROM users WHERE email='%s' hosts = 127.0.0.1 |
vi /etc/postfix/mysql-virtual_email2email.cf
user = mail_admin password = mail_admin_password dbname = mail query = SELECT email FROM users WHERE email='%s' hosts = 127.0.0.1 |
vi /etc/postfix/mysql-virtual_transports.cf
user = mail_admin password = mail_admin_password dbname = mail query = SELECT transport FROM transport WHERE domain='%s' hosts = 127.0.0.1 |
vi /etc/postfix/mysql-virtual_mailbox_limit_maps.cf
user = mail_admin password = mail_admin_password dbname = mail query = SELECT quota FROM users WHERE email='%s' hosts = 127.0.0.1 |
chmod o= /etc/postfix/mysql-virtual_*.cf
chgrp postfix /etc/postfix/mysql-virtual_*.cf
Sekarang kita membuat pengguna dan grup bernama vmail dengan direktori home /home/vmail . Di sinilah semua kotak surat akan disimpan.
groupadd -g 5000 vmail
useradd -g vmail -u 5000 vmail -d /home/vmail -m
Selanjutnya kita melakukan beberapa konfigurasi Postfix. Pastikan Anda mengganti server1.example.com dengan FQDN yang valid, jika tidak, Postfix Anda mungkin tidak berfungsi dengan baik!
postconf -e 'myhostname = server1.example.com'
postconf -e 'mydestination = server1.example.com, localhost, localhost.localdomain'
postconf -e 'mynetworks = 127.0.0.0/8'
postconf -e 'virtual_alias_domains ='
postconf -e ' virtual_alias_maps = proxy:mysql:/etc/postfix/mysql-virtual_forwardings.cf, mysql:/etc/postfix/mysql-virtual_email2email.cf'
postconf -e 'virtual_mailbox_domains = proxy:mysql:/etc/postfix/mysql-virtual_domains.cf'
postconf -e 'virtual_mailbox_maps = proxy:mysql:/etc/postfix/mysql-virtual_mailboxes.cf'
postconf -e 'virtual_mailbox_base = /home/vmail'
postconf -e 'virtual_uid_maps = static:5000'
postconf -e 'virtual_gid_maps = static:5000'
postconf -e 'smtpd_sasl_auth_enable = yes'
postconf -e 'broken_sasl_auth_clients = yes'
postconf -e 'smtpd_sasl_authenticated_header = yes'
postconf -e 'smtpd_recipient_restrictions = permit_mynetworks, permit_sasl_authenticated, reject_unauth_destination'
postconf -e 'smtpd_use_tls = yes'
postconf -e 'smtpd_tls_cert_file = /etc/postfix/smtpd.cert'
postconf -e 'smtpd_tls_key_file = /etc/postfix/smtpd.key'
postconf -e 'transport_maps = proxy:mysql:/etc/postfix/mysql-virtual_transports.cf'
postconf -e 'virtual_create_maildirsize = yes'
postconf -e 'virtual_maildir_extended = yes'
postconf -e 'virtual_mailbox_limit_maps = proxy:mysql:/etc/postfix/mysql-virtual_mailbox_limit_maps.cf'
postconf -e 'virtual_mailbox_limit_override = yes'
postconf -e 'virtual_maildir_limit_message = "The user you are trying to reach is over quota."'
postconf -e 'virtual_overquota_bounce = yes'
postconf -e 'proxy_read_maps = $local_recipient_maps $mydestination $virtual_alias_maps $virtual_alias_domains $virtual_mailbox_maps $virtual_mailbox_domains $relay_recipient_maps $relay_domains $canonical_maps $sender_canonical_maps $recipient_canonical_maps $relocated_maps $transport_maps $mynetworks $virtual_mailbox_limit_maps'
postconf -e 'inet_interfaces = all'
Setelah itu kita buat sertifikat SSL yang dibutuhkan untuk TLS :
cd /etc/postfix
openssl req -new -outform PEM -out smtpd.cert -newkey rsa:2048 -nodes -keyout smtpd.key -keyform PEM -days 365 -x509
Nama Negara (kode 2 huruf) [XX]:<-- Masukkan Nama Negara Anda (mis., "DE").
Nama Negara Bagian atau Provinsi (nama lengkap) []:<-- Masukkan Nama Negara Bagian atau Provinsi Anda .
Nama Lokalitas (mis., kota) [Kota Bawaan]:<-- Masukkan Kota Anda.
Nama Organisasi (mis., perusahaan) [Perusahaan Bawaan Ltd]:<-- Masukkan Nama Organisasi Anda (mis. , nama perusahaan Anda).
Nama Unit Organisasi (mis., bagian) []:<-- Masukkan Nama Unit Organisasi Anda (mis. "Departemen TI").
Nama Umum (mis., nama Anda atau nama host server Anda) []:<-- Masukkan Nama Domain yang Sepenuhnya Memenuhi Syarat dari sistem (mis. "server1.example.com").
Alamat Email []:<-- Masukkan Alamat Email Anda.
Kemudian ubah izin smtpd.key:
chmod o= /etc/postfix/smtpd.key
9 Konfigurasi Saslauthd
Edit /etc/sasl2/smtpd.conf. Seharusnya terlihat seperti ini:
vi /etc/sasl2/smtpd.conf
pwcheck_method: authdaemond log_level: 3 mech_list: PLAIN LOGIN authdaemond_path:/var/spool/authdaemon/socket |
Kemudian matikan Sendmail dan mulai Postfix, saslauthd, dan kurir-authlib:
chmod 755 /var/spool/authdaemon
systemctl enable courier-authlib.service
systemctl start courier-authlib.service
systemctl disable sendmail.service
systemctl enable postfix.service
systemctl enable saslauthd.service
systemctl stop sendmail.service
systemctl start postfix.service
systemctl start saslauthd.service
10 Konfigurasi Kurir
Sekarang kita harus memberi tahu Courier bahwa itu harus mengautentikasi terhadap database MySQL kita. Pertama, edit /etc/authlib/authdaemonrc dan ubah nilai authmodulelist sehingga terbaca
vi /etc/authlib/authdaemonrc
[...] authmodulelist="authmysql" #authmodulelist="authuserdb authpam authpgsql authldap authmysql authsqlite authcustom authpipe" [...] |
Then edit /etc/authlib/authmysqlrc. It should look exactly like this (again, make sure to fill in the correct database details):
cp /etc/authlib/authmysqlrc /etc/authlib/authmysqlrc_orig
cat /dev/null > /etc/authlib/authmysqlrc
vi /etc/authlib/authmysqlrc
MYSQL_SERVER localhost MYSQL_USERNAME mail_admin MYSQL_PASSWORD mail_admin_password MYSQL_PORT 0 MYSQL_DATABASE mail MYSQL_USER_TABLE users MYSQL_CRYPT_PWFIELD password #MYSQL_CLEAR_PWFIELD password MYSQL_UID_FIELD 5000 MYSQL_GID_FIELD 5000 MYSQL_LOGIN_FIELD email MYSQL_HOME_FIELD "/home/vmail" MYSQL_MAILDIR_FIELD CONCAT(SUBSTRING_INDEX(email,'@',-1),'/',SUBSTRING_INDEX(email,'@',1),'/') #MYSQL_NAME_FIELD MYSQL_QUOTA_FIELD quota |
Then restart Courier:
systemctl enable courier-imap.service
systemctl restart courier-authlib.service
systemctl restart courier-imap.service
When courier-imap is started for the first time, it automatically creates the certificate files /usr/lib/courier-imap/share/imapd.pem and /usr/lib/courier-imap/share/pop3d.pem from the /usr/lib/courier-imap/etc/imapd.cnf and /usr/lib/courier-imap/etc/pop3d.cnf files. Because the .cnf files contain the line CN=localhost, but our server is named server1.example.com, the certificates might cause problems when you use TLS connections. To solve this, we delete both certificates...
cd /usr/lib/courier-imap/share
rm -f imapd.pem
rm -f pop3d.pem
... and replace the CN=localhost lines in /usr/lib/courier-imap/etc/imapd.cnf and /usr/lib/courier-imap/etc/pop3d.cnf with CN=server1.example.com:
vi /usr/lib/courier-imap/etc/imapd.cnf
[...] CN=server1.example.com [...] |
vi /usr/lib/courier-imap/etc/pop3d.cnf
[...] CN=server1.example.com [...] |
Then we recreate both certificates...
./mkimapdcert
./mkpop3dcert
... and restart courier-authlib and courier-imap:
systemctl restart courier-authlib.service
systemctl restart courier-imap.service
By running
telnet localhost pop3
you can see if your POP3 server is working correctly. It should give back +OK Hello there . (type quit to get back to the Linux shell):
[[email protected] share]# telnet localhost pop3
Trying ::1...
Connected to localhost.
Escape character is '^]'.
+OK Hello there.
<-- quit
+OK Better luck next time.
Connection closed by foreign host.
[[email protected] share]#
11 Modify /etc/aliases
Now we should open /etc/aliases. Make sure that postmaster points to root and root to your own username or your email address, e.g. like this:
vi /etc/aliases
[...] postmaster: root root: [email protected] [...] |
or like this (if administrator is your own username):
[...] postmaster: root root: administrator [...] |
Whenever you modify /etc/aliases, you must run
newaliases
setelah itu dan mulai ulang Postfix:
systemctl restart postfix.service
12 Install Amavisd-new, SpamAssassin And ClamAV
To install amavisd-new, spamassassin and clamav, run the following command:
yum install amavisd-new spamassassin clamav clamav-data clamav-server clamav-server-sysvinit clamav-update unzip bzip2 pax
Now we must edit /etc/amavisd/amavisd.conf.
vi /etc/amavisd/amavisd.conf
In this file we change six places:
1) Change
$mydomain = 'example.com'; # a convenient default for other settings |
to
$mydomain = 'localhost'; #$mydomain = 'example.com'; # a convenient default for other settings |
2) Change
$sa_tag_level_deflt = 2.0; # add spam info headers if at, or above that level $sa_tag2_level_deflt = 6.2; # add 'spam detected' headers at that level $sa_kill_level_deflt = 6.9; # triggers spam evasive actions (e.g. blocks mail) $sa_dsn_cutoff_level = 10; # spam level beyond which a DSN is not sent |
to
$sa_tag_level_deflt = 2.0; # add spam info headers if at, or above that level $sa_tag2_level_deflt = 4.0; # add 'spam detected' headers at that level $sa_kill_level_deflt = $sa_tag2_level_deflt; # triggers spam evasive actions (e.g. blocks mail) $sa_dsn_cutoff_level = 10; # spam level beyond which a DSN is not sent #$sa_tag_level_deflt = 2.0; # add spam info headers if at, or above that level #$sa_tag2_level_deflt = 6.2; # add 'spam detected' headers at that level #$sa_kill_level_deflt = 6.9; # triggers spam evasive actions (e.g. blocks mail) #$sa_dsn_cutoff_level = 10; # spam level beyond which a DSN is not sent |
(Of course, you can adjust the spam scores to your liking.)
3) Change
# @lookup_sql_dsn = # ( ['DBI:mysql:database=mail;host=127.0.0.1;port=3306', 'user1', 'passwd1'], # ['DBI:mysql:database=mail;host=host2', 'username2', 'password2'], # ["DBI:SQLite:dbname=$MYHOME/sql/mail_prefs.sqlite", '', ''] ); # @storage_sql_dsn = @lookup_sql_dsn; # none, same, or separate database |
to
# @lookup_sql_dsn =
#   ( ['DBI:mysql:database=mail;host=127.0.0.1;port=3306', 'user1', 'passwd1'],
#     ['DBI:mysql:database=mail;host=host2', 'username2', 'password2'],
#     ["DBI:SQLite:dbname=$MYHOME/sql/mail_prefs.sqlite", '', ''] );
# @storage_sql_dsn = @lookup_sql_dsn;  # none, same, or separate database

@lookup_sql_dsn =
   ( ['DBI:mysql:database=mail;host=127.0.0.1;port=3306', 'mail_admin', 'mail_admin_password'] );

$sql_select_policy = 'SELECT "Y" as local FROM domains WHERE CONCAT("@",domain) IN (%k)';

$sql_select_white_black_list = undef;  # undef disables SQL white/blacklisting

$recipient_delimiter = '+';                # (default is '+')

$replace_existing_extension = 1;        # (default is false)

$localpart_is_case_sensitive = 0; # (default is false) |
(Make sure you fill in the correct database details!)
4) Change
# $recipient_delimiter = '+'; # undef disables address extensions altogether # when enabling addr extensions do also Postfix/main.cf: recipient_delimiter=+ |
to
$recipient_delimiter = undef; # undef disables address extensions altogether # $recipient_delimiter = '+'; # undef disables address extensions altogether # when enabling addr extensions do also Postfix/main.cf: recipient_delimiter=+ |
5) Change
$final_virus_destiny = D_DISCARD; $final_banned_destiny = D_BOUNCE; $final_spam_destiny = D_DISCARD; $final_bad_header_destiny = D_BOUNCE; |
to
$final_virus_destiny = D_REJECT; $final_banned_destiny = D_REJECT; $final_spam_destiny = D_PASS; $final_bad_header_destiny = D_PASS; #$final_virus_destiny = D_DISCARD; #$final_banned_destiny = D_BOUNCE; #$final_spam_destiny = D_DISCARD; #$final_bad_header_destiny = D_BOUNCE; |
(Of course, it's up to you to decide what should happen with spam and viruses. I decide to accept spam (D_PASS) so that Spam can be filtered in my email client with a simple filter rule (based on the subject that gets rewritten by amavisd-new if it thinks a mail is spam). The allowed actions (D_PASS, D_DISCARD, D_BOUNCE, and D_REJECT) are explained here:http://www.ijs.si/software/amavisd/amavisd-new-docs.html#actions)
6) At the end of the file, right before the 1; # insure a defined return value line, add the line $pax='pax';:
$pax='pax'; 1; # insure a defined return value |
After my changes, /etc/amavisd/amavisd.conf looks like this:
use strict;

# a minimalistic configuration file for amavisd-new with all necessary settings
#
#   see amavisd.conf-default for a list of all variables with their defaults;
#   for more details see documentation in INSTALL, README_FILES/*
#   and at http://www.ijs.si/software/amavisd/amavisd-new-docs.html


# COMMONLY ADJUSTED SETTINGS:

# @bypass_virus_checks_maps = (1);  # controls running of anti-virus code
# @bypass_spam_checks_maps  = (1);  # controls running of anti-spam code
# $bypass_decode_parts = 1;         # controls running of decoders&dearchivers

$max_servers = 2;            # num of pre-forked children (2..30 is common), -m
$daemon_user  = 'amavis';    # (no default;  customary: vscan or amavis), -u
$daemon_group = 'amavis';    # (no default;  customary: vscan or amavis), -g

$mydomain = 'localhost';
#$mydomain = 'example.com';   # a convenient default for other settings

$MYHOME = '/var/spool/amavisd';   # a convenient default for other settings, -H
$TEMPBASE = "$MYHOME/tmp";   # working directory, needs to exist, -T
$ENV{TMPDIR} = $TEMPBASE;    # environment variable TMPDIR, used by SA, etc.
$QUARANTINEDIR = undef;      # -Q
# $quarantine_subdir_levels = 1;  # add level of subdirs to disperse quarantine
# $release_format = 'resend';     # 'attach', 'plain', 'resend'
# $report_format  = 'arf';        # 'attach', 'plain', 'resend', 'arf'

# $daemon_chroot_dir = $MYHOME;   # chroot directory or undef, -R

$db_home   = "$MYHOME/db";        # dir for bdb nanny/cache/snmp databases, -D
# $helpers_home = "$MYHOME/var";  # working directory for SpamAssassin, -S
$lock_file = "/var/run/amavisd/amavisd.lock";  # -L
$pid_file  = "/var/run/amavisd/amavisd.pid";   # -P
#NOTE: create directories $MYHOME/tmp, $MYHOME/var, $MYHOME/db manually

$log_level = 0;              # verbosity 0..5, -d
$log_recip_templ = undef;    # disable by-recipient level-0 log entries
$do_syslog = 1;              # log via syslogd (preferred)
$syslog_facility = 'mail';   # Syslog facility as a string
           # e.g.: mail, daemon, user, local0, ... local7

$enable_db = 1;              # enable use of BerkeleyDB/libdb (SNMP and nanny)
# $enable_zmq = 1;           # enable use of ZeroMQ (SNMP and nanny)
$nanny_details_level = 2;    # nanny verbosity: 1: traditional, 2: detailed
$enable_dkim_verification = 1;  # enable DKIM signatures verification
$enable_dkim_signing = 1;    # load DKIM signing code, keys defined by dkim_key

@local_domains_maps = ( [".$mydomain"] );  # list of all local domains

@mynetworks = qw( 127.0.0.0/8 [::1] [FE80::]/10 [FEC0::]/10
                  10.0.0.0/8 172.16.0.0/12 192.168.0.0/16 );

$unix_socketname = "$MYHOME/amavisd.sock";  # amavisd-release or amavis-milter
               # option(s) -p overrides $inet_socket_port and $unix_socketname

$inet_socket_port = 10024;   # listen on this local TCP port(s)
# $inet_socket_port = [10024,10026];  # listen on multiple TCP ports

$policy_bank{'MYNETS'} = {   # mail originating from @mynetworks
  originating => 1,  # is true in MYNETS by default, but let's make it explicit
  os_fingerprint_method => undef,  # don't query p0f for internal clients
};

# it is up to MTA to re-route mail from authenticated roaming users or
# from internal hosts to a dedicated TCP port (such as 10026) for filtering
$interface_policy{'10026'} = 'ORIGINATING';

$policy_bank{'ORIGINATING'} = {  # mail supposedly originating from our users
  originating => 1,  # declare that mail was submitted by our smtp client
  allow_disclaimers => 1,  # enables disclaimer insertion if available
  # notify administrator of locally originating malware
  virus_admin_maps => ["virusalert\@$mydomain"],
  spam_admin_maps  => ["virusalert\@$mydomain"],
  warnbadhsender   => 1,
  # forward to a smtpd service providing DKIM signing service
  forward_method => 'smtp:[127.0.0.1]:10027',
  # force MTA conversion to 7-bit (e.g. before DKIM signing)
  smtpd_discard_ehlo_keywords => ['8BITMIME'],
  bypass_banned_checks_maps => [1],  # allow sending any file names and types
  terminate_dsn_on_notify_success => 0,  # don't remove NOTIFY=SUCCESS option
};

$interface_policy{'SOCK'} = 'AM.PDP-SOCK'; # only applies with $unix_socketname

# Use with amavis-release over a socket or with Petr Rehor's amavis-milter.c
# (with amavis-milter.c from this package or old amavis.c client use 'AM.CL'):
$policy_bank{'AM.PDP-SOCK'} = {
  protocol => 'AM.PDP',
  auth_required_release => 0,  # do not require secret_id for amavisd-release
};

$sa_tag_level_deflt  = 2.0;  # add spam info headers if at, or above that level
$sa_tag2_level_deflt = 4.0;  # add 'spam detected' headers at that level
$sa_kill_level_deflt = $sa_tag2_level_deflt;  # triggers spam evasive actions (e.g. blocks mail)
$sa_dsn_cutoff_level = 10;   # spam level beyond which a DSN is not sent
#$sa_tag_level_deflt  = 2.0;  # add spam info headers if at, or above that level
#$sa_tag2_level_deflt = 6.2;  # add 'spam detected' headers at that level
#$sa_kill_level_deflt = 6.9;  # triggers spam evasive actions (e.g. blocks mail)
#$sa_dsn_cutoff_level = 10;   # spam level beyond which a DSN is not sent
$sa_crediblefrom_dsn_cutoff_level = 18; # likewise, but for a likely valid From
# $sa_quarantine_cutoff_level = 25; # spam level beyond which quarantine is off
$penpals_bonus_score = 8;    # (no effect without a @storage_sql_dsn database)
$penpals_threshold_high = $sa_kill_level_deflt;  # don't waste time on hi spam
$bounce_killer_score = 100;  # spam score points to add for joe-jobbed bounces

$sa_mail_body_size_limit = 400*1024; # don't waste time on SA if mail is larger
$sa_local_tests_only = 0;    # only tests which do not require internet access?

# @lookup_sql_dsn =
#   ( ['DBI:mysql:database=mail;host=127.0.0.1;port=3306', 'user1', 'passwd1'],
#     ['DBI:mysql:database=mail;host=host2', 'username2', 'password2'],
#     ["DBI:SQLite:dbname=$MYHOME/sql/mail_prefs.sqlite", '', ''] );
# @storage_sql_dsn = @lookup_sql_dsn;  # none, same, or separate database

@lookup_sql_dsn =
   ( ['DBI:mysql:database=mail;host=127.0.0.1;port=3306', 'mail_admin', 'mail_admin_password'] );

$sql_select_policy = 'SELECT "Y" as local FROM domains WHERE CONCAT("@",domain) IN (%k)';

$sql_select_white_black_list = undef;  # undef disables SQL white/blacklisting

$recipient_delimiter = '+';                # (default is '+')

$replace_existing_extension = 1;        # (default is false)

$localpart_is_case_sensitive = 0;        # (default is false)

# $timestamp_fmt_mysql = 1; # if using MySQL *and* msgs.time_iso is TIMESTAMP;
#   defaults to 0, which is good for non-MySQL or if msgs.time_iso is CHAR(16)

$virus_admin               = undef;                    # notifications recip.

$mailfrom_notify_admin     = undef;                    # notifications sender
$mailfrom_notify_recip     = undef;                    # notifications sender
$mailfrom_notify_spamadmin = undef;                    # notifications sender
$mailfrom_to_quarantine = ''; # null return path; uses original sender if undef

@addr_extension_virus_maps      = ('virus');
@addr_extension_banned_maps     = ('banned');
@addr_extension_spam_maps       = ('spam');
@addr_extension_bad_header_maps = ('badh');
$recipient_delimiter = undef;  # undef disables address extensions altogether
# $recipient_delimiter = '+';  # undef disables address extensions altogether
# when enabling addr extensions do also Postfix/main.cf: recipient_delimiter=+

$path = '/usr/local/sbin:/usr/local/bin:/usr/sbin:/sbin:/usr/bin:/bin';
# $dspam = 'dspam';

$MAXLEVELS = 14;
$MAXFILES = 1500;
$MIN_EXPANSION_QUOTA =      100*1024;  # bytes  (default undef, not enforced)
$MAX_EXPANSION_QUOTA = 300*1024*1024;  # bytes  (default undef, not enforced)

$sa_spam_subject_tag = '***Spam*** ';
$defang_virus  = 1;  # MIME-wrap passed infected mail
$defang_banned = 1;  # MIME-wrap passed mail containing banned name
# for defanging bad headers only turn on certain minor contents categories:
$defang_by_ccat{CC_BADH.",3"} = 1;  # NUL or CR character in header
$defang_by_ccat{CC_BADH.",5"} = 1;  # header line longer than 998 characters
$defang_by_ccat{CC_BADH.",6"} = 1;  # header field syntax error


# OTHER MORE COMMON SETTINGS (defaults may suffice):

# $myhostname = 'host.example.com';  # must be a fully-qualified domain name!

# $notify_method  = 'smtp:[127.0.0.1]:10025';
# $forward_method = 'smtp:[127.0.0.1]:10025';  # set to undef with milter!

$final_virus_destiny      = D_REJECT;
$final_banned_destiny     = D_REJECT;
$final_spam_destiny       = D_PASS;
$final_bad_header_destiny = D_PASS;
#$final_virus_destiny      = D_DISCARD;
#$final_banned_destiny     = D_BOUNCE;
#$final_spam_destiny       = D_DISCARD;  #!!!  D_DISCARD / D_REJECT
#$final_bad_header_destiny = D_BOUNCE;
# $bad_header_quarantine_method = undef;

# $os_fingerprint_method = 'p0f:*:2345';  # to query p0f-analyzer.pl

## hierarchy by which a final setting is chosen:
##   policy bank (based on port or IP address) -> *_by_ccat
##   *_by_ccat (based on mail contents) -> *_maps
##   *_maps (based on recipient address) -> final configuration value


# SOME OTHER VARIABLES WORTH CONSIDERING (see amavisd.conf-default for all)

# $warnbadhsender,
# $warnvirusrecip, $warnbannedrecip, $warnbadhrecip, (or @warn*recip_maps)
#
# @bypass_virus_checks_maps, @bypass_spam_checks_maps,
# @bypass_banned_checks_maps, @bypass_header_checks_maps,
#
# @virus_lovers_maps, @spam_lovers_maps,
# @banned_files_lovers_maps, @bad_header_lovers_maps,
#
# @blacklist_sender_maps, @score_sender_maps,
#
# $clean_quarantine_method, $virus_quarantine_to, $banned_quarantine_to,
# $bad_header_quarantine_to, $spam_quarantine_to,
#
# $defang_bad_header, $defang_undecipherable, $defang_spam


# REMAINING IMPORTANT VARIABLES ARE LISTED HERE BECAUSE OF LONGER ASSIGNMENTS

@keep_decoded_original_maps = (new_RE(
  qr'^MAIL$',   # retain full original message for virus checking
  qr'^MAIL-UNDECIPHERABLE$', # recheck full mail if it contains undecipherables
  qr'^(ASCII(?! cpio)|text|uuencoded|xxencoded|binhex)'i,
# qr'^Zip archive data',     # don't trust Archive::Zip
));


$banned_filename_re = new_RE(

### BLOCKED ANYWHERE
# qr'^UNDECIPHERABLE$',  # is or contains any undecipherable components
  qr'^\.(exe-ms|dll)$',                   # banned file(1) types, rudimentary
# qr'^\.(exe|lha|cab|dll)$',              # banned file(1) types

### BLOCK THE FOLLOWING, EXCEPT WITHIN UNIX ARCHIVES:
# [ qr'^\.(gz|bz2)$'             => 0 ],  # allow any in gzip or bzip2
  [ qr'^\.(rpm|cpio|tar)$'       => 0 ],  # allow any in Unix-type archives

  qr'.\.(pif|scr)$'i,                     # banned extensions - rudimentary
# qr'^\.zip$',                            # block zip type

### BLOCK THE FOLLOWING, EXCEPT WITHIN ARCHIVES:
# [ qr'^\.(zip|rar|arc|arj|zoo)$'=> 0 ],  # allow any within these archives

  qr'^application/x-msdownload$'i,        # block these MIME types
  qr'^application/x-msdos-program$'i,
  qr'^application/hta$'i,

# qr'^message/partial$'i,         # rfc2046 MIME type
# qr'^message/external-body$'i,   # rfc2046 MIME type

# qr'^(application/x-msmetafile|image/x-wmf)$'i,  # Windows Metafile MIME type
# qr'^\.wmf$',                            # Windows Metafile file(1) type

  # block certain double extensions in filenames
  qr'^(?!cid:).*\.[^./]*[A-Za-z][^./]*\.\s*(exe|vbs|pif|scr|bat|cmd|com|cpl|dll)[.\s]*$'i,

# qr'\{[0-9a-f]{8}(-[0-9a-f]{4}){3}-[0-9a-f]{12}\}?'i, # Class ID CLSID, strict
# qr'\{[0-9a-z]{4,}(-[0-9a-z]{4,}){0,7}\}?'i, # Class ID extension CLSID, loose

  qr'.\.(exe|vbs|pif|scr|cpl)$'i,             # banned extension - basic
# qr'.\.(exe|vbs|pif|scr|cpl|bat|cmd|com)$'i, # banned extension - basic+cmd
# qr'.\.(ade|adp|app|bas|bat|chm|cmd|com|cpl|crt|emf|exe|fxp|grp|hlp|hta|
#        inf|ini|ins|isp|js|jse|lib|lnk|mda|mdb|mde|mdt|mdw|mdz|msc|msi|
#        msp|mst|ocx|ops|pcd|pif|prg|reg|scr|sct|shb|shs|sys|vb|vbe|vbs|vxd|
#        wmf|wsc|wsf|wsh)$'ix,                # banned extensions - long
# qr'.\.(asd|asf|asx|url|vcs|wmd|wmz)$'i,     # consider also
# qr'.\.(ani|cur|ico)$'i,                 # banned cursors and icons filename
# qr'^\.ani$',                            # banned animated cursor file(1) type
# qr'.\.(mim|b64|bhx|hqx|xxe|uu|uue)$'i,  # banned extension - WinZip vulnerab.
);
# See http://support.microsoft.com/default.aspx?scid=kb;EN-US;q262631
# and http://www.cknow.com/vtutor/vtextensions.htm


# ENVELOPE SENDER SOFT-WHITELISTING / SOFT-BLACKLISTING

@score_sender_maps = ({ # a by-recipient hash lookup table,
                        # results from all matching recipient tables are summed

# ## per-recipient personal tables  (NOTE: positive: black, negative: white)
# '[email protected]'  => [{'[email protected]' => 10.0}],
# '[email protected]'  => [{'.ebay.com'                 => -3.0}],
# '[email protected]'  => [{'[email protected]' => -7.0,
#                           '.cleargreen.com'           => -5.0}],

  ## site-wide opinions about senders (the '.' matches any recipient)
  '.' => [  # the _first_ matching sender determines the score boost

   new_RE(  # regexp-type lookup table, just happens to be all soft-blacklist
    [qr'^(bulkmail|offers|cheapbenefits|earnmoney|foryou)@'i         => 5.0],
    [qr'^(greatcasino|investments|lose_weight_today|market\.alert)@'i=> 5.0],
    [qr'^(money2you|MyGreenCard|new\.tld\.registry|opt-out|opt-in)@'i=> 5.0],
    [qr'^(optin|saveonlsmoking2002k|specialoffer|specialoffers)@'i   => 5.0],
    [qr'^(stockalert|stopsnoring|wantsome|workathome|yesitsfree)@'i  => 5.0],
    [qr'^(your_friend|greatoffers)@'i                                => 5.0],
    [qr'^(inkjetplanet|marketopt|MakeMoney)\d*@'i                    => 5.0],
   ),

#  read_hash("/var/amavis/sender_scores_sitewide"),

   { # a hash-type lookup table (associative array)
     '[email protected]'                        => -3.0,
     '[email protected]'              => -3.0,
     '[email protected]'                    => -3.0,
     '[email protected]'                  => -3.0,
     'securityfocus.com'                      => -3.0,
     '[email protected]'       => -3.0,
     '[email protected]'      => -3.0,
     '[email protected]'      => -3.0,
     '[email protected]'=> -3.0,
     '[email protected]' => -3.0,
     'spamassassin.apache.org'                => -3.0,
     '[email protected]'   => -3.0,
     '[email protected]'        => -3.0,
     '[email protected]'     => -3.0,
     '[email protected]'   => -3.0,
     '[email protected]' => -3.0,
     '[email protected]'                => -3.0,
     '[email protected]'               => -3.0,
     '[email protected]'                  => -3.0,
     '[email protected]'          => -3.0,
     '[email protected]'           => -3.0,
     '[email protected]'       => -3.0,
     '[email protected]'          => -3.0,
     '[email protected]'            => -3.0,
     '[email protected]'            => -3.0,
     '[email protected]'                => -5.0,
     '[email protected]'           => -3.0,
     'returns.groups.yahoo.com'               => -3.0,
     '[email protected]'           => -3.0,
     lc('[email protected]')    => -3.0,
     lc('[email protected]') => -5.0,

     # soft-blacklisting (positive score)
     '[email protected]'                     =>  3.0,
     '.example.net'                           =>  1.0,

   },
  ],  # end of site-wide tables
});


@decoders = (
  ['mail', \&do_mime_decode],
# [[qw(asc uue hqx ync)], \&do_ascii],  # not safe
  ['F',    \&do_uncompress, ['unfreeze', 'freeze -d', 'melt', 'fcat'] ],
  ['Z',    \&do_uncompress, ['uncompress', 'gzip -d', 'zcat'] ],
  ['gz',   \&do_uncompress, 'gzip -d'],
  ['gz',   \&do_gunzip],
  ['bz2',  \&do_uncompress, 'bzip2 -d'],
  ['xz',   \&do_uncompress,
           ['xzdec', 'xz -dc', 'unxz -c', 'xzcat'] ],
  ['lzma', \&do_uncompress,
           ['lzmadec', 'xz -dc --format=lzma',
            'lzma -dc', 'unlzma -c', 'lzcat', 'lzmadec'] ],
  ['lrz',  \&do_uncompress,
           ['lrzip -q -k -d -o -', 'lrzcat -q -k'] ],
  ['lzo',  \&do_uncompress, 'lzop -d'],
  ['rpm',  \&do_uncompress, ['rpm2cpio.pl', 'rpm2cpio'] ],
  [['cpio','tar'], \&do_pax_cpio, ['pax', 'gcpio', 'cpio'] ],
           # ['/usr/local/heirloom/usr/5bin/pax', 'pax', 'gcpio', 'cpio']
  ['deb',  \&do_ar, 'ar'],
# ['a',    \&do_ar, 'ar'],  # unpacking .a seems an overkill
  ['rar',  \&do_unrar, ['unrar', 'rar'] ],
  ['arj',  \&do_unarj, ['unarj', 'arj'] ],
  ['arc',  \&do_arc,   ['nomarch', 'arc'] ],
  ['zoo',  \&do_zoo,   ['zoo', 'unzoo'] ],
  ['doc',  \&do_ole,   'ripole'],
  ['cab',  \&do_cabextract, 'cabextract'],
  ['tnef', \&do_tnef_ext, 'tnef'],
  ['tnef', \&do_tnef],
# ['lha',  \&do_lha,   'lha'],  # not safe, use 7z instead
# ['sit',  \&do_unstuff, 'unstuff'],  # not safe
  [['zip','kmz'], \&do_7zip,  ['7za', '7z'] ],
  [['zip','kmz'], \&do_unzip],
  ['7z',   \&do_7zip,  ['7zr', '7za', '7z'] ],
  [[qw(7z zip gz bz2 Z tar)],
           \&do_7zip,  ['7za', '7z'] ],
  [[qw(xz lzma jar cpio arj rar swf lha iso cab deb rpm)],
           \&do_7zip,  '7z' ],
  ['exe',  \&do_executable, ['unrar','rar'], 'lha', ['unarj','arj'] ],
);


@av_scanners = (

# ### http://www.sophos.com/
# ['Sophos-SSSP',
#   \&ask_daemon, ["{}", 'sssp:/var/run/savdi/sssp.sock'],
#           # or: ["{}", 'sssp:[127.0.0.1]:4010'],
#   qr/^DONE OK\b/m, qr/^VIRUS\b/m, qr/^VIRUS\s*(\S*)/m ],

# ### http://www.clanfield.info/sophie/ (http://www.vanja.com/tools/sophie/)
# ['Sophie',
#   \&ask_daemon, ["{}/\n", 'sophie:/var/run/sophie'],
#   qr/(?x)^ 0+ ( : | [\000\r\n]* $)/,  qr/(?x)^ 1 ( : | [\000\r\n]* $)/,
#   qr/(?x)^ [-+]? \d+ : (.*?) [\000\r\n]* $/m ],

# ### http://www.csupomona.edu/~henson/www/projects/SAVI-Perl/
# ['Sophos SAVI', \&ask_daemon, ['{}','savi-perl:'] ],

# ['Avira SAVAPI',
#   \&ask_daemon, ["*", 'savapi:/var/tmp/.savapi3', 'product-id'],
#   qr/^(200|210)/m,  qr/^(310|420|319)/m,
#   qr/^(?:310|420)[,\s]*(?:.* <<< )?(.+?)(?: ; |$)/m ],
# settings for the SAVAPI3.conf: ArchiveScan=1, HeurLevel=2, MailboxScan=1

  ### http://www.clamav.net/
  ['ClamAV-clamd',
    \&ask_daemon, ["CONTSCAN {}\n", "/var/spool/amavisd/clamd.sock"],
    qr/\bOK$/m, qr/\bFOUND$/m,
    qr/^.*?: (?!Infected Archive)(.*) FOUND$/m ],
  # NOTE: run clamd under the same user as amavisd - or run it under its own
  #   uid such as clamav, add user clamav to the amavis group, and then add
  #   AllowSupplementaryGroups to clamd.conf;
  # NOTE: match socket name (LocalSocket) in clamav.conf to the socket name in
  #   this entry; when running chrooted one may prefer a socket under $MYHOME.

# ### http://www.clamav.net/ and CPAN  (memory-hungry! clamd is preferred)
# # note that Mail::ClamAV requires perl to be build with threading!
# ['Mail::ClamAV', \&ask_daemon, ['{}','clamav-perl:'],
#   [0], [1], qr/^INFECTED: (.+)/m],

# ### http://www.openantivirus.org/
# ['OpenAntiVirus ScannerDaemon (OAV)',
#   \&ask_daemon, ["SCAN {}\n", '127.0.0.1:8127'],
#   qr/^OK/m, qr/^FOUND: /m, qr/^FOUND: (.+)/m ],

# ### http://www.vanja.com/tools/trophie/
# ['Trophie',
#   \&ask_daemon, ["{}/\n", 'trophie:/var/run/trophie'],
#   qr/(?x)^ 0+ ( : | [\000\r\n]* $)/m,  qr/(?x)^ 1 ( : | [\000\r\n]* $)/m,
#   qr/(?x)^ [-+]? \d+ : (.*?) [\000\r\n]* $/m ],

# ### http://www.grisoft.com/
# ['AVG Anti-Virus',
#   \&ask_daemon, ["SCAN {}\n", '127.0.0.1:55555'],
#   qr/^200/m, qr/^403/m, qr/^403[- ].*: ([^\r\n]+)/m ],

# ### http://www.f-prot.com/
# ['F-Prot fpscand',  # F-PROT Antivirus for BSD/Linux/Solaris, version 6
#   \&ask_daemon,
#   ["SCAN FILE {}/*\n", '127.0.0.1:10200'],
#   qr/^(0|8|64) /m,
#   qr/^([1235679]|1[01345]) |<[^>:]*(?i)(infected|suspicious|unwanted)/m,
#   qr/(?i)<[^>:]*(?:infected|suspicious|unwanted)[^>:]*: ([^>]*)>/m ],

# ### http://www.f-prot.com/
# ['F-Prot f-protd',  # old version
#   \&ask_daemon,
#   ["GET {}/*?-dumb%20-archive%20-packed HTTP/1.0\r\n\r\n",
#     ['127.0.0.1:10200', '127.0.0.1:10201', '127.0.0.1:10202',
#      '127.0.0.1:10203', '127.0.0.1:10204'] ],
#   qr/(?i)<summary[^>]*>clean<\/summary>/m,
#   qr/(?i)<summary[^>]*>infected<\/summary>/m,
#   qr/(?i)<name>(.+)<\/name>/m ],

# ### http://www.sald.com/, http://www.dials.ru/english/, http://www.drweb.ru/
# ['DrWebD', \&ask_daemon,   # DrWebD 4.31 or later
#   [pack('N',1).  # DRWEBD_SCAN_CMD
#    pack('N',0x00280001).   # DONT_CHANGEMAIL, IS_MAIL, RETURN_VIRUSES
#    pack('N',     # path length
#      length("$TEMPBASE/amavis-yyyymmddTHHMMSS-xxxxx/parts/pxxx")).
#    '{}/*'.       # path
#    pack('N',0).  # content size
#    pack('N',0),
#    '/var/drweb/run/drwebd.sock',
#  # '/var/amavis/var/run/drwebd.sock',   # suitable for chroot
#  # '/usr/local/drweb/run/drwebd.sock',  # FreeBSD drweb ports default
#  # '127.0.0.1:3000',                    # or over an inet socket
#   ],
#   qr/\A\x00[\x10\x11][\x00\x10]\x00/sm,        # IS_CLEAN,EVAL_KEY; SKIPPED
#   qr/\A\x00[\x00\x01][\x00\x10][\x20\x40\x80]/sm,# KNOWN_V,UNKNOWN_V,V._MODIF
#   qr/\A.{12}(?:infected with )?([^\x00]+)\x00/sm,
# ],
# # NOTE: If using amavis-milter, change length to:
# # length("$TEMPBASE/amavis-milter-xxxxxxxxxxxxxx/parts/pxxx").

  ### http://www.kaspersky.com/  (kav4mailservers)
  ['KasperskyLab AVP - aveclient',
    ['/usr/local/kav/bin/aveclient','/usr/local/share/kav/bin/aveclient',
     '/opt/kav/5.5/kav4mailservers/bin/aveclient','aveclient'],
    '-p /var/run/aveserver -s {}/*',
    [0,3,6,8], qr/\b(INFECTED|SUSPICION|SUSPICIOUS)\b/m,
    qr/(?:INFECTED|WARNING|SUSPICION|SUSPICIOUS) (.+)/m,
  ],
  # NOTE: one may prefer [0],[2,3,4,5], depending on how suspicious,
  # currupted or protected archives are to be handled

  ### http://www.kaspersky.com/
  ['KasperskyLab AntiViral Toolkit Pro (AVP)', ['avp'],
    '-* -P -B -Y -O- {}', [0,3,6,8], [2,4],    # any use for -A -K   ?
    qr/infected: (.+)/m,
    sub {chdir('/opt/AVP') or die "Can't chdir to AVP: $!"},
    sub {chdir($TEMPBASE) or die "Can't chdir back to $TEMPBASE $!"},
  ],

  ### The kavdaemon and AVPDaemonClient have been removed from Kasperky
  ### products and replaced by aveserver and aveclient
  ['KasperskyLab AVPDaemonClient',
    [ '/opt/AVP/kavdaemon',       'kavdaemon',
      '/opt/AVP/AvpDaemonClient', 'AvpDaemonClient',
      '/opt/AVP/AvpTeamDream',    'AvpTeamDream',
      '/opt/AVP/avpdc', 'avpdc' ],
    "-f=$TEMPBASE {}", [0,8], [3,4,5,6], qr/infected: ([^\r\n]+)/m ],
    # change the startup-script in /etc/init.d/kavd to:
    #   DPARMS="-* -Y -dl -f=/var/amavis /var/amavis"
    #   (or perhaps:   DPARMS="-I0 -Y -* /var/amavis" )
    # adjusting /var/amavis above to match your $TEMPBASE.
    # The '-f=/var/amavis' is needed if not running it as root, so it
    # can find, read, and write its pid file, etc., see 'man kavdaemon'.
    # defUnix.prf: there must be an entry "*/var/amavis" (or whatever
    #   directory $TEMPBASE specifies) in the 'Names=' section.
    # cd /opt/AVP/DaemonClients; configure; cd Sample; make
    # cp AvpDaemonClient /opt/AVP/
    # su - vscan -c "${PREFIX}/kavdaemon ${DPARMS}"

  ### http://www.centralcommand.com/
  ['CentralCommand Vexira (new) vascan',
    ['vascan','/usr/lib/Vexira/vascan'],
    "-a s --timeout=60 --temp=$TEMPBASE -y $QUARANTINEDIR ".
    "--log=/var/log/vascan.log {}",
    [0,3], [1,2,5],
    qr/(?x)^\s* (?:virus|iworm|macro|mutant|sequence|trojan)\ found:\ ( [^\]\s']+ )\ \.\.\.\ /m ],
    # Adjust the path of the binary and the virus database as needed.
    # 'vascan' does not allow to have the temp directory to be the same as
    # the quarantine directory, and the quarantine option can not be disabled.
    # If $QUARANTINEDIR is not used, then another directory must be specified
    # to appease 'vascan'. Move status 3 to the second list if password
    # protected files are to be considered infected.

  ### http://www.avira.com/
  ### old Avira AntiVir 2.x (ex H+BEDV) or old CentralCommand Vexira Antivirus
  ['Avira AntiVir', ['antivir','vexira'],
    '--allfiles -noboot -nombr -rs -s -z {}', [0], qr/ALERT:|VIRUS:/m,
    qr/(?x)^\s* (?: ALERT: \s* (?: \[ | [^']* ' ) |
         (?i) VIRUS:\ .*?\ virus\ '?) ( [^\]\s']+ )/m ],
    # NOTE: if you only have a demo version, remove -z and add 214, as in:
    #  '--allfiles -noboot -nombr -rs -s {}', [0,214], qr/ALERT:|VIRUS:/,

  ### http://www.avira.com/
  ### Avira for UNIX 3.x
  ['Avira AntiVir', ['avscan'],
   '-s --batch --alert-action=none {}', [0,4], qr/(?:ALERT|FUND):/m,
   qr/(?:ALERT|FUND): (?:.* <<< )?(.+?)(?: ; |$)/m ],

  ### http://www.commandsoftware.com/
  ['Command AntiVirus for Linux', 'csav',
    '-all -archive -packed {}', [50], [51,52,53],
    qr/Infection: (.+)/m ],

  ### http://www.symantec.com/
  ['Symantec CarrierScan via Symantec CommandLineScanner',
    'cscmdline', '-a scan -i 1 -v -s 127.0.0.1:7777 {}',
    qr/^Files Infected:\s+0$/m, qr/^Infected\b/m,
    qr/^(?:Info|Virus Name):\s+(.+)/m ],

  ### http://www.symantec.com/
  ['Symantec AntiVirus Scan Engine',
    'savsecls', '-server 127.0.0.1:7777 -mode scanrepair -details -verbose {}',
    [0], qr/^Infected\b/m,
    qr/^(?:Info|Virus Name):\s+(.+)/m ],
    # NOTE: check options and patterns to see which entry better applies

# ### http://www.f-secure.com/products/anti-virus/  version 5.52
#  ['F-Secure Antivirus for Linux servers',
#   ['/opt/f-secure/fsav/bin/fsav', 'fsav'],
#   '--virus-action1=report --archive=yes --auto=yes '.
#   '--dumb=yes --list=no --mime=yes {}', [0], [3,4,6,8],
#   qr/(?:infection|Infected|Suspected|Riskware): (.+)/m ],
#   # NOTE: internal archive handling may be switched off by '--archive=no'
#   #   to prevent fsav from exiting with status 9 on broken archives

  ### http://www.f-secure.com/ version 9.14
   ['F-Secure Linux Security',
    ['/opt/f-secure/fsav/bin/fsav', 'fsav'],
    '--virus-action1=report --archive=yes --auto=yes '.
    '--list=no --nomimeerr {}', [0], [3,4,6,8],
    qr/(?:infection|Infected|Suspected|Riskware): (.+)/m ],
    # NOTE: internal archive handling may be switched off by '--archive=no'
    #   to prevent fsav from exiting with status 9 on broken archives

# ### http://www.avast.com/
# ['avast! Antivirus daemon',
#   \&ask_daemon,        # greets with 220, terminate with QUIT
#   ["SCAN {}\015\012QUIT\015\012", '/var/run/avast4/mailscanner.sock'],
#   qr/\t\[\+\]/m, qr/\t\[L\]\t/m, qr/\t\[L\]\t([^[ \t\015\012]+)/m ],

# ### http://www.avast.com/
# ['avast! Antivirus - Client/Server Version', 'avastlite',
#   '-a /var/run/avast4/mailscanner.sock -n {}', [0], [1],
#   qr/\t\[L\]\t([^[ \t\015\012]+)/m ],

  ['CAI InoculateIT', 'inocucmd',  # retired product
    '-sec -nex {}', [0], [100],
    qr/was infected by virus (.+)/m ],
  # see: http://www.flatmtn.com/computer/Linux-Antivirus_CAI.html

  ### http://www3.ca.com/Solutions/Product.asp?ID=156  (ex InoculateIT)
  ['CAI eTrust Antivirus', 'etrust-wrapper',
    '-arc -nex -spm h {}', [0], [101],
    qr/is infected by virus: (.+)/m ],
    # NOTE: requires suid wrapper around inocmd32; consider flag: -mod reviewer
    # see http://marc.theaimsgroup.com/?l=amavis-user&m=109229779912783

  ### http://mks.com.pl/english.html
  ['MkS_Vir for Linux (beta)', ['mks32','mks'],
    '-s {}/*', [0], [1,2],
    qr/--[ \t]*(.+)/m ],

  ### http://mks.com.pl/english.html
  ['MkS_Vir daemon', 'mksscan',
    '-s -q {}', [0], [1..7],
    qr/^... (\S+)/m ],

# ### http://www.nod32.com/,  version v2.52 (old)
# ['ESET NOD32 for Linux Mail servers',
#   ['/opt/eset/nod32/bin/nod32cli', 'nod32cli'],
#    '--subdir --files -z --sfx --rtp --adware --unsafe --pattern --heur '.
#    '-w -a --action-on-infected=accept --action-on-uncleanable=accept '.
#    '--action-on-notscanned=accept {}',
#   [0,3], [1,2], qr/virus="([^"]+)"/m ],

# ### http://www.eset.com/, version v2.7 (old)
# ['ESET NOD32 Linux Mail Server - command line interface',
#   ['/usr/bin/nod32cli', '/opt/eset/nod32/bin/nod32cli', 'nod32cli'],
#   '--subdir {}', [0,3], [1,2], qr/virus="([^"]+)"/m ],

# ### http://www.eset.com/, version 2.71.12
# ['ESET Software ESETS Command Line Interface',
#   ['/usr/bin/esets_cli', 'esets_cli'],
#   '--subdir {}', [0], [1,2,3], qr/virus="([^"]+)"/m ],

  ### http://www.eset.com/, version 3.0
  ['ESET Software ESETS Command Line Interface',
    ['/usr/bin/esets_cli', 'esets_cli'],
    '--subdir {}', [0], [1,2,3],
    qr/:\s*action="(?!accepted)[^"]*"\n.*:\s*virus="([^"]*)"/m ],

  ## http://www.nod32.com/,  NOD32LFS version 2.5 and above
  ['ESET NOD32 for Linux File servers',
    ['/opt/eset/nod32/sbin/nod32','nod32'],
    '--files -z --mail --sfx --rtp --adware --unsafe --pattern --heur '.
    '-w -a --action=1 -b {}',
    [0], [1,10], qr/^object=.*, virus="(.*?)",/m ],

# Experimental, based on posting from Rado Dibarbora (Dibo) on 2002-05-31
# ['ESET Software NOD32 Client/Server (NOD32SS)',
#   \&ask_daemon2,    # greets with 200, persistent, terminate with QUIT
#   ["SCAN {}/*\r\n", '127.0.0.1:8448' ],
#   qr/^200 File OK/m, qr/^201 /m, qr/^201 (.+)/m ],

  ### http://www.norman.com/products_nvc.shtml
  ['Norman Virus Control v5 / Linux', 'nvcc',
    '-c -l:0 -s -u -temp:$TEMPBASE {}', [0,10,11], [1,2,14],
    qr/(?i).* virus in .* -> \'(.+)\'/m ],

  ### http://www.pandasoftware.com/
  ['Panda CommandLineSecure 9 for Linux',
    ['/opt/pavcl/usr/bin/pavcl','pavcl'],
    '-auto -aex -heu -cmp -nbr -nor -nos -eng -nob {}',
    qr/Number of files infected[ .]*: 0+(?!\d)/m,
    qr/Number of files infected[ .]*: 0*[1-9]/m,
    qr/Found virus :\s*(\S+)/m ],
  # NOTE: for efficiency, start the Panda in resident mode with 'pavcl -tsr'
  # before starting amavisd - the bases are then loaded only once at startup.
  # To reload bases in a signature update script:
  #   /opt/pavcl/usr/bin/pavcl -tsr -ulr; /opt/pavcl/usr/bin/pavcl -tsr
  # Please review other options of pavcl, for example:
  #  -nomalw, -nojoke, -nodial, -nohackt, -nospyw, -nocookies

# ### http://www.pandasoftware.com/
# ['Panda Antivirus for Linux', ['pavcl'],
#   '-TSR -aut -aex -heu -cmp -nbr -nor -nso -eng {}',
#   [0], [0x10, 0x30, 0x50, 0x70, 0x90, 0xB0, 0xD0, 0xF0],
#   qr/Found virus :\s*(\S+)/m ],

# GeCAD AV technology is acquired by Microsoft; RAV has been discontinued.
# Check your RAV license terms before fiddling with the following two lines!
# ['GeCAD RAV AntiVirus 8', 'ravav',
#   '--all --archive --mail {}', [1], [2,3,4,5], qr/Infected: (.+)/m ],
# # NOTE: the command line switches changed with scan engine 8.5 !
# # (btw, assigning stdin to /dev/null causes RAV to fail)

  ### http://www.nai.com/
  ['NAI McAfee AntiVirus (uvscan)', 'uvscan',
    '--secure -rv --mime --summary --noboot - {}', [0], [13],
    qr/(?x) Found (?:
        \ the\ (.+)\ (?:virus|trojan)  |
        \ (?:virus|trojan)\ or\ variant\ ([^ ]+)  |
        :\ (.+)\ NOT\ a\ virus)/m,
  # sub {$ENV{LD_PRELOAD}='/lib/libc.so.6'},
  # sub {delete $ENV{LD_PRELOAD}},
  ],
  # NOTE1: with RH9: force the dynamic linker to look at /lib/libc.so.6 before
  # anything else by setting environment variable LD_PRELOAD=/lib/libc.so.6
  # and then clear it when finished to avoid confusing anything else.
  # NOTE2: to treat encrypted files as viruses replace the [13] with:
  #  qr/^\s{5,}(Found|is password-protected|.*(virus|trojan))/

  ### http://www.virusbuster.hu/en/
  ['VirusBuster', ['vbuster', 'vbengcl'],
    "{} -ss -i '*' -log=$MYHOME/vbuster.log", [0], [1],
    qr/: '(.*)' - Virus/m ],
  # VirusBuster Ltd. does not support the daemon version for the workstation
  # engine (vbuster-eng-1.12-linux-i386-libc6.tgz) any longer. The names of
  # binaries, some parameters AND return codes have changed (from 3 to 1).
  # See also the new Vexira entry 'vascan' which is possibly related.

# ### http://www.virusbuster.hu/en/
# ['VirusBuster (Client + Daemon)', 'vbengd',
#   '-f -log scandir {}', [0], [3],
#   qr/Virus found = (.*);/m ],
# # HINT: for an infected file it always returns 3,
# # although the man-page tells a different story

  ### http://www.cyber.com/
  ['CyberSoft VFind', 'vfind',
    '--vexit {}/*', [0], [23], qr/##==>>>> VIRUS ID: CVDL (.+)/m,
  # sub {$ENV{VSTK_HOME}='/usr/lib/vstk'},
  ],

  ### http://www.avast.com/
  ['avast! Antivirus', ['/usr/bin/avastcmd','avastcmd'],
    '-a -i -n -t=A {}', [0], [1], qr/\binfected by:\s+([^ \t\n\[\]]+)/m ],

  ### http://www.ikarus-software.com/
  ['Ikarus AntiVirus for Linux', 'ikarus',
    '{}', [0], [40], qr/Signature (.+) found/m ],

  ### http://www.bitdefender.com/
  ['BitDefender', 'bdscan',  # new version
    '--action=ignore --no-list {}', qr/^Infected files\s*:\s*0+(?!\d)/m,
    qr/^(?:Infected files|Identified viruses|Suspect files)\s*:\s*0*[1-9]/m,
    qr/(?:suspected|infected)\s*:\s*(.*)(?:\033|$)/m ],

  ### http://www.bitdefender.com/
  ['BitDefender', 'bdc',  # old version
    '--arc --mail {}', qr/^Infected files *:0+(?!\d)/m,
    qr/^(?:Infected files|Identified viruses|Suspect files) *:0*[1-9]/m,
    qr/(?:suspected|infected): (.*)(?:\033|$)/m ],
  # consider also: --all --nowarn --alev=15 --flev=15.  The --all argument may
  # not apply to your version of bdc, check documentation and see 'bdc --help'

  ### ArcaVir for Linux and Unix http://www.arcabit.pl/
  ['ArcaVir for Linux', ['arcacmd','arcacmd.static'],
    '-v 1 -summary 0 -s {}', [0], [1,2],
    qr/(?:VIR|WIR):[ \t]*(.+)/m ],

# ### a generic SMTP-client interface to a SMTP-based virus scanner
# ['av_smtp', \&ask_av_smtp,
#   ['{}', 'smtp:[127.0.0.1]:5525', '[email protected]'],
#   qr/^2/, qr/^5/, qr/^\s*(.*?)\s*$/m ],

# ['File::Scan', sub {Amavis::AV::ask_av(sub{
#   use File::Scan; my($fn)[email protected]_;
#   my($f)=File::Scan->new(max_txt_size=>0, max_bin_size=>0);
#   my($vname) = $f->scan($fn);
#   $f->error ? (2,"Error: ".$f->error)
#   : ($vname ne '') ? (1,"$vname FOUND") : (0,"Clean")}, @_) },
#   ["{}/*"], [0], [1], qr/^(.*) FOUND$/m ],

# ### fully-fledged checker for JPEG marker segments of invalid length
# ['check-jpeg',
#   sub { use JpegTester (); Amavis::AV::ask_av(\&JpegTester::test_jpeg, @_) },
#   ["{}/*"], undef, [1], qr/^(bad jpeg: .*)$/m ],
# # NOTE: place file JpegTester.pm somewhere where Perl can find it,
# #       for example in /usr/local/lib/perl5/site_perl

);


@av_scanners_backup = (

  ### http://www.clamav.net/   - backs up clamd or Mail::ClamAV
  ['ClamAV-clamscan', 'clamscan',
    "--stdout --no-summary -r --tempdir=$TEMPBASE {}",
    [0], qr/:.*\sFOUND$/m, qr/^.*?: (?!Infected Archive)(.*) FOUND$/m ],

# ### http://www.clamav.net/ - using remote clamd scanner as a backup
# ['ClamAV-clamdscan', 'clamdscan',
#   "--stdout --no-summary --config-file=/etc/clamd-client.conf {}",
#   [0], qr/:.*\sFOUND$/m, qr/^.*?: (?!Infected Archive)(.*) FOUND$/m ],

# ['ClamAV-clamd-stream',
#   \&ask_daemon, ["*", 'clamd:/var/run/clamav/clamd.sock'],
#   qr/\bOK$/m, qr/\bFOUND$/m,
#   qr/^.*?: (?!Infected Archive)(.*) FOUND$/m ],

  ### http://www.f-prot.com/   - backs up F-Prot Daemon, V6
  ['F-PROT Antivirus for UNIX', ['fpscan'],
    '--report --mount --adware {}',  # consider: --applications -s 4 -u 3 -z 10
    [0,8,64],  [1,2,3, 4+1,4+2,4+3, 8+1,8+2,8+3, 12+1,12+2,12+3],
    qr/^\[Found\s+[^\]]*\]\s+<([^ \t(>]*)/m ],

  ### http://www.f-prot.com/   - backs up F-Prot Daemon (old)
  ['FRISK F-Prot Antivirus', ['f-prot','f-prot.sh'],
    '-dumb -archive -packed {}', [0,8], [3,6],   # or: [0], [3,6,8],
    qr/(?:Infection:|security risk named) (.+)|\s+contains\s+(.+)$/m ],

  ### http://www.trendmicro.com/   - backs up Trophie
  ['Trend Micro FileScanner', ['/etc/iscan/vscan','vscan'],
    '-za -a {}', [0], qr/Found virus/m, qr/Found virus (.+) in/m ],

  ### http://www.sald.com/, http://drweb.imshop.de/   - backs up DrWebD
  ['drweb - DrWeb Antivirus',  # security LHA hole in Dr.Web 4.33 and earlier
    ['/usr/local/drweb/drweb', '/opt/drweb/drweb', 'drweb'],
    '-path={} -al -go -ot -cn -upn -ok-',
    [0,32], [1,9,33], qr' infected (?:with|by)(?: virus)? (.*)$'m ],

   ### http://www.kaspersky.com/
   ['Kaspersky Antivirus v5.5',
     ['/opt/kaspersky/kav4fs/bin/kav4fs-kavscanner',
      '/opt/kav/5.5/kav4unix/bin/kavscanner',
      '/opt/kav/5.5/kav4mailservers/bin/kavscanner', 'kavscanner'],
     '-i0 -xn -xp -mn -R -ePASBME {}/*', [0,10,15], [5,20,21,25],
     qr/(?:INFECTED|WARNING|SUSPICION|SUSPICIOUS) (.*)/m,
#    sub {chdir('/opt/kav/bin') or die "Can't chdir to kav: $!"},
#    sub {chdir($TEMPBASE) or die "Can't chdir back to $TEMPBASE $!"},
   ],

# Commented out because the name 'sweep' clashes with Debian and FreeBSD
# package/port of an audio editor. Make sure the correct 'sweep' is found
# in the path when enabling.
#
# ### http://www.sophos.com/   - backs up Sophie or SAVI-Perl
# ['Sophos Anti Virus (sweep)', 'sweep',
#   '-nb -f -all -rec -ss -sc -archive -cab -mime -oe -tnef '.
#   '--no-reset-atime {}',
#   [0,2], qr/Virus .*? found/m,
#   qr/^>>> Virus(?: fragment)? '?(.*?)'? found/m,
# ],
# # other options to consider: -idedir=/usr/local/sav

# Always succeeds and considers mail clean.
# Potentially useful when all other scanners fail and it is desirable
# to let mail continue to flow with no virus checking (when uncommented).
# ['always-clean', sub {0}],

);

$pax='pax';
1; # insure a defined return value |
amavisd-new is the program that glues together Postfix and SpamAssassin/ClamAV. Postfix passes the mails to amavisd-new which then invokes SpamAssassin and ClamAV to scan the emails. Please have a look at the Spamassassin and ClamAV settings in /etc/amavisd/amavisd.conf . Of course, you can customize that file a lot more. Feel free to do so, and have a look at the explanations in the original /etc/amavisd/amavisd.conf file!
When we installed ClamAV, a cron job got installed that tries to update the ClamAV virus database every three hours. But this works only if we enable it in /etc/sysconfig/freshclam and /etc/freshclam.conf:
vi /etc/sysconfig/freshclam
Comment out the FRESHCLAM_DELAY line at the end:
## When changing the periodicity of freshclam runs in the crontab, ## this value must be adjusted also. Its value is the timespan between ## two subsequent freshclam runs in minutes. E.g. for the default ## ## | 0 */3 * * * ... ## ## crontab line, the value is 180 (minutes). # FRESHCLAM_MOD= ## A predefined value for the delay in seconds. By default, the value is ## calculated by the 'hostid' program. This predefined value guarantees ## constant timespans of 3 hours between two subsequent freshclam runs. ## ## This option accepts two special values: ## 'disabled-warn' ... disables the automatic freshclam update and ## gives out a warning ## 'disabled' ... disables the automatic freshclam silently # FRESHCLAM_DELAY= ### !!!!! REMOVE ME !!!!!! ### REMOVE ME: By default, the freshclam update is disabled to avoid ### REMOVE ME: network access without prior activation #FRESHCLAM_DELAY=disabled-warn # REMOVE ME |
vi /etc/freshclam.conf
Comment out the Example line:
[...] # Comment or remove the line below. #Example [...] |
Before we start amavisd, we must create the directory /var/run/amavisd:
mkdir /var/run/amavisd
chown amavis /var/run/amavisd
Fedora 18 has a /run directory for storing runtime data. /run is now a tmpfs, and /var/run and /var/lock are now bind mounted to /run and /run/lock from tmpfs, and hence emptied on reboot (see https://docs.fedoraproject.org/en-US/Fedora/15/html/Release_Notes/sect-Release_Notes-Changes_for_SysAdmin.html for more details).
This means that after a reboot, the directory /var/run/amavisd that we have just created will not exist anymore, and therefore amavisd will fail to start. Therefore we create the file /etc/tmpfiles.d/amavisd.conf now that will create this directory at system startup (see http://0pointer.de/public/systemd-man/tmpfiles.d.html for more details):
vi /etc/tmpfiles.d/amavisd.conf
D /var/run/amavisd 0755 amavis root - |
Now let's create the system startup links for ClamAV and amavisd-new, update ClamAV's virus signature database, and start both services:
systemctl enable amavisd.service
systemctl enable clamd.amavisd.service
/usr/bin/freshclam
systemctl start amavisd.service
systemctl start clamd.amavisd.service
Now we have to configure Postfix to pipe incoming emails through amavisd-new:
postconf -e 'content_filter = amavis:[127.0.0.1]:10024'
postconf -e 'receive_override_options = no_address_mappings'
Afterwards append the following lines to /etc/postfix/master.cf :
vi /etc/postfix/master.cf
[...]
amavis unix - - - - 2 smtp
        -o smtp_data_done_timeout=1200
        -o smtp_send_xforward_command=yes

127.0.0.1:10025 inet n - - - - smtpd
        -o content_filter=
        -o local_recipient_maps=
        -o relay_recipient_maps=
        -o smtpd_restriction_classes=
        -o smtpd_client_restrictions=
        -o smtpd_helo_restrictions=
        -o smtpd_sender_restrictions=
        -o smtpd_recipient_restrictions=permit_mynetworks,reject
        -o mynetworks=127.0.0.0/8
        -o strict_rfc821_envelopes=yes
-o receive_override_options=no_unknown_recipient_checks,no_header_body_checks |
and restart Postfix:
systemctl restart postfix.service
13 Install Razor, Pyzor And DCC And Configure SpamAssassin
Razor, Pyzor and DCC are spamfilters that use a collaborative filtering network. To install Razor and Pyzor, run
yum install perl-Razor-Agent pyzor
Then initialize both services:
chmod -R a+rX /usr/share/doc/pyzor-0.5.0 /usr/bin/pyzor /usr/bin/pyzord
chmod -R a+rX /usr/lib/python2.7/site-packages/pyzor
su -m amavis -c 'pyzor --homedir /var/spool/amavisd discover'
su -m amavis -c 'razor-admin -home=/var/spool/amavisd -create'
su -m amavis -c 'razor-admin -home=/var/spool/amavisd -register'
Then we install DCC as follows:
cd /tmp
wget http://www.dcc-servers.net/dcc/source/dcc-dccproc.tar.Z
tar xzvf dcc-dccproc.tar.Z
cd dcc-dccproc-1.3.144
./configure --with-uid=amavis
make
make install
chown -R amavis:amavis /var/dcc
ln -s /var/dcc/libexec/dccifd /usr/local/bin/dccifd
Now we have to tell SpamAssassin to use these three programs. Edit /etc/mail/spamassassin/local.cf so that it looks like this:
vi /etc/mail/spamassassin/local.cf
# These values can be overridden by editing ~/.spamassassin/user_prefs.cf # (see spamassassin(1) for details) # These should be safe assumptions and allow for simple visual sifting # without risking lost emails. #required_hits 5 #report_safe 0 #rewrite_header Subject [SPAM] # dcc use_dcc 1 dcc_path /usr/local/bin/dccproc #pyzor use_pyzor 1 pyzor_path /usr/bin/pyzor #razor use_razor2 1 razor_config /var/spool/amavisd/razor-agent.conf #bayes use_bayes 1 use_bayes_rules 1 bayes_auto_learn 1 |
Then we must enable the DCC plugin in SpamAssassin. Open /etc/mail/spamassassin/v310.pre and uncomment the loadplugin Mail::SpamAssassin::Plugin::DCC line:
vi /etc/mail/spamassassin/v310.pre
[...] # DCC - perform DCC message checks. # # DCC is disabled here because it is not open source. See the DCC # license for more details. # loadplugin Mail::SpamAssassin::Plugin::DCC [...] |
You can check your SpamAssassin configuration by executing:
spamassassin --lint
It shouldn't show any errors.
Jalankan
systemctl restart amavisd.service
afterwards.
Now we update our SpamAssassin rulesets as follows:
sa-update --no-gpg
We create a cron job so that the rulesets will be updated regularly. Jalankan
crontab -e
to open the cron job editor. Create the following cron job:
23 4 */2 * * /usr/bin/sa-update --no-gpg &> /dev/null |
This will update the rulesets every second day at 4.23h.
14 Quota Exceedance Notifications
If you want to get notifications about all the email accounts that are over quota, then create the file /usr/local/sbin/quota_notify:
cd /usr/local/sbin/
vi quota_notify
#!/usr/bin/perl -w

# Author <[email protected]>
#
# This script assumes that virtual_mailbox_base in defined
# in postfix's main.cf file. This directory is assumed to contain
# directories which themselves contain your virtual user's maildirs.
# For example:
#
# -----------/
#            |
#            |
#    home/vmail/domains/
#        |          |
#        |          |
#  example.com/  foo.com/
#                   |
#                   |
#           -----------------
#           |       |       |
#           |       |       |
#         user1/   user2/  user3/
#                           |
#                           |
#                        maildirsize
#

use strict;

my $POSTFIX_CF = "/etc/postfix/main.cf";
my $MAILPROG = "/usr/sbin/sendmail -t";
my $WARNPERCENT = 80;
my @POSTMASTERS = ('[email protected]');
my $CONAME = 'My Company';
my $COADDR = '[email protected]';
my $SUADDR = '[email protected]';
my $MAIL_REPORT = 1;
my $MAIL_WARNING = 1;

#get virtual mailbox base from postfix config
open(PCF, "< $POSTFIX_CF") or die $!;
my $mboxBase;
while (<PCF>) {
   next unless /virtual_mailbox_base\s*=\s*(.*)\s*/;
   $mboxBase = $1;
}
close(PCF);

#assume one level of subdirectories for domain names
my @domains;
opendir(DIR, $mboxBase) or die $!;
while (defined(my $name = readdir(DIR))) {
   next if $name =~ /^\.\.?$/;        #skip '.' and '..'
   next unless (-d "$mboxBase/$name");
   push(@domains, $name);
}
closedir(DIR);
#iterate through domains for username/maildirsize files
my @users;
chdir($mboxBase);
foreach my $domain (@domains) {
        opendir(DIR, $domain) or die $!;
        while (defined(my $name = readdir(DIR))) {
           next if $name =~ /^\.\.?$/;        #skip '.' and '..'
           next unless (-d "$domain/$name");
      push(@users, {"$name\@$domain" => "$mboxBase/$domain/$name"});
        }
}
closedir(DIR);

#get user quotas and percent used
my (%lusers, $report);
foreach my $href (@users) {
   foreach my $user (keys %$href) {
      my $quotafile = "$href->{$user}/maildirsize";
      next unless (-f $quotafile);
      open(QF, "< $quotafile") or die $!;
      my ($firstln, $quota, $used);
      while (<QF>) {
         my $line = $_;
              if (! $firstln) {
                 $firstln = 1;
                 die "Error: corrupt quotafile $quotafile"
                    unless ($line =~ /^(\d+)S/);
                 $quota = $1;
            last if (! $quota);
            next;
         }
         die "Error: corrupt quotafile $quotafile"
            unless ($line =~ /\s*(-?\d+)/);
         $used += $1;
      }
      close(QF);
      next if (! $used);
      my $percent = int($used / $quota * 100);
      $lusers{$user} = $percent unless not $percent;
   }
}

#send a report to the postmasters
if ($MAIL_REPORT) {
   open(MAIL, "| $MAILPROG");
   select(MAIL);
   map {print "To: $_\n"} @POSTMASTERS;
   print "From: $COADDR\n";
   print "Subject: Daily Quota Report.\n";
   print "DAILY QUOTA REPORT:\n\n";
   print "----------------------------------------------\n";
   print "| % USAGE |            ACCOUNT NAME          |\n";
   print "----------------------------------------------\n";
   foreach my $luser ( sort { $lusers{$b} <=> $lusers{$a} } keys %lusers ) {
      printf("|   %3d   | %32s |\n", $lusers{$luser}, $luser);
      print "---------------------------------------------\n";
   }
        print "\n--\n";
        print "$CONAME\n";
        close(MAIL);
}

#email a warning to people over quota
if ($MAIL_WARNING) {
        foreach my $luser (keys (%lusers)) {
           next unless $lusers{$luser} >= $WARNPERCENT;       # skip those under quota
           open(MAIL, "| $MAILPROG");
           select(MAIL);
           print "To: $luser\n";
      map {print "BCC: $_\n"} @POSTMASTERS;
           print "From: $SUADDR\n";
           print "Subject: WARNING: Your mailbox is $lusers{$luser}% full.\n";
           print "Reply-to: $SUADDR\n";
           print "Your mailbox: $luser is $lusers{$luser}% full.\n\n";
           print "Once your e-mail box has exceeded your monthly storage quota\n";
      print "your monthly billing will be automatically adjusted.\n";
      print "Please consider deleting e-mail and emptying your trash folder to clear some space.\n\n";
           print "Contact <$SUADDR> for further assistance.\n\n";
           print "Thank You.\n\n";
           print "--\n";
           print "$CONAME\n";
           close(MAIL);
        }
} |
Make sure that you adjust the variables at the top (especially the [email protected] email address).
We must make the file executable:
chmod 755 quota_notify
Jalankan
crontab -e
to create a cron job for that script:
0 0 * * * /usr/local/sbin/quota_notify &> /dev/null |
15 Test Postfix
To see if Postfix is ready for SMTP-AUTH and TLS , run
telnet localhost 25
After you have established the connection to your Postfix mail server type
ehlo localhost
If you see the lines
250-STARTTLS
and
250-AUTH PLAIN LOGIN
everything is fine.
[[email protected] sbin]# telnet localhost 25
Trying ::1...
telnet:connect to address ::1:Connection refused
Trying 127.0.0.1...
Connected to localhost.
Escape character is '^]'.
220 server1.example.com ESMTP Postfix
<-- ehlo localhost
250-server1.example.com
250-PIPELINING
250-SIZE 10240000
250-VRFY
250-ETRN
250-STARTTLS
250-AUTH PLAIN LOGIN
250-AUTH=PLAIN LOGIN
250-ENHANCEDSTATUSCODES
250-8BITMIME
250 DSN
<-- quit
221 2.0.0 Bye
Connection closed by foreign host.
[[email protected] sbin]#
Type
quit
to return to the system's shell.
16 Populate The Database And Test
To populate the database you can use the MySQL shell:
mysql -u root -p
USE mail;
At least you have to create entries in the tables domains and users :
INSERT INTO `domains` (`domain`) VALUES ('example.com');
INSERT INTO `users` (`email`, `password`, `quota`) VALUES ('[email protected]', ENCRYPT('secret'), 10485760);
(Please take care you use the ENCRYPT syntax in the second INSERT statement in order to encrypt the password!)
If you want to make entries in the other two tables, that would look like this:
INSERT INTO `forwardings` (`source`, `destination`) VALUES ('[email protected]', '[email protected]');
INSERT INTO `transport` (`domain`, `transport`) VALUES ('example.com', 'smtp:mail.example.com');
To leave the MySQL shell, type
quit;
For most people it is easier if they have a graphical front-end to MySQL; therefore you can also use phpMyAdmin (in this example under http://192.168.0.100/phpMyAdmin/ or http://server1.example.com/phpMyAdmin/) to administrate the mail database. Again, when you create a user, go sure that you use the ENCRYPT function to encrypt the password:
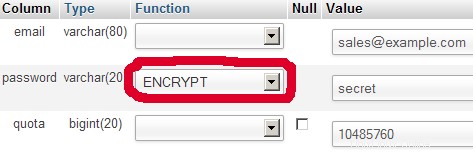
I do not think I have to explain the domains and users table further.
The forwardings table can have entries like the following:
| source | destination | |
| [email protected] | [email protected] | Redirects emails for [email protected] to [email protected] |
| @example.com | [email protected] | Creates a Catch-All account for [email protected] All emails to example.com will arrive at [email protected], except those that exist in the users table (i.e., if [email protected] exists in the users table, mails to [email protected] will still arrive at [email protected]). |
| @example.com | @anotherdomain.tld | This redirects all emails to example.com to the same user at anotherdomain.tld. E.g., emails to [email protected] will be forwarded to [email protected] |
| [email protected] | [email protected], [email protected] | Forward emails for [email protected] to two or more email addresses. All listed email addresses under destination receive a copy of the email. |
The transport table can have entries like these:
| domain | transport | |
| example.com | : | Delivers emails for example.com locally. This is as if this record would not exist in this table at all. |
| example.com | smtp:mail.anotherdomain.tld | Delivers all emails for example.com via smtp to the server mail.anotherdomain.com. |
| example.com | smtp:mail.anotherdomain.tld:2025 | Delivers all emails for example.com via smtp to the server mail.anotherdomain.com, but on port 2025, not 25 which is the default port for smtp. |
| example.com |
smtp:[1.2.3.4] | The square brackets prevent Postfix from doing lookups of the MX DNS record for the address in square brackets. Makes sense for IP addresses. |
| .example.com | smtp:mail.anotherdomain.tld | Mail for any subdomain of example.com is delivered to mail.anotherdomain.tld. |
| * | smtp:mail.anotherdomain.tld | All emails are delivered to mail.anotherdomain.tld. |
| [email protected] | smtp:mail.anotherdomain.tld | Emails for [email protected] are delivered to mail.anotherdomain.tld. |
See
man transport
for more details.
Please keep in mind that the order of entries in the transport table is important! The entries will be followed from the top to the bottom.
Important: Postfix uses a caching mechanism for the transports, therefore it might take a while until you changes in the transport table take effect. If you want them to take effect immediately, run
postfix reload
after you have made your changes in the transport table.
17 Send A Welcome Email For Creating Maildir
When you create a new email account and try to fetch emails from it (with POP3/IMAP) you will probably get error messages saying that the Maildir doesn't exist. The Maildir is created automatically when the first email arrives for the new account. Therefore it's a good idea to send a welcome email to a new account.
First, we install the mailx package:
yum install mailx
To send a welcome email to [email protected], we do this:
mailx [email protected]
You will be prompted for the subject. Type in the subject (e.g. Welcome), then press ENTER, and in the next line type your message. When the message is finished, press ENTER again so that you are in a new line, then press CTRL+D:
[[email protected] ~]# mailx [email protected]
Subject:Welcome <-- ENTER
Welcome! Have fun with your new mail account. <-- ENTER
<-- CTRL+D
EOT
[[email protected] ~]#
18 Installing SquirrelMail
SquirrelMail is a webmail interface that will let your users send and receive emails in a browser. This chapter shows how to install it and adjust it to our setup so that users can even change their email account password from the SquirrelMail interface.
To install SquirrelMail, we run:
yum install squirrelmail php-pear-DB
Open /etc/httpd/conf.d/squirrelmail.conf...
vi /etc/httpd/conf.d/squirrelmail.conf
... and add Require all granted to the
#
# SquirrelMail is a webmail package written in PHP.
#

Alias /webmail /usr/share/squirrelmail

<Directory "/usr/share/squirrelmail/plugins/squirrelspell/modules">
  Deny from all
</Directory>

# this section makes squirrelmail use https connections only, for this you
# need to have mod_ssl installed. If you want to use unsecure http
# connections, just remove this section:
<Directory /usr/share/squirrelmail>
  Require all granted
  RewriteEngine  on
  RewriteCond    %{HTTPS} !=on
  RewriteRule (.*) https://%{HTTP_HOST}%{REQUEST_URI}
</Directory> |
Afterwards we restart Apache:
systemctl restart httpd.service
SquirrelMail comes with some pre-installed plugins, unfortunately none of them is capable of letting us change our email password in our MySQL database. But there's the Change SQL Password plugin which we can install manually:
cd /usr/share/squirrelmail/plugins
wget http://www.squirrelmail.org/plugins/change_sqlpass-3.3-1.2.tar.gz
tar xvfz change_sqlpass-3.3-1.2.tar.gz
cd change_sqlpass
cp config.php.sample config.php
Now we must edit config.php and adjust it to our setup. Please adjust the $csp_dsn, $lookup_password_query, $password_update_queries, $password_encryption, $csp_salt_static, and $csp_delimiter variables as follows and comment out $csp_salt_query:
vi config.php
[...]
$csp_dsn = 'mysql://mail_admin:[email protected]/mail';
[...]
$lookup_password_query = 'SELECT count(*) FROM users WHERE email = "%1" AND password = %4';
[...]
$password_update_queries = array('UPDATE users SET password = %4 WHERE email = "%1"');
[...]
$password_encryption = 'MYSQLENCRYPT';
[...]
$csp_salt_static = 'LEFT(password, 2)';
[...]
//$csp_salt_query = 'SELECT salt FROM users WHERE username = "%1"';
[...]
$csp_delimiter = '@';
[...] |
The complete file looks as follows:
<?php

/**
  * SquirrelMail Change SQL Password Plugin
  * Copyright (C) 2001-2002 Tyler Akins
  *               2002 Thijs Kinkhorst <[email protected]>
  *               2002-2005 Paul Lesneiwski <[email protected]>
  * This program is licensed under GPL. See COPYING for details
  *
  * @package plugins
  * @subpackage Change SQL Password
  *
  */


   // Global Variables, don't touch these unless you want to break the plugin
   //
   global $csp_dsn, $password_update_queries, $lookup_password_query,
          $force_change_password_check_query, $password_encryption,
          $csp_salt_query, $csp_salt_static, $csp_secure_port,
          $csp_non_standard_http_port, $csp_delimiter, $csp_debug,
          $min_password_length, $max_password_length, $include_digit_in_password,
          $include_uppercase_letter_in_password, $include_lowercase_letter_in_password,
          $include_nonalphanumeric_in_password;


   // csp_dsn
   //
   // Theoretically, any SQL database supported by Pear should be supported
   // here.  The DSN (data source name) must contain the information needed
   // to connect to your database backend. A MySQL example is included below.
   // For more details about DSN syntax and list of supported database types,
   // please see:
   //   http://pear.php.net/manual/en/package.database.db.intro-dsn.php
   //
   //$csp_dsn = 'mysql://user:[email protected]/email_users';
   $csp_dsn = 'mysql://mail_admin:[email protected]/mail';


   // lookup_password_query
   //
   // This plugin will always verify the user's old password
   // against their login password, but an extra check can also
   // be done against the database for more security if you
   // desire.  If you do not need the extra password check,
   // make sure this setting is empty.
   //
   // This is a query that returns a positive value if a user
   // and password pair are found in the database.
   //
   // This query should return one value (one row, one column), the
   // value being ideally a one or a zero, simply indicating that
   // the user/password pair does in fact exist in the database.
   //
   //   %1 in this query will be replaced with the full username
   //      (including domain), such as "[email protected]"
   //   %2 in this query will be replaced with the username (without
   //      any domain portion), such as "jose"
   //   %3 in this query will be replaced with the domain name,
   //      such as "example.com"
   //   %4 in this query will be replaced with the current (old)
   //      password in whatever encryption format is needed per other
   //      plugin configuration settings (Note that the syntax of
   //      the password will be provided depending on your encryption
   //      choices, so you NEVER need to provide quotes around this
   //      value in the query here.)
   //   %5 in this query will be replaced with the current (old)
   //      password in unencrypted plain text.  If you do not use any
   //      password encryption, %4 and %5 will be the same values,
   //      except %4 will have double quotes around it and %5 will not.
   //
   //$lookup_password_query = '';
   // TERRIBLE SECURITY: $lookup_password_query = 'SELECT count(*) FROM users WHERE username = "%1" AND plain_password = "%5"';
   //$lookup_password_query = 'SELECT count(*) FROM users WHERE username = "%1" AND crypt_password = %4';
   $lookup_password_query = 'SELECT count(*) FROM users WHERE email = "%1" AND password = %4';


   // password_update_queries
   //
   // An array of SQL queries that will all be executed
   // whenever a password change attempt is made.
   //
   // Any number of queries may be included here.
   // The queries will be executed in the order given here.
   //
   //   %1 in all queries will be replaced with the full username
   //      (including domain), such as "[email protected]"
   //   %2 in all queries will be replaced with the username (without
   //      any domain portion), such as "jose"
   //   %3 in all queries will be replaced with the domain name,
   //      such as "example.com"
   //   %4 in all queries will be replaced with the new password
   //      in whatever encryption format is needed per other
   //      plugin configuration settings (Note that the syntax of
   //      the password will be provided depending on your
   //      encryption choices, so you NEVER need to provide quotes
   //      around this value in the queries here.)
   //   %5 in all queries will be replaced with the new password
   //      in unencrypted plain text - BEWARE!  If you do not use
   //      any password encryption, %4 and %5 will be the same
   //      values, except %4 will have double quotes around it
   //      and %5 will not.
   //
//   $password_update_queries = array(
//            'UPDATE users SET crypt_password = %4 WHERE username = "%1"',
//            'UPDATE user_flags SET force_change_pwd = 0 WHERE username = "%1"',
//            'UPDATE users SET crypt_password = %4, force_change_pwd = 0 WHERE username = "%1"',
//                                   );
     $password_update_queries = array('UPDATE users SET password = %4 WHERE email = "%1"');


   // force_change_password_check_query
   //
   // A query that checks for a flag that indicates if a user
   // should be forced to change their password.  This query
   // should return one value (one row, one column) which is
   // zero if the user does NOT need to change their password,
   // or one if the user should be forced to change it now.
   //
   // This setting should be an empty string if you do not wish
   // to enable this functionality.
   //
   //   %1 in this query will be replaced with the full username
   //      (including domain), such as "[email protected]"
   //   %2 in this query will be replaced with the username (without
   //      any domain portion), such as "jose"
   //   %3 in this query will be replaced with the domain name,
   //      such as "example.com"
   //
   //$force_change_password_check_query = 'SELECT IF(force_change_pwd = "yes", 1, 0) FROM users WHERE username = "%1"';
   //$force_change_password_check_query = 'SELECT force_change_pwd FROM users WHERE username = "%1"';
   $force_change_password_check_query = '';


   // password_encryption
   //
   // What encryption method do you use to store passwords
   // in your database?  Please use one of the following,
   // exactly as you see it:
   //
   //   NONE          Passwords are stored as plain text only
   //   MYSQLPWD      Passwords are stored using the MySQL password() function
   //   MYSQLENCRYPT  Passwords are stored using the MySQL encrypt() function
   //   PHPCRYPT      Passwords are stored using the PHP crypt() function
   //   MD5CRYPT      Passwords are stored using encrypted MD5 algorithm
   //   MD5           Passwords are stored as MD5 hash
   //
   //$password_encryption = 'MYSQLPWD';
   $password_encryption = 'MYSQLENCRYPT';


   // csp_salt_query
   // csp_salt_static
   //
   // Encryption types that need a salt need to know where to get
   // that salt.  If you have a constant, known salt value, you
   // should define it in $csp_salt_static.  Otherwise, leave that
   // value empty and define a value for the $csp_salt_query.
   //
   // Leave both values empty if you do not need (or use) salts
   // to encrypt your passwords.
   //
   // The query should return one value (one row, one column) which
   // is the salt value for the current user's password.  This
   // query is ignored if $csp_salt_static is anything but empty.
   //
   //   %1 in this query will be replaced with the full username
   //      (including domain), such as "[email protected]"
   //   %2 in this query will be replaced with the username (without
   //      any domain portion), such as "jose"
   //   %3 in this query will be replaced with the domain name,
   //      such as "example.com"
   //
   //$csp_salt_static = 'LEFT(crypt_password, 2)';
   //$csp_salt_static = '"a4"';  // use this format with MYSQLENCRYPT
   //$csp_salt_static = '$2$blowsomefish$';  // use this format with PHPCRYPT
   //$csp_salt_static = '';
   $csp_salt_static = 'LEFT(password, 2)';

   //$csp_salt_query = 'SELECT SUBSTRING_INDEX(crypt_password, '$', 1) FROM users WHERE username = "%1"';
   //$csp_salt_query = 'SELECT SUBSTRING(crypt_password, (LENGTH(SUBSTRING_INDEX(crypt_password, '$', 2)) + 2)) FROM users WHERE username = "%1"';
   //$csp_salt_query = 'SELECT salt FROM users WHERE username = "%1"';
   //$csp_salt_query = '';


   // csp_secure_port
   //
   // You may ensure that SSL encryption is used during password
   // change by setting this to the port that your HTTPS is served
   // on (443 is typical).  Set to zero if you do not wish to force
   // an HTTPS connection when users are changing their passwords.
   //
   // You may override this value for certain domains, users, or
   // service levels through the Virtual Host Login (vlogin) plugin
   // by setting a value(s) for $vlogin_csp_secure_port in the vlogin
   // configuration.
   //
   $csp_secure_port = 0;
   //$csp_secure_port = 443;


   // csp_non_standard_http_port
   //
   // If you serve standard HTTP web requests on a non-standard
   // port (anything other than port 80), you should specify that
   // port number here.  Set to zero otherwise.
   //
   // You may override this value for certain domains, users, or
   // service levels through the Virtual Host Login (vlogin) plugin
   // by setting a value(s) for $vlogin_csp_non_standard_http_port
   // in the vlogin configuration.
   //
   //$csp_non_standard_http_port = 8080;
   $csp_non_standard_http_port = 0;


   // min_password_length
   // max_password_length
   // include_digit_in_password
   // include_uppercase_letter_in_password
   // include_lowercase_letter_in_password
   // include_nonalphanumeric_in_password
   //
   // You can set the minimum and maximum password lengths that
   // you accept or leave those settings as zero to indicate that
   // no limit should be applied.
   //
   // Turn on any of the other settings here to check that the
   // new password contains at least one digit, upper case letter,
   // lower case letter and/or one non-alphanumeric character.
   //
   $min_password_length = 6;
   $max_password_length = 0;
   $include_digit_in_password = 0;
   $include_uppercase_letter_in_password = 0;
   $include_lowercase_letter_in_password = 0;
   $include_nonalphanumeric_in_password = 0;


   // csp_delimiter
   //
   // if your system has usernames with something other than
   // an "@" sign separating the user and domain portion,
   // specify that character here
   //
   //$csp_delimiter = '|';
   $csp_delimiter = '@';


   // debug mode
   //
   $csp_debug = 0;


?> |
The Change SQL Password plugin also depends on the Compatibility plugin which we install as follows:
cd /usr/share/squirrelmail/plugins
wget http://www.squirrelmail.org/plugins/compatibility-2.0.16-1.0.tar.gz
tar xvfz compatibility-2.0.16-1.0.tar.gz
Now we must go into the SquirrelMail configuration and tell SquirrelMail that we use Courier as our POP3 and IMAP server and enable the Change SQL Password and the Compatibility plugins:
/usr/share/squirrelmail/config/conf.pl
You'll see the following menu. Navigate through it as indicated:
SquirrelMail Configuration : Read: config.php (1.4.0)
---------------------------------------------------------
Main Menu --
1.  Organization Preferences
2.  Server Settings
3.  Folder Defaults
4.  General Options
5.  Themes
6.  Address Books
7.  Message of the Day (MOTD)
8.  Plugins
9.  Database
10. Languages

D.  Set pre-defined settings for specific IMAP servers

C   Turn color off
S   Save data
Q   Quit

Command >> <-- D


SquirrelMail Configuration : Read: config.php
---------------------------------------------------------
While we have been building SquirrelMail, we have discovered some
preferences that work better with some servers that don't work so
well with others.  If you select your IMAP server, this option will
set some pre-defined settings for that server.

Please note that you will still need to go through and make sure
everything is correct.  This does not change everything.  There are
only a few settings that this will change.

Please select your IMAP server:
    bincimap    = Binc IMAP server
    courier     = Courier IMAP server
    cyrus       = Cyrus IMAP server
    dovecot     = Dovecot Secure IMAP server
    exchange    = Microsoft Exchange IMAP server
    hmailserver = hMailServer
    macosx      = Mac OS X Mailserver
    mercury32   = Mercury/32
    uw          = University of Washington's IMAP server
    gmail       = IMAP access to Google mail (Gmail) accounts

    quit        = Do not change anything
Command >> <-- courier


              imap_server_type = courier
         default_folder_prefix = INBOX.
                  trash_folder = Trash
                   sent_folder = Sent
                  draft_folder = Drafts
            show_prefix_option = false
          default_sub_of_inbox = false
show_contain_subfolders_option = false
            optional_delimiter = .
                 delete_folder = true

Press enter to continue... <-- press ENTER


SquirrelMail Configuration : Read: config.php (1.4.0)
---------------------------------------------------------
Main Menu --
1.  Organization Preferences
2.  Server Settings
3.  Folder Defaults
4.  General Options
5.  Themes
6.  Address Books
7.  Message of the Day (MOTD)
8.  Plugins
9.  Database
10. Languages

D.  Set pre-defined settings for specific IMAP servers

C   Turn color off
S   Save data
Q   Quit

Command >> <-- 8


SquirrelMail Configuration : Read: config.php (1.4.0)
---------------------------------------------------------
Plugins
  Installed Plugins
    1. delete_move_next
    2. squirrelspell
    3. newmail

  Available Plugins:
    4. administrator
    5. bug_report
    6. calendar
    7. change_sqlpass
    8. compatibility
    9. filters
    10. fortune
    11. info
    12. listcommands
    13. mail_fetch
    14. message_details
    15. sent_subfolders
    16. spamcop
    17. test
    18. translate

R   Return to Main Menu
C   Turn color off
S   Save data
Q   Quit

Command >> <-- 8 (or whatever number the compatibility plugin has - it's needed by the change_sqlpass plugin)


SquirrelMail Configuration : Read: config.php (1.4.0)
---------------------------------------------------------
Plugins
  Installed Plugins
    1. delete_move_next
    2. squirrelspell
    3. newmail
    4. compatibility

  Available Plugins:
    5. administrator
    6. bug_report
    7. calendar
    8. change_sqlpass
    9. filters
    10. fortune
    11. info
    12. listcommands
    13. mail_fetch
    14. message_details
    15. sent_subfolders
    16. spamcop
    17. test
    18. translate

R   Return to Main Menu
C   Turn color off
S   Save data
Q   Quit

Command >> <-- 8 (the number of the change_sqlpass plugin)


SquirrelMail Configuration : Read: config.php (1.4.0)
---------------------------------------------------------
Plugins
  Installed Plugins
    1. delete_move_next
    2. squirrelspell
    3. newmail
    4. compatibility
    5. change_sqlpass

  Available Plugins:
    6. administrator
    7. bug_report
    8. calendar
    9. filters
    10. fortune
    11. info
    12. listcommands
    13. mail_fetch
    14. message_details
    15. sent_subfolders
    16. spamcop
    17. test
    18. translate

R   Return to Main Menu
C   Turn color off
S   Save data
Q   Quit

Command >> <-- S


SquirrelMail Configuration : Read: config.php (1.4.0)
---------------------------------------------------------
Plugins
  Installed Plugins
    1. delete_move_next
    2. squirrelspell
    3. newmail
    4. compatibility
    5. change_sqlpass

  Available Plugins:
    6. administrator
    7. bug_report
    8. calendar
    9. filters
    10. fortune
    11. info
    12. listcommands
    13. mail_fetch
    14. message_details
    15. sent_subfolders
    16. spamcop
    17. test
    18. translate

R   Return to Main Menu
C   Turn color off
S   Save data
Q   Quit

Command >> S

Data saved in config.php
Press enter to continue... <-- ENTER


SquirrelMail Configuration : Read: config.php (1.4.0)
---------------------------------------------------------
Plugins
  Installed Plugins
    1. delete_move_next
    2. squirrelspell
    3. newmail
    4. compatibility
    5. change_sqlpass

  Available Plugins:
    6. administrator
    7. bug_report
    8. calendar
    9. filters
    10. fortune
    11. info
    12. listcommands
    13. mail_fetch
    14. message_details
    15. sent_subfolders
    16. spamcop
    17. test
    18. translate

R   Return to Main Menu
C   Turn color off
S   Save data
Q   Quit

Command >> <-- Q
One last thing we need to do is modify the file /etc/squirrelmail/config_local.php and comment out the $default_folder_prefix variable - if you don't do this, you will see the following error message in SquirrelMail after you've logged in:Query:CREATE "Sent" Reason Given:Invalid mailbox name.
vi /etc/squirrelmail/config_local.php
<?php /** * Local config overrides. * * You can override the config.php settings here. * Don't do it unless you know what you're doing. * Use standard PHP syntax, see config.php for examples. * * @copyright © 2002-2006 The SquirrelMail Project Team * @license http://opensource.org/licenses/gpl-license.php GNU Public License * @version $Id$ * @package squirrelmail * @subpackage config */ //$default_folder_prefix = ''; ?> |
Now you can type in http://server1.example.com/webmail or http://192.168.0.100/webmail in your browser to access SquirrelMail.
Log in with your email address (e.g. [email protected]) and your password:
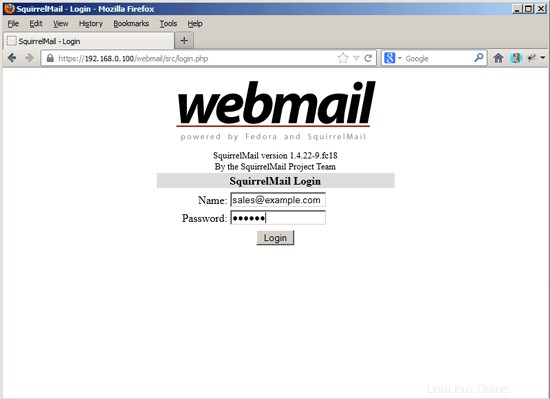
You should find the welcome email in your inbox:
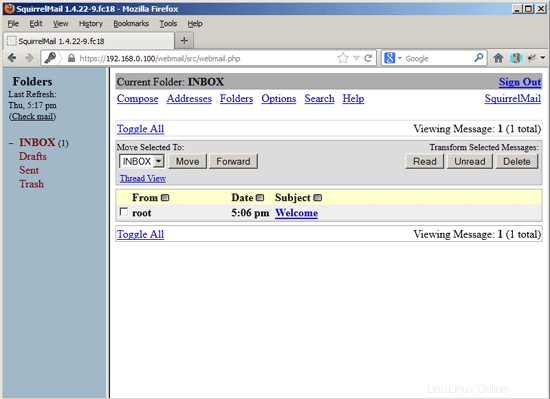
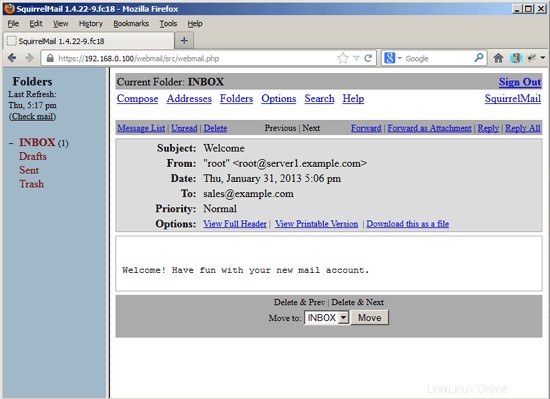
To change your password, go to Options and then select Change Password:
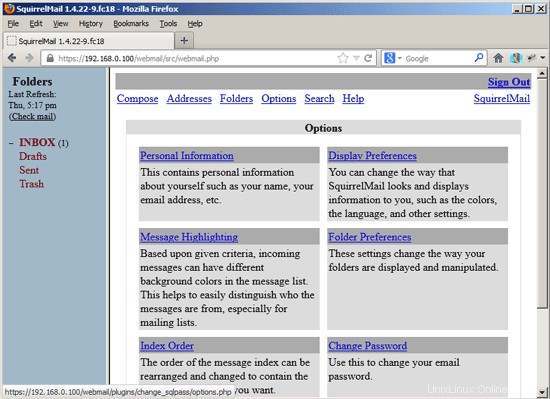
Type in your current password and then your new password twice:
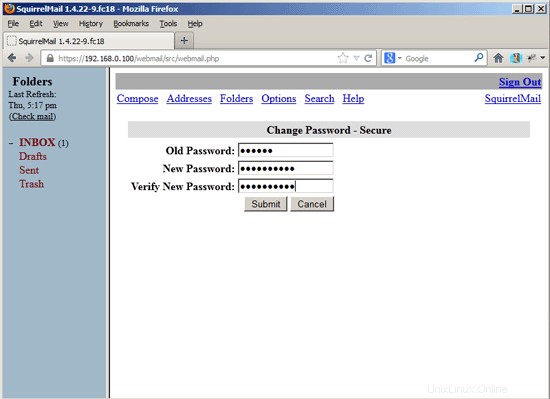
After you've changed the password, you will have to immediately log in again with the new password:
19 VMA (Virtual Mail Admin Interface)
Virtual Mail Admin (VMA) is a small PHP-based web app written to manage the email system set up in this guide. I didn't test it, but I thought I'd share.
This is what the developer (Charl Loubser) wrote to me in an email:
"Hi There,
I don't know if you'll like this, or if this has any use to you, but I thought I'd Share:
I wrote a silly little webapp for the setup you did in the Howto:https://www.howtoforge.com/virtual-users-domains-postfix-courier-mysql-squirrelmail-ubuntu-10.04
If you approve and think it worthy of sharing on your tutorial, you are more than welcome, and can feel free to do so.
As mentioned in the readme, this is not a perfect app, but it does the job for now, and I'd thing it's relatively safe in a closed environment (LAN setup between servers).
The rar file with the app is attached, but can also be downloaded at :http://code.google.com/p/vma/"
20 References
Tutorial:ISP-style Email Service with Debian-Sarge and Postfix 2.1:http://workaround.org/articles/ispmail-sarge/
Postfix + Quota:http://vhcs.net/new/modules/newbb/viewtopic.php?topic_id=3496&forum=17
Mail Passwords Encrypted using saslauthd:http://www.syscp.de/docs/public/contrib/cryptedmailpws
21 Links
- Postfix MTA:http://www.postfix.org/
- Postfix Quota Patch:http://web.onda.com.br/nadal/
- phpMyAdmin:http://www.phpmyadmin.net/
- SquirrelMail:http://www.squirrelmail.org/
- Fedora:http://fedoraproject.org/