MySQL adalah sistem manajemen basis data sumber terbuka yang biasa digunakan dalam tumpukan aplikasi web untuk menyimpan dan mengambil catatan dan informasi.
MySQL adalah aplikasi database utama untuk sistem operasi Linux sampai MariaDB , garpu MySQL, muncul di gambar. MySQL pertama kali dikembangkan oleh MYSQL AB, sekarang dimiliki oleh Oracle Corporation.
Dalam panduan ini, kita akan melihat langkah-langkah untuk Menginstal MySQL 8 di Ubuntu 18.04.
Yang Baru di MySQL 8.0
- MySQL sekarang menggabungkan kamus data transaksional
- Mendukung peran, kumpulan hak istimewa.
- Menyimpan riwayat sandi
- Set karakter default telah diubah dari latin1 menjadi utf8mb4.
- Peningkatan pada InnoDB dan JSON
- Pengelolaan sumber daya yang lebih baik
- Error logging telah ditulis ulang untuk menggunakan arsitektur komponen MySQL
- Peningkatan pada Replikasi MySQL
Instal MySQL 8.0 di Ubuntu 18.04
Seperti yang Anda ketahui, server MySQL tidak lagi didistribusikan melalui image sistem operasi dasar atau repositori OS karena masalah lisensi.
Sebagai langkah pertama, sekarang kita akan menyiapkan repositori resmi MySQL di sistem.
wget https://dev.mysql.com/get/mysql-apt-config_0.8.10-1_all.deb
Instal paket repositori menggunakan dpkg perintah.
sudo dpkg -i mysql-apt-config_0.8.10-1_all.deb
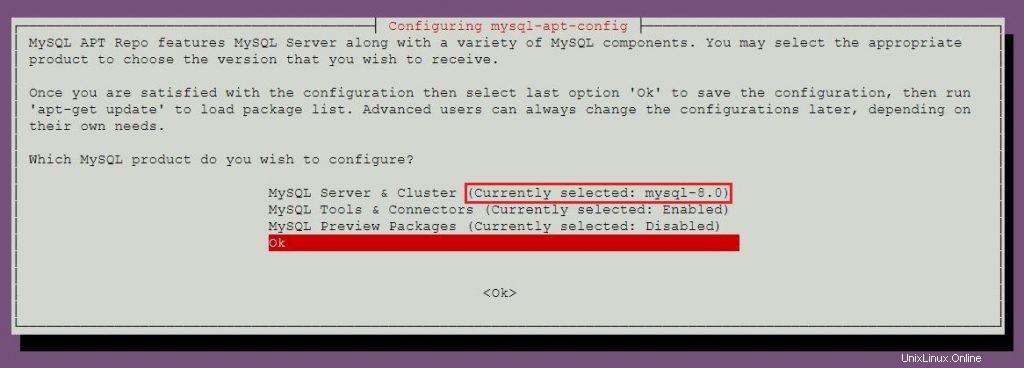
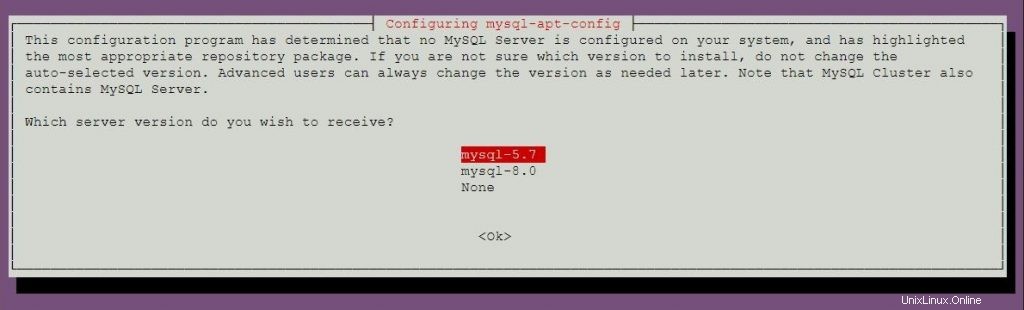
Penginstal MYSQL akan meminta Anda untuk memilih repositori MySQL. Berdasarkan pilihan Anda, penginstal akan mengonfigurasi repositori pada sistem untuk menerima versi MySQL yang sesuai.
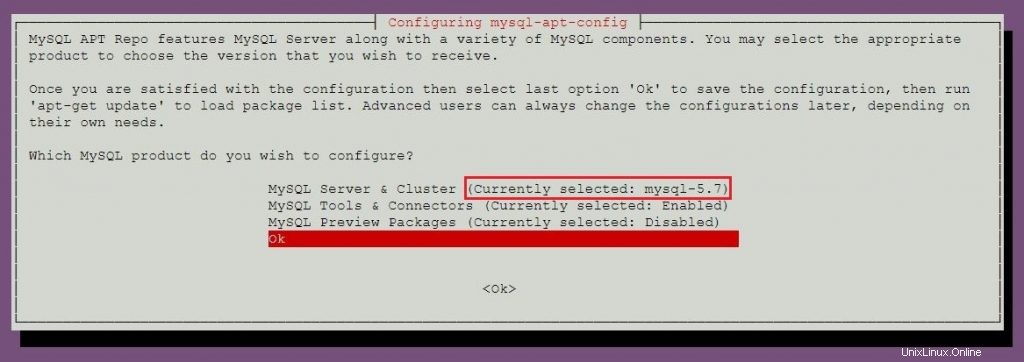
Di sini, saya akan memilih MySQL 8.0 yang merupakan default. Kemudian pilih OK lalu tekan enter.
Untuk menginstal MySQL 5.7, buka bagian instal MySQL 5.7 untuk mengetahui lebih lanjut tentang memilih repositori MySQL 5.7.
Perbarui indeks repositori menggunakan apt-get update perintah.
sudo apt-get update
Gunakan apt perintah untuk menginstal versi stabil terbaru MySQL .
sudo apt-get -y install mysql-server
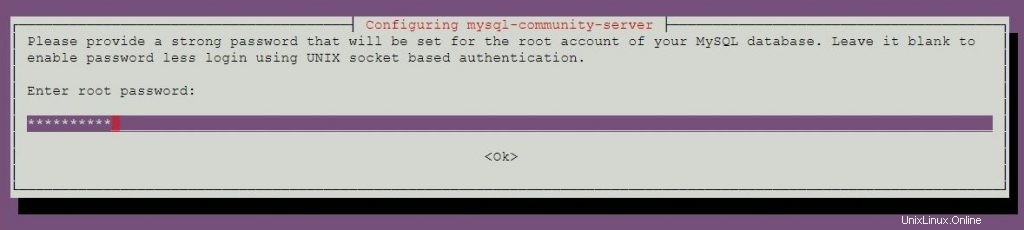
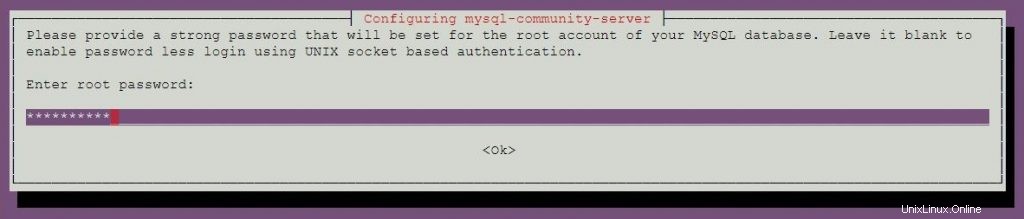
Pemasang paket akan meminta Anda untuk menyetel kata sandi root MySQL.
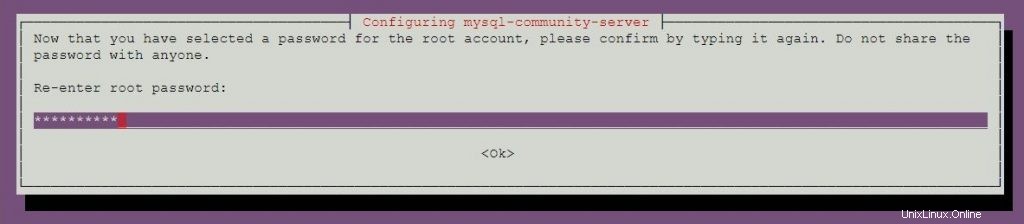
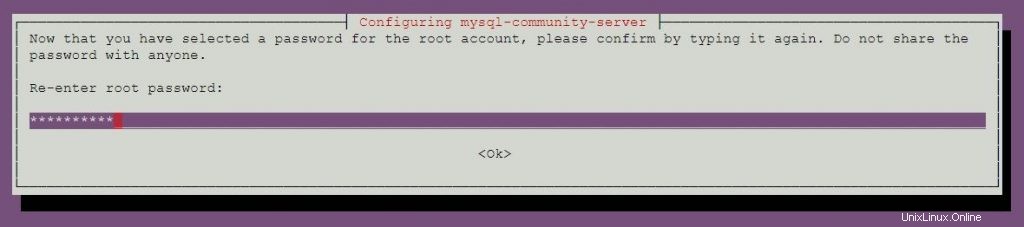
Masukkan kembali kata sandi.
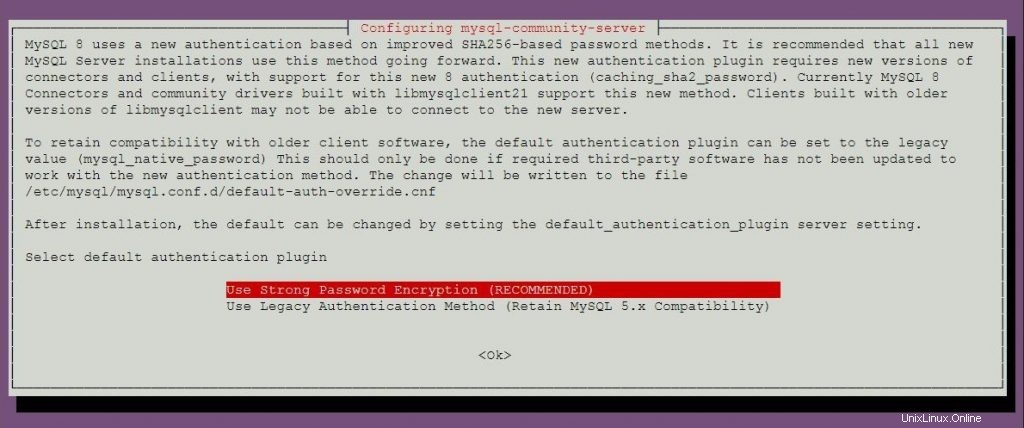
MySQL 8.0 menggunakan otentikasi baru berdasarkan metode kata sandi SHA 256 yang ditingkatkan. Jika Anda memilih opsi ini, klien lama mungkin tidak dapat terhubung ke server. Anda dapat mengubah autentikasi default kapan saja dengan menyetel default-authentication-plugin = mysql_native_password dalam file konfigurasi.
Pilih plugin autentikasi default.
Instal MySQL 5.7 di Ubuntu 18.04
Sekarang kita akan menyiapkan repositori resmi MySQL di sistem.
wget https://dev.mysql.com/get/mysql-apt-config_0.8.10-1_all.deb
Instal paket repositori menggunakan dpkg perintah.
sudo dpkg -i mysql-apt-config_0.8.10-1_all.deb
ATAU
Jika sistem sudah memiliki paket repositori MySQL, dan Anda ingin menginstal MySQL 5.7 pada sistem.
sudo dpkg-reconfigure mysql-apt-config
Penginstal paket MySQL akan meminta Anda untuk memilih repositori MySQL. Berdasarkan pilihan Anda, penginstal akan mengonfigurasi repositori untuk menerima versi MySQL yang sesuai.
Tekan tombol enter untuk mengubah versi MySQL pada jendela ini.

Pilih mysql-5.7 lalu tekan enter.
Pilih OK lalu tekan enter.
Perbarui indeks repositori menggunakan perintah apt.
sudo apt-get update
Jalankan perintah di bawah ini untuk menginstal MySQL 5.7 di komputer Anda.
sudo apt-get -y install mysql-server
Pemasang paket akan meminta Anda untuk menyetel kata sandi root MySQL.
Masukkan kembali kata sandi.
Mulai server MySQL
Setelah instalasi MySQL, Anda dapat memulai server MySQL menggunakan perintah berikut.
sudo systemctl start mysql
Aktifkan server MySQL saat startup sistem.
sudo systemctl enable mysql
Verifikasi bahwa layanan server MySQL dimulai menggunakan perintah berikut.
sudo systemctl status mysql
Keluaran:
● mysql.service - MySQL Community Server
   Loaded: loaded (/lib/systemd/system/mysql.service; enabled; vendor preset: enabled)
   Active: active (running) since Mon 2018-05-14 11:15:52 UTC; 27min ago
 Main PID: 3269 (mysqld)
    Tasks: 27 (limit: 1997)
   CGroup: /system.slice/mysql.service
           └─3269 /usr/sbin/mysqld --daemonize --pid-file=/var/run/mysqld/mysqld.pid

May 14 11:15:51 mysqlub18 systemd[1]: Starting MySQL Community Server...
May 14 11:15:52 mysqlub18 systemd[1]: Started MySQL Community Server.
Server MySQL Aman
Sebagai langkah pertama setelah penginstalan, kita perlu menjalankan skrip aman MySQL yang disertakan dengan paket untuk membuat instance MySQL ini lebih aman.
sudo mysql_secure_installation
Perintah ini membutuhkan kata sandi root MySQL.
Securing the MySQL server deployment.

Enter password for user root: <-- Enter MySQL root password

VALIDATE PASSWORD PLUGIN can be used to test passwords
and improve security. It checks the strength of password
and allows the users to set only those passwords which are
secure enough. Would you like to setup VALIDATE PASSWORD plugin?

Press y|Y for Yes, any other key for No: n <-- N for not to validate the password
Using existing password for root.
Change the password for root ? ((Press y|Y for Yes, any other key for No) : no <-- No, as we have already set root password

 ... skipping.
By default, a MySQL installation has an anonymous user,
allowing anyone to log into MySQL without having to have
a user account created for them. This is intended only for
testing, and to make the installation go a bit smoother.
You should remove them before moving into a production
environment.

Remove anonymous users? (Press y|Y for Yes, any other key for No) : y <-- Remove anonymous users
Success.


Normally, root should only be allowed to connect from
'localhost'. This ensures that someone cannot guess at
the root password from the network.

Disallow root login remotely? (Press y|Y for Yes, any other key for No) : y <-- Disallow root login
Success.

By default, MySQL comes with a database named 'test' that
anyone can access. This is also intended only for testing,
and should be removed before moving into a production
environment.


Remove test database and access to it? (Press y|Y for Yes, any other key for No) : y <-- Remove test database
 - Dropping test database...
Success.

 - Removing privileges on test database...
Success.

Reloading the privilege tables will ensure that all changes
made so far will take effect immediately.

Reload privilege tables now? (Press y|Y for Yes, any other key for No) : y <-- Reload privilege table
Success.

All done!
Bekerja dengan Server MySQL
Masuk ke server MySQL dengan root pengguna dan kata sandi yang Anda tetapkan selama instalasi MySQL.
mysql -u root -p
MySQL 8.0:
Enter password:
Welcome to the MySQL monitor.  Commands end with ; or \g.
Your MySQL connection id is 8
Server version: 8.0.11 MySQL Community Server - GPL

Copyright (c) 2000, 2018, Oracle and/or its affiliates. All rights reserved.

Oracle is a registered trademark of Oracle Corporation and/or its
affiliates. Other names may be trademarks of their respective
owners.

Type 'help;' or '\h' for help. Type '\c' to clear the current input statement.

mysql>
MySQL 5.7:
Enter password:
Welcome to the MySQL monitor.  Commands end with ; or \g.
Your MySQL connection id is 4
Server version: 5.7.21 MySQL Community Server (GPL)

Copyright (c) 2000, 2018, Oracle and/or its affiliates. All rights reserved.

Oracle is a registered trademark of Oracle Corporation and/or its
affiliates. Other names may be trademarks of their respective
owners.

Type 'help;' or '\h' for help. Type '\c' to clear the current input statement.

mysql>
Itu saja.