Lighttpd adalah server web yang aman, cepat, dan sesuai standar yang dirancang untuk lingkungan yang kritis terhadap kecepatan. Tutorial ini menunjukkan bagaimana Anda dapat menginstal Lighttpd di server Centos 7 dengan dukungan PHP (melalui PHP-FPM) dan dukungan MySQL. PHP-FPM (FastCGI Process Manager) adalah implementasi PHP FastCGI alternatif dengan beberapa fitur tambahan yang berguna untuk situs dari berbagai ukuran, terutama situs yang lebih sibuk. Saya menggunakan PHP-FPM dalam tutorial ini daripada spawn-fcgi Lighttpd.
1 Catatan Awal
Dalam tutorial ini, saya menggunakan hostname server1.example.com dengan alamat IP 192.168.1.100. Setelan ini mungkin berbeda untuk Anda, jadi Anda harus menggantinya jika perlu.
2 Menginstal MariaDB sebagai pengganti MySQL
Pertama kita install MySQL seperti ini:
yum -y install mariadb mariadb-server
Kemudian kita membuat link startup sistem untuk MySQL (sehingga MySQL mulai secara otomatis setiap kali sistem boot) dan memulai server MySQL:
systemctl enable  mariadb.service
systemctl start  mariadb.service
Setel kata sandi untuk akun root MarisDB:
mysql_secure_installation
[[email protected] ~]# mysql_secure_installation
/usr/bin/mysql_secure_installation:
NOTE: RUNNING ALL PARTS OF THIS SCRIPT IS RECOMMENDED FOR ALL MariaDB
SERVERS IN PRODUCTION USE! PLEASE READ EACH STEP CAREFULLY!
In order to log into MariaDB to secure it, we'll need the current
password for the root user. If you've just installed MariaDB, and
you haven't set the root password yet, the password will be blank,
so you should just press enter here.
Enter current password for root (enter for none): <-- press enter
OK, successfully used password, moving on...
Setting the root password ensures that nobody can log into the MariaDB
root user without the proper authorisation.
Set root password? [Y/n] <-- y
New password: <-- enter new password
Re-enter new password: <-- enter new password
Password updated successfully!
Reloading privilege tables..
... Success!
By default, a MariaDB installation has an anonymous user, allowing anyone
to log into MariaDB without having to have a user account created for
them. This is intended only for testing, and to make the installation
go a bit smoother. You should remove them before moving into a
production environment.
Remove anonymous users? [Y/n] <-- y
... Success!
Normally, root should only be allowed to connect from 'localhost'. This
ensures that someone cannot guess at the root password from the network.
Disallow root login remotely? [Y/n] <-- y
... Success!
By default, MariaDB comes with a database named 'test' that anyone can
access. This is also intended only for testing, and should be removed
before moving into a production environment.
Remove test database and access to it? [Y/n] <-- y
- Dropping test database...
... Success!
- Removing privileges on test database...
... Success!
Reloading the privilege tables will ensure that all changes made so far
will take effect immediately.
Reload privilege tables now? [Y/n] <-- y
... Success!
Cleaning up...
All done! If you've completed all of the above steps, your MariaDB
installation should now be secure.
Thanks for using MariaDB!
3 Memasang Lighttpd
Karena Lighttpd dan PHP-FPM tidak tersedia dari repositori CentOS resmi, kita perlu mengaktifkan repositori EPEL:
yum -y install epel-release
Impor kunci EPEL GPG:
rpm --import /etc/pki/rpm-gpg/RPM-GPG-KEY-EPEL-7
lalu jalankan:
yum update
Setelah itu, kita dapat menginstal Lighttpd seperti ini:
yum -y install lighttpd
Kemudian kita membuat link startup sistem untuk Lighttpd (sehingga Lighttpd dimulai secara otomatis setiap kali sistem boot) dan memulainya:
systemctl enable  lighttpd.service
systemctl start  lighttpd.service
Jika Lighttpd gagal memulai dengan pesan kesalahan berikut...
(network.c.203) socket failed: Address family not supported by protocol
... buka /etc/lightpd/lightpd.conf...
nano /etc/lighttpd/lighttpd.conf
... dan ubah server.use-ipv6 dari aktifkan menjadi nonaktifkan:
[...]
##
## Use IPv6?
##
server.use-ipv6 = "disable"
[...]
Kemudian coba mulai Lighttpd lagi - sekarang seharusnya berfungsi tanpa masalah:
systemctl start lighttpd.service
Lighttpd memiliki root dokumen di /var/www/ htdocs (direktori dasar /var/www plus htdocs sebagai subdirektori menurut file lighttpd.conf) tetapi menginstal file default ke /var/www/ lighttpd. Itu tidak konsisten sehingga kita harus mengganti nama direktori seperti ini.
mv /var/www/lighttpd /var/www/htdocs
Sekarang arahkan browser Anda ke http://192.168.1.100, dan Anda akan melihat halaman berikut:
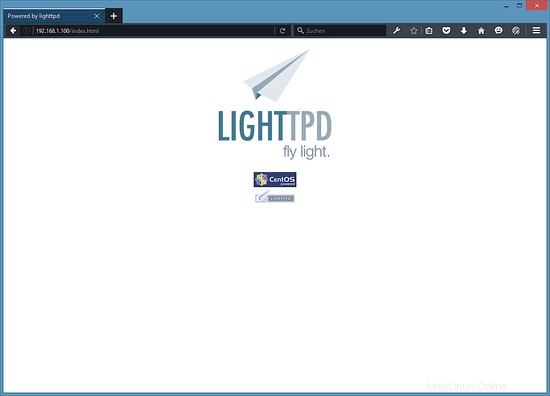
Akar dokumen default Lighttpd adalah /var/www/htdocs/ pada CentOS 7, dan file konfigurasinya adalah /etc/lighttpd/lighttpd.conf.
4 Menginstal PHP
Kita bisa membuat PHP bekerja di Lighttpd melalui PHP-FPM yang kita install seperti ini:
yum -y install php-fpm lighttpd-fastcgi
PHP-FPM adalah proses daemon yang menjalankan server FastCGI pada port 9000.
Buka /etc/php-fpm.d/www.conf...
nano /etc/php-fpm.d/www.conf
... dan atur pengguna dan grup ke lighttpd:
[...]
; Unix user/group of processes
; Note: The user is mandatory. If the group is not set, the default user's group
;       will be used.
; RPM: apache Choosed to be able to access some dir as httpd
user = lighttpd
; RPM: Keep a group allowed to write in log dir.
group = lighttpd
[...]
Buat tautan startup sistem untuk PHP-FPM dan mulai:
systemctl enable  php-fpm.service
systemctl start  php-fpm.service