Pacemaker adalah Perangkat Lunak cluster Ketersediaan Tinggi untuk Linux seperti Sistem Operasi.Pacemaker dikenal sebagai 'Manajer Sumber Daya Cluster ‘, Ini menyediakan ketersediaan maksimum sumber daya cluster dengan melakukan fail over sumber daya antara node cluster.
Alat pacu jantung menggunakan corosync untuk detak jantung dan komunikasi internal antar komponen cluster, Corosync juga menangani Quorum dalam cluster.
Pada artikel ini kami akan mendemonstrasikan instalasi dan konfigurasi dua Clustering Server Web Node Apache (httpd) menggunakan Pacemaker di CentOS 7.
Dalam pengaturan saya, saya akan menggunakan dua Mesin Virtual dan Penyimpanan Bersama dari Server Fedora (dua disk akan dibagikan di mana satu disk akan digunakan sebagai perangkat pagar dan disk lainnya akan digunakan sebagai penyimpanan bersama untuk server web)
- node1.linuxtechi.com ( 192.168.1.51 ) — CentOS 7.x
- node2.linuxtechi.com (192.168.1.52 ) — CentOS 7.x
Langkah:1 Perbarui file '/etc/hosts'
Tambahkan baris berikut di file /etc/hosts di kedua node.
192.168.1.51 node1.linuxtechi.com node1192.168.1.52 node2.linuxtechi.com node2
Langkah:2 Instal Cluster dan paket lain yang diperlukan.
Gunakan perintah yum di bawah ini pada kedua node untuk menginstal paket cluster (pcs ), agen pagar &server web (httpd)
[[email protected] ~]# yum -y update[[email protected] ~]# yum -y install pcs fence-agents-all iscsi-initiator-utils httpd[[email protected] ~]# yum -y update[[email protected] ~]# yum -y install pcs fence-agents-all iscsi-initiator-utils httpd
Langkah:3 Setel kata sandi ke pengguna 'hacluster'
Disarankan untuk menggunakan kata sandi yang sama dari pengguna 'hacluster' di kedua node.
[[email protected] ~]# echo| passwd --stdin hacluster[[email protected] ~]# echo | passwd --stdin hacluster
Langkah:4 Izinkan port Ketersediaan Tinggi di firewall.
Gunakan ‘firewall-cmd ' perintah pada kedua node untuk membuka port Ketersediaan Tinggi di firewall OS.
[[email protected] ~]# firewall-cmd --permanent --add-service=high-availabilitysuccess[[email protected] ~]# firewall-cmd --reloadsuccess[[email protected] ~]#[[ email protected] ~]# firewall-cmd --permanent --add-service=high-availabilitysuccess[[email protected] ~]# firewall-cmd --reloadsuccess[[email protected] ~]#
Langkah:5 Mulai Layanan Cluster dan otorisasi node untuk bergabung dengan cluster.
Mari kita mulai layanan cluster di kedua node,
[[email protected] ~]# systemctl start pcsd.service[[email protected] ~]# systemctl enable pcsd.serviceln -s '/usr/lib/systemd/system/pcsd.service' '/etc/systemd /system/multi-user.target.wants/pcsd.service'[[email protected] ~]#[[email protected] ~]# systemctl start pcsd.service[[email protected] ~]# systemctl enable pcsd.serviceln - s '/usr/lib/systemd/system/pcsd.service' '/etc/systemd/system/multi-user.target.wants/pcsd.service'[[email protected] ~]#
Gunakan perintah di bawah ini pada salah satu node untuk mengotorisasi node untuk bergabung dengan cluster.
[[email protected] ~]# pcs cluster auth node1 node2Username:haclusterPassword:node1:Authorizednode2:Authorized[[email protected] ~]#
Langkah:6 Buat Cluster &aktifkan Layanan Cluster
Gunakan perintah pcs di bawah ini pada salah satu node cluster untuk membuat cluster dengan nama ‘apachecluster ' dan node1 &node2 adalah node cluster.
[[email protected] ~]# pcs penyiapan cluster --start --name apachecluster node1 node2Mematikan layanan alat pacu jantung/corosync...Mengalihkan ke /bin/systemctl stop pacemaker.serviceMengalihkan ke /bin/systemctl stop corosync.serviceKilling layanan yang tersisa...Menghapus semua file konfigurasi cluster...node1:Succeedednode2:BerhasilMemulai cluster pada node:node1, node2...node2:Memulai Cluster...node1:Memulai Cluster...Menyinkronkan sertifikat pcsd pada node node1, node2...node1:Successnode2:SuccessRestaring pcsd pada node untuk memuat ulang sertifikat...node1:Successnode2:Success[[email protected] ~]#
Aktifkan Layanan Cluster menggunakan perintah pcs di bawah ini :
[[email protected] ~]# pcs cluster aktifkan --allnode1:Cluster Enablednode2:Cluster Enabled[[email protected] ~]#
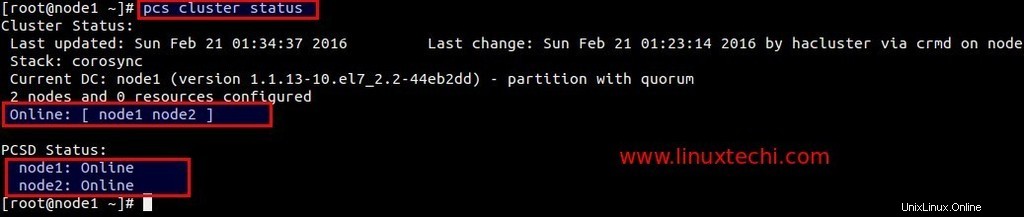
Sekarang Verifikasi Layanan cluster
[[email protected] ~]# pcs status cluster
Langkah:7 Siapkan penyimpanan bersama iscsi di Server Fedora untuk kedua node.
Alamat IP Fedora 23 Server =192.168.1.21
Instal paket yang diperlukan terlebih dahulu.
[[email protected] ~]# dnf -y install targetcli
Saya memiliki disk baru (/ dev/sdb) berukuran 11 GB di server fedora saya di mana saya telah membuat dua LV satu untuk Fecing dan lainnya untuk sistem file Apache.
[[email protected] ~]# pvcreate /dev/sdb Volume fisik "/dev/sdb" berhasil dibuat[[email protected] ~]# vgcreate cluster_data /dev/sdb Grup volume "cluster_data" berhasil dibuat[example@unixlinux.online ~]# lvcreate -L 1G -n fence_storage cluster_data Volume logis "fence_storage" dibuat.[[email protected] ~]# lvcreate -L 10G -n apache_storage cluster_data Volume logis "apache_storage" dibuat.[[email protected] ~] #
Dapatkan Nama Inisiator dari kedua node.
[[email protected] ~]# cat /etc/iscsi/initiatorname.iscsi InitiatorName=iqn.1994-05.com.redhat:63ba7391df7f[[email protected] ~]# [[email protected] ~]# cat /etc/iscsi/initiatorname.iscsi InitiatorName=iqn.1994-05.com.redhat:d4337e65531e[[email protected] ~]#
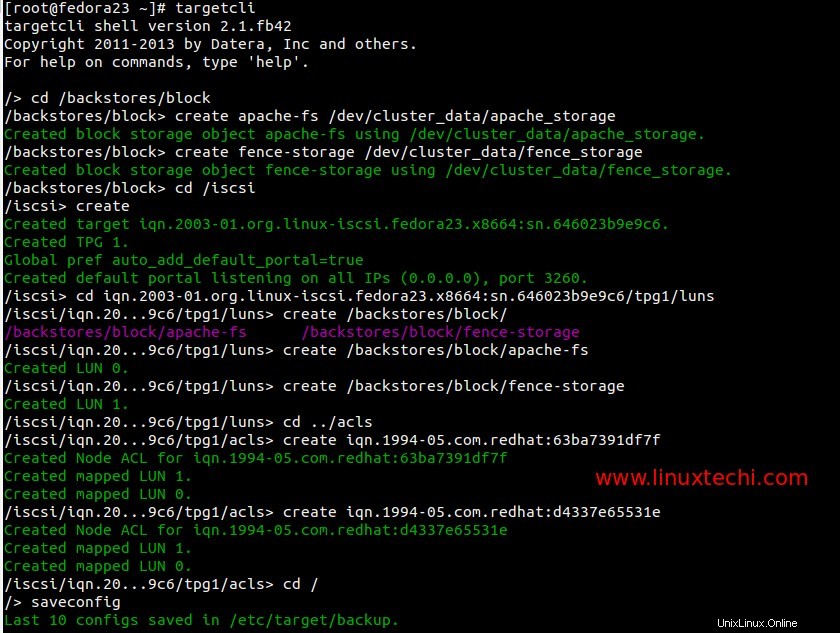
Sekarang gunakan ‘targetcli ' perintah untuk mengonfigurasi penyimpanan iscsi untuk kedua node.
[[email protected] ~]# targetcli/> cd /backstores/block/backstores/block> create apache-fs /dev/cluster_data/apache_storage /backstores/block> create fence-storage /dev/cluster_data/fence_storage / backstores/block> cd /iscsi/iscsi> create/iscsi> cd iqn.2003-01.org.linux-iscsi.fedora23.x8664:sn.646023b9e9c6/tpg1/luns/iscsi/iqn.20...9c6/tpg1 /luns> buat /backstores/block/Apache-fs/iscsi/iqn.2...9c6/tpg1/luns> buat /backstores/block/fence-storage/iscsi/iqn.2...9c6/tpg1/luns> cd ../acls/iscsi/iqn.2...9c6/tpg1/acls> buat iqn.1994-05.com.redhat:63ba7391df7f/iscsi/iqn.20...9c6/tpg1/acls> buat iqn .1994-05.com.redhat:d4337e65531e/iscsi/iqn.2...9c6/tpg1/acls> cd //> saveconfig /> exit
Mulai &aktifkan layanan target
[[email protected] ~]# systemctl start target.service[[email protected] ~]# systemctl enable target.service[[email protected] ~]#
Buka port iscsi di OS Firewall.
[[email protected] ~]# firewall-cmd --permanent --add-port=3260/tcpsuccess[[email protected] ~]# firewall-cmd --reloadsuccess[[email protected] ~]#Sekarang Pindai penyimpanan iscsi di kedua node :
Jalankan perintah di bawah ini pada kedua node
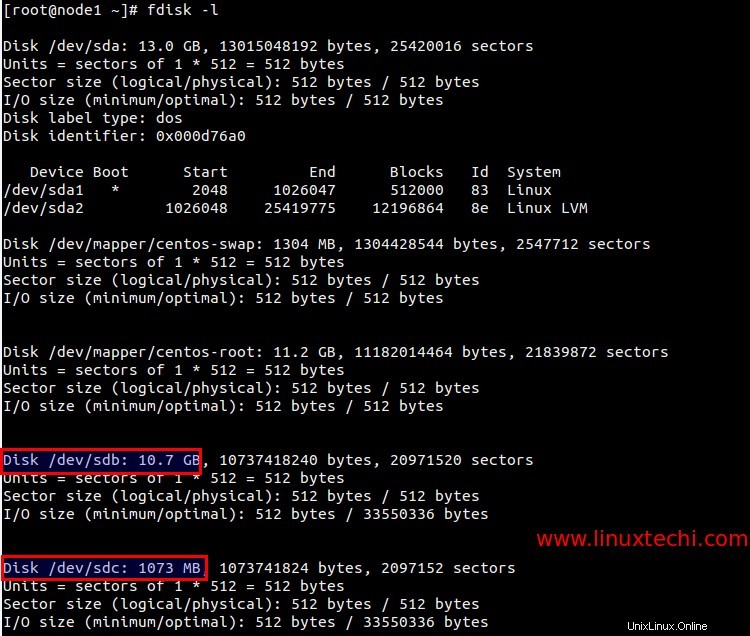
# iscsiadm --mode discovery --type sendtargets --portal 192.168.1.21# iscsiadm -m node -T iqn.2003-01.org.linux-iscsi.fedora23.x8664:sn.646023b9e9c6 -l -p 192.168 .1.21:3260Ganti target 'iqn' dan 'alamat ip' sesuai pengaturan Anda. Setelah menjalankan perintah di atas kita dapat melihat dua disk baru di output perintah 'fdisk -l'.
Mencantumkan id disk iscsi yang baru dipindai.
[[email protected] ~]# ls -l /dev/disk/by-id/total 0..........lrwxrwxrwx. 1 root root 9 Feb 21 03:22 wwn-0x60014056e8763c571974ec3b78812777 -> ../../sdblrwxrwxrwx. 1 root root 9 Feb 21 03:22 wwn-0x6001405ce01173dcd7c4c0da10051405 -> ../../sdc[[email protected] ~]#Mulai dan aktifkan layanan iscsi di kedua node.
[[email protected] ~]# systemctl start iscsi.service[[email protected] ~]# systemctl enable iscsi.service[[email protected] ~]# systemctl enable iscsid.serviceln -s '/usr/lib/ systemd/system/iscsid.service' '/etc/systemd/system/multi-user.target.wants/iscsid.service'[[email protected] ~]# [[email protected] ~]# systemctl start iscsi.service[ [email protected] ~]# systemctl aktifkan iscsi.service[[email protected] ~]# systemctl aktifkan iscsid.serviceln -s '/usr/lib/systemd/system/iscsid.service' '/etc/systemd/system/multi -user.target.wants/iscsid.service'[[email protected] ~]#Langkah:8 Buat Sumber Daya Cluster.
Definisikan batu (Shoot The Other Node In The Head) perangkat pagar untuk cluster. Ini adalah metode untuk mengisolasi node dari cluster ketika node menjadi tidak responsif.
Saya menggunakan penyimpanan iscsi 1 GB (/dev/sdc ) untuk pagar.
Jalankan perintah berikut pada salah satu node :
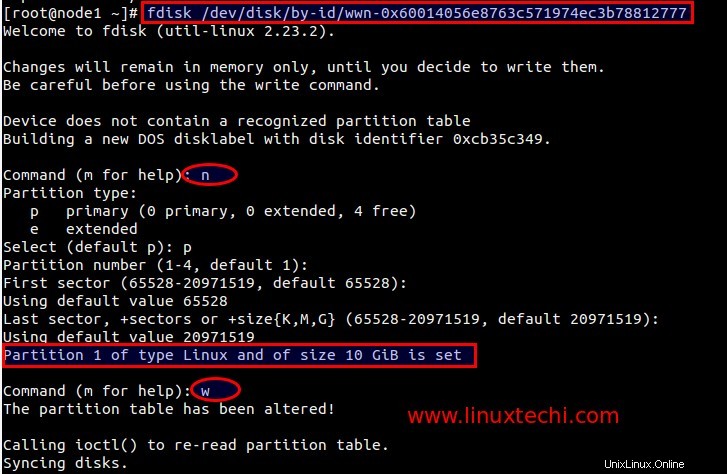
[[email protected] ~]# pcs stonith create scsi_fecing_device fence_scsi pcmk_host_list="node1 node2" pcmk_monitor_action="metadata" pcmk_reboot_action="off" devices="/dev/disk/by-id/wwn-0x6001405ce01173dcd7cd7cd7cd ="unfencing"[[email protected] ~]# [[email protected] ~]# pcs stonith show scsi_fecing_device (stonith:fence_scsi):Memulai node1[[email protected] ~]#Sekarang Buat partisi pada penyimpanan iscsi kedua (/dev/sdb ) yang akan digunakan sebagai root dokumen untuk server web kita.
[[email protected] ~]# fdisk /dev/disk/by-id/wwn-0x60014056e8763c571974ec3b78812777
Format partisi yang baru dibuat :
[[email protected] ~]# mkfs.ext4 /dev/disk/by-id/wwn-0x60014056e8763c571974ec3b78812777-part1Pasang sistem file baru sementara di /var/www dan buat sub-folder dan atur aturan selinux.
[[email protected] html]# mount /dev/disk/by-id/wwn-0x60014056e8763c571974ec3b78812777-part1 /var/www/[[email protected] html]# mkdir /var/www/html[[email protected] ] html]# mkdir /var/www/cgi-bin[[email protected] html]# mkdir /var/www/error[[email protected] html]# restorecon -R /var/www[[email protected] html] # echo "Cluster Alat Pacu Jantung Pemutus Web Apache"> /var/www/html/index.htmlUmount sistem file sekarang karena cluster akan memasang sistem file saat diperlukan.
[[email protected] html]# umount /var/www/[[email protected] html]#Buat Sumber Daya Cluster sistem file Web Server menggunakan perintah pcs di bawah ini.
[[email protected] html]# pcs resource buat webserver_fs Filesystem device="/dev/disk/by-id/wwn-0x60014056e8763c571974ec3b78812777-part1" directory="/var/www" fstype="ext4" --group webgroup[[email protected] html]# [[email protected] html]# pcs resource show Grup Sumber Daya:webgroup webserver_fs (ocf::heartbeat:Filesystem):Memulai node1[[email protected] html]#Tambahkan baris berikut di file ‘/etc/httpd/conf/httpd.conf’ di kedua node.
SetHandler server-status Pesanan ditolak, izinkan Tolak dari semua Izinkan dari 127.0.0.1 Buka httpd atau port server web di firewall OS di kedua node
[[email protected] ~]# firewall-cmd --permanent --add-service=httpsuccess[[email protected] ~]# firewall-cmd --reloadsuccess[[email protected] ~]#[[email protected] ] ~]# firewall-cmd --permanent --add-service=httpsuccess[[email protected] ~]# firewall-cmd --reloadsuccess[[email protected] ~]#Buat Sumber Daya Cluster IP Virtual (IPaddr2) menggunakan perintah di bawah ini. Jalankan perintah berikut pada salah satu node.
[[email protected] ~]# pcs resource buat vip_res IPaddr2 ip=192.168.1.151 cidr_netmask=24 --group webgroup[[email protected] ~]#Buat Sumber Daya Cluster Apache menggunakan Perintah di bawah ini :
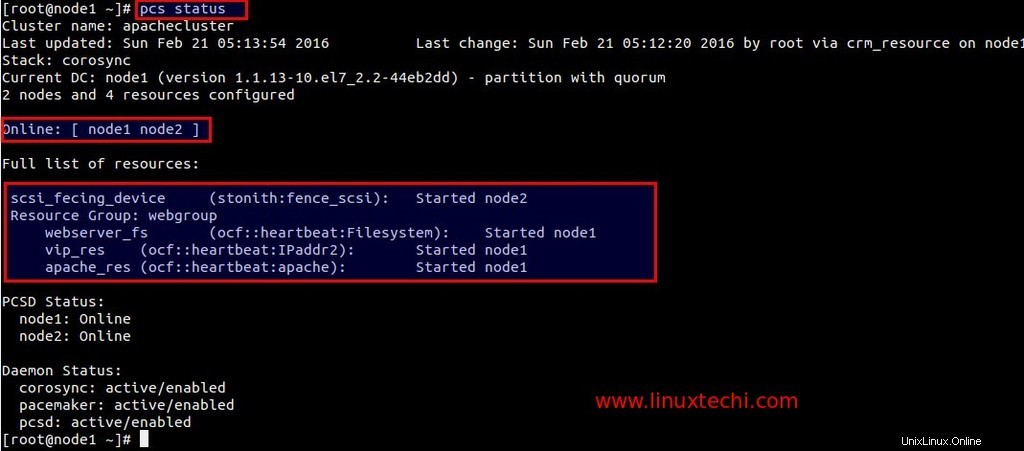
[[email protected] ~]# pcs resource create Apache_res apache configfile="/etc/httpd/conf/httpd.conf" statusurl="http://127.0.0.1/server-status" --group webgroup[ [dilindungi email] ~]#Verifikasi Status Gugus :
[[email protected] ~]# pcs status
Gunakan ‘df ' dan 'ip add ' perintah untuk memverifikasi sistem file dan failover alamat ip.
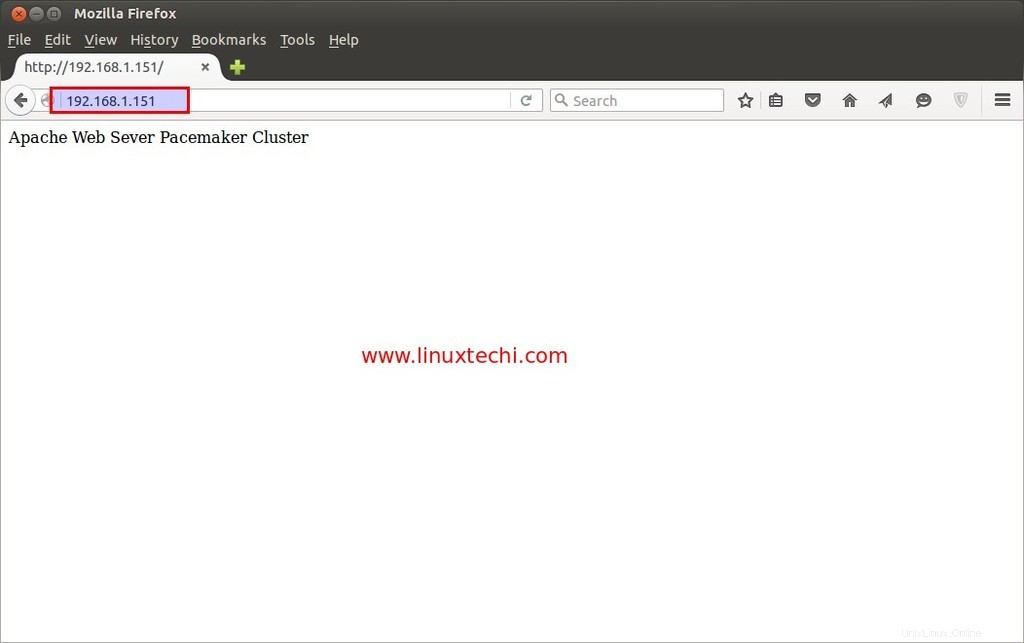
Akses Situs Web Anda menggunakan VIP (192.168.1.151)
.
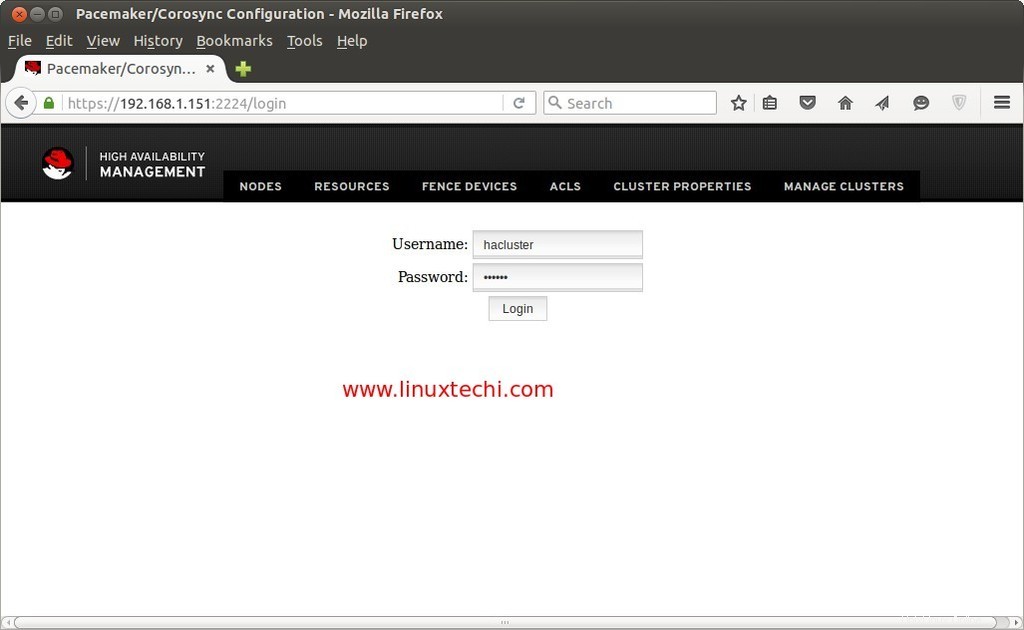
GUI alat pacu jantung :
GUI Pacemaker dapat diakses dari browser web menggunakan vip.
https://192.168.1.151:2224/
Gunakan nama pengguna 'hacluster' dan kata sandinya yang kami atur pada langkah di atas.
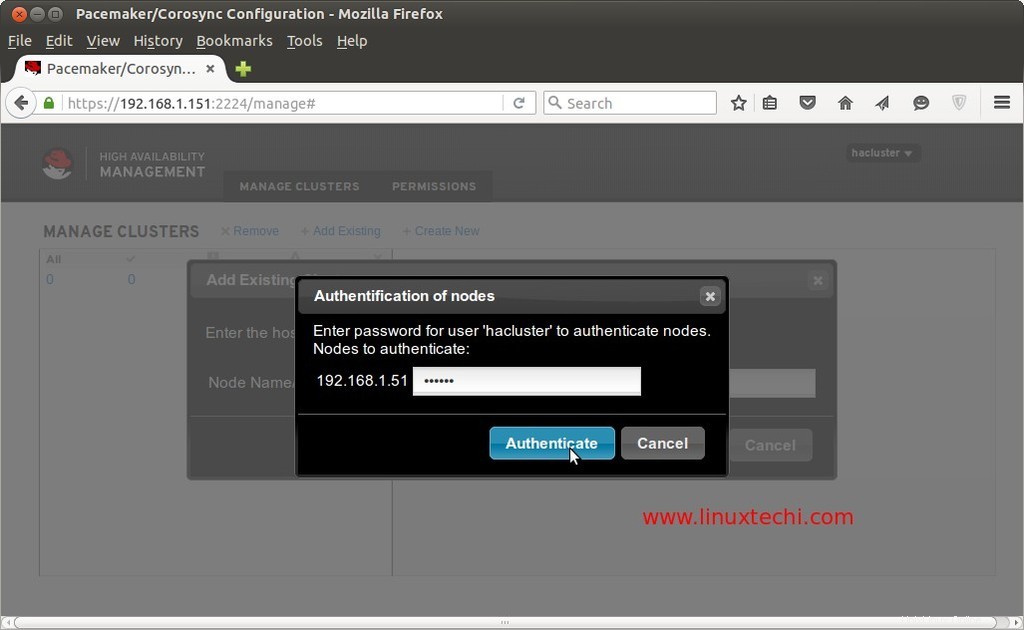
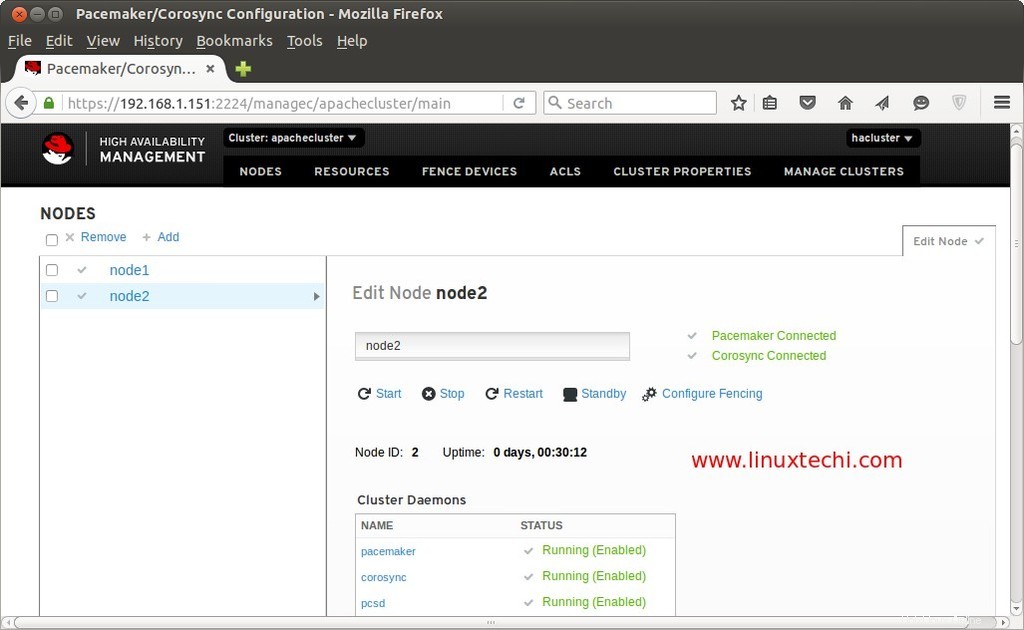
Tambahkan node Cluster yang ada.
Instalasi dan Konfigurasi Alat Pacu Jantung selesai Sekarang, Semoga Anda menikmati langkah-langkahnya. Silakan bagikan umpan balik &komentar Anda yang berharga
Referensi : http://clusterlabs.org/quickstart-redhat.html
Cent OS