Pengantar
How-to ini akan membantu Anda dengan instalasi dan konfigurasi Apache di server Ubuntu 20.04 Anda. Apache adalah server web yang sangat populer di sistem Linux dan melalui Internet. Ini digunakan oleh banyak perusahaan Web Hosting di seluruh dunia karena popularitas dan efisiensinya dalam menghosting situs di seluruh World Wide Web.
Prasyarat
Anda memerlukan server Ubuntu 20.04 yang dikonfigurasi dengan alamat IP statis. Jika Anda belum memiliki server, Anda dapat menjalankan server pribadi virtual yang aman dalam waktu kurang dari 30 detik.
Instal Apache di Ubuntu 20.04
Langkah pertama adalah menginstal Apache dengan perintah berikut:
sudo apt-get install apache2
Jalankan Apache dengan perintah berikut:
service apache2 start
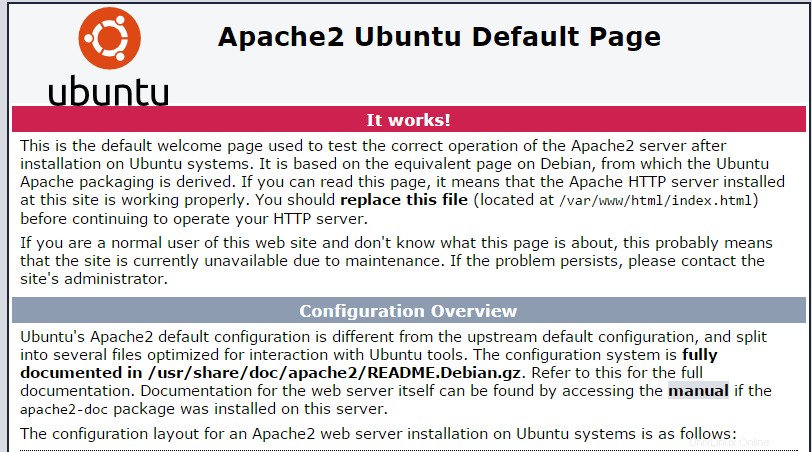
Verifikasi apakah semuanya berfungsi dengan mengetikkan http://YOUR.IP.ADD.RESS
IP Anda dapat diambil dari server dengan perintah berikut:
ifconfig eth0 | grep inet | awk '{ print $2 }' 
Gambar ini adalah halaman web default saat menginstal Apache di Ubuntu 20.04
Konfigurasi Apache (Host Tunggal)
Sekarang kita akan mengonfigurasi Apache dengan membuka file konfigurasi utama dan mengedit baris ServerName dan ServerAdmin yang sesuai.
nano /etc/apache2/sites-available/000-default.conf
<VirtualHost *:80>
        # The ServerName directive sets the request scheme, hostname and port that
        # the server uses to identify itself. This is used when creating
        # redirection URLs. In the context of virtual hosts, the ServerName
        # specifies what hostname must appear in the request's Host: header to
        # match this virtual host. For the default virtual host (this file) this
        # value is not decisive as it is used as a last resort host regardless.
        # However, you must set it for any further virtual host explicitly.
        #ServerName www.example.com

        ServerAdmin [email protected]
        DocumentRoot /var/www/html

        # Available loglevels: trace8, ..., trace1, debug, info, notice, warn,
        # error, crit, alert, emerg.
        # It is also possible to configure the loglevel for particular
        # modules, e.g.
        #LogLevel info ssl:warn

        ErrorLog ${APACHE_LOG_DIR}/error.log
        CustomLog ${APACHE_LOG_DIR}/access.log combined

        # For most configuration files from conf-available/, which are
        # enabled or disabled at a global level, it is possible to
        # include a line for only one particular virtual host. For example the
        # following line enables the CGI configuration for this host only
        # after it has been globally disabled with "a2disconf".
        #Include conf-available/serve-cgi-bin.conf
</VirtualHost>

# vim: syntax=apache ts=4 sw=4 sts=4 sr noet
Simpan file dan mulai ulang layanan Apache HTTP, agar perubahan diterapkan.
service apache2 restart
Sekarang Anda dapat membuat/mengunggah konten web Anda ke direktori HTML Apache.(Ingatlah untuk mengganti file index.html yang ada dengan index.html yang merupakan halaman beranda Anda)
nano /var/www/html/index.html
Konfigurasi Apache (Multi-Host)
Jika Anda ingin meng-host beberapa situs web, lanjutkan dengan membuka file konfigurasi utama, salin entri Virtual Host yang ada dan tempel di bawahnya. Kemudian edit baris ServerName, ServerAdmin, dan DocumentRoot yang sesuai.
nano /etc/apache2/sites-available/000-default.conf
Atau Anda dapat menyalin entri berikut dan mengeditnya sesuai dengan itu:
<VirtualHost *:80>
ServerAdmin [email protected]
DocumentRoot /var/www/site1
ServerName site1.com
ServerAlias www.site1.com
 ErrorLog ${APACHE_LOG_DIR}/error.log
 CustomLog ${APACHE_LOG_DIR}/access.log combined
</VirtualHost>

<VirtualHost *:80>
ServerAdmin [email protected]
DocumentRoot /var/www/site2
ServerName site2.com
ServerAlias www.site2.com
 ErrorLog ${APACHE_LOG_DIR}/error.log
 CustomLog ${APACHE_LOG_DIR}/access.log combined
</VirtualHost>
Sekarang kita harus membuat direktori untuk situs yang baru saja dikonfigurasi, site1 dan site2.
mkdir /var/www/site1
mkdir /var/www/site2
Sekarang Anda dapat mulai membuat/mengunggah konten web Anda di direktori situs Apache.
nano /var/www/site1/index.html
nano /var/www/site2/index.html
Apa Selanjutnya?
Dengan itu, Anda sekarang memiliki server yang diinstal dan dikonfigurasi dengan Apache. Anda sekarang dapat melanjutkan membangun situs web Anda. Terima kasih telah mengikuti dan jangan ragu untuk menghubungi kami kembali untuk pembaruan lebih lanjut, lihat posting terkait Ubuntu lainnya di blog kami atau pelajari lebih lanjut tentang solusi hosting VPS kami yang memenangkan penghargaan.