Grav adalah CMS gratis, open-source, dan flat-file yang tidak memerlukan database apa pun. Ini didasarkan pada PHP dan menawarkan beberapa fitur yang mungkin tidak tersedia untuk CMS lain seperti, WordPress, Joomla, dll. Sederhana, mudah digunakan, dan dilengkapi dengan beberapa teknologi utama termasuk, Twig Templating, Markdown, YAML, Parsedown, Doctrine Cache, Gregwar Image Library, dan Symfony Console.
Dalam tutorial ini, saya akan menunjukkan cara menginstal Grav CMS dengan Nginx dan Let's Encrypt SSL di server Ubuntu 20.04.
Prasyarat
- Server yang menjalankan Ubuntu 20.04.
- Nama domain valid yang ditunjukkan dengan IP server Anda.
- Kata sandi root dikonfigurasi di server.
Memulai
Pertama, perbarui paket sistem ke versi yang diperbarui dengan menjalankan perintah berikut:
apt-get update -y
Setelah semua paket diperbarui, Anda dapat melanjutkan ke langkah berikutnya.
Instal Nginx dan PHP
Pertama, Anda perlu menginstal server web Nginx, PHP, dan ekstensi PHP lainnya ke sistem Anda. Anda dapat menginstal semuanya dengan perintah berikut:
apt-get install nginx php php-cli php-fpm php-common php-curl php-gd php-json php-mbstring php-xml php-zip php-opcache php-apcu unzip -y
Setelah semua paket diinstal, verifikasi versi PHP menggunakan perintah berikut:
php --version
Anda akan mendapatkan output berikut:
PHP 7.4.3 (cli) (built: Jul  5 2021 15:13:35) ( NTS )
Copyright (c) The PHP Group
Zend Engine v3.4.0, Copyright (c) Zend Technologies
    with Zend OPcache v7.4.3, Copyright (c), by Zend Technologies
Selanjutnya, edit file php.ini dan buat beberapa perubahan:
nano /etc/php/7.4/fpm/php.ini
Ubah baris berikut:
memory_limit = 256M
upload_max_filesize = 100M
max_execution_time = 360
max_input_vars = 1500
date.timezone = America/Chicago
Simpan dan tutup file kemudian restart layanan PHP-FPM untuk menerapkan perubahan:
systemctl restart php7.4-fpm
Setelah selesai, Anda dapat melanjutkan ke langkah berikutnya.
Instal Grav CMS
Selanjutnya, Anda perlu mengunduh Grav CMS ke direktori root web Nginx. Anda dapat mengunduhnya dari halaman unduhan Grav menggunakan perintah berikut:
cd /var/www/html
wget https://getgrav.org/download/core/grav-admin/1.7.17
Setelah unduhan selesai, unzip file yang diunduh dengan perintah berikut:
unzip 1.7.17
Selanjutnya, ganti nama direktori yang diekstrak menjadi grav dengan perintah berikut:
mv grav-admin grav
Selanjutnya, atur kepemilikan yang tepat ke direktori grav:
chown -R www-data:www-data /var/www/html/grav
Setelah selesai, Anda dapat melanjutkan ke langkah berikutnya.
Konfigurasi Nginx untuk Grav CMS
Selanjutnya, Anda perlu membuat file konfigurasi virtual host Nginx untuk menghosting Grav CMS. Anda dapat membuatnya dengan perintah berikut:
nano /etc/nginx/conf.d/grav.conf
Tambahkan baris berikut:
server {

listen 80;

server_name grav.example.com;
root /var/www/html/grav;

index index.html index.php;

location / {
   try_files $uri $uri/ /index.php?$query_string;
 }

   location ~* /(\.git|cache|bin|logs|backup|tests)/.*$ { return 403; }
   location ~* /(system|vendor)/.*\.(txt|xml|md|html|yaml|yml|php|pl|py|cgi|twig|sh|bat)$ { return 403; }
   location ~* /user/.*\.(txt|md|yaml|yml|php|pl|py|cgi|twig|sh|bat)$ { return 403; }
   location ~ /(LICENSE\.txt|composer\.lock|composer\.json|nginx\.conf|web\.config|htaccess\.txt|\.htaccess) { return 403; }

location ~ \.php$ {
   fastcgi_pass unix:/var/run/php/php7.4-fpm.sock;
   fastcgi_split_path_info ^(.+\.php)(/.+)$;
   fastcgi_index index.php;
   include fastcgi_params;
   fastcgi_param SCRIPT_FILENAME $document_root/$fastcgi_script_name;
 }

}
Simpan dan tutup file setelah Anda selesai kemudian verifikasi Nginx untuk kesalahan sintaks:
nginx -t
Anda akan mendapatkan output berikut:
nginx: the configuration file /etc/nginx/nginx.conf syntax is ok
nginx: configuration file /etc/nginx/nginx.conf test is successful
Terakhir, restart layanan Nginx untuk menerapkan perubahan:
systemctl restart nginx
Anda juga dapat memverifikasi status Nginx dengan perintah berikut:
systemctl status nginx
Anda akan melihat output berikut:
? nginx.service - A high performance web server and a reverse proxy server
     Loaded: loaded (/lib/systemd/system/nginx.service; enabled; vendor preset: enabled)
     Active: active (running) since Fri 2021-07-09 06:45:28 UTC; 3s ago
       Docs: man:nginx(8)
    Process: 33099 ExecStartPre=/usr/sbin/nginx -t -q -g daemon on; master_process on; (code=exited, status=0/SUCCESS)
    Process: 33110 ExecStart=/usr/sbin/nginx -g daemon on; master_process on; (code=exited, status=0/SUCCESS)
   Main PID: 33111 (nginx)
      Tasks: 2 (limit: 2353)
     Memory: 2.6M
     CGroup: /system.slice/nginx.service
             ??33111 nginx: master process /usr/sbin/nginx -g daemon on; master_process on;
             ??33112 nginx: worker process

Jul 09 06:45:28 node1 systemd[1]: Starting A high performance web server and a reverse proxy server...
Jul 09 06:45:28 node1 systemd[1]: Started A high performance web server and a reverse proxy server.
Setelah semuanya baik-baik saja, Anda dapat melanjutkan ke langkah berikutnya.
Akses Grav CMS
Anda sekarang dapat mengakses UI web Grav CMS menggunakan URL http://grav.example.com . Anda akan melihat layar berikut:
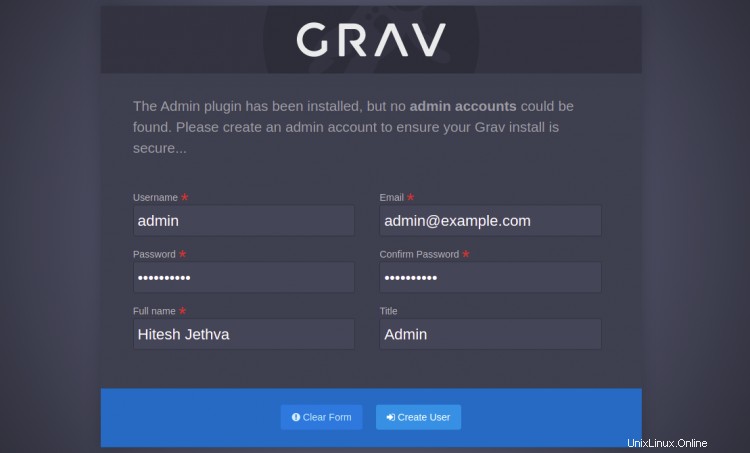
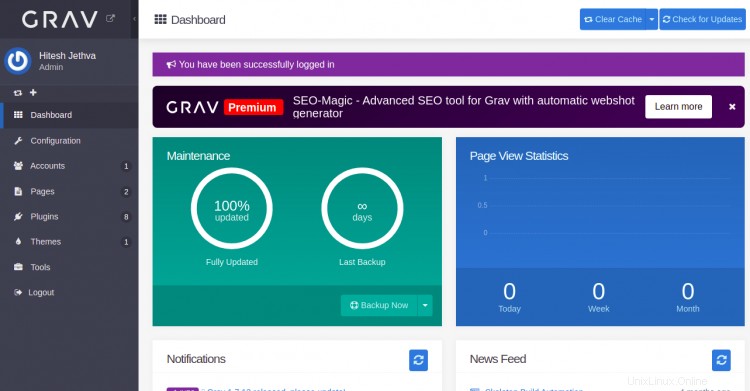
Tetapkan nama pengguna, kata sandi admin Anda, dan klik Buat Pengguna tombol. Anda akan diarahkan ke dasbor Grav CMS:
Halaman Konfigurasi

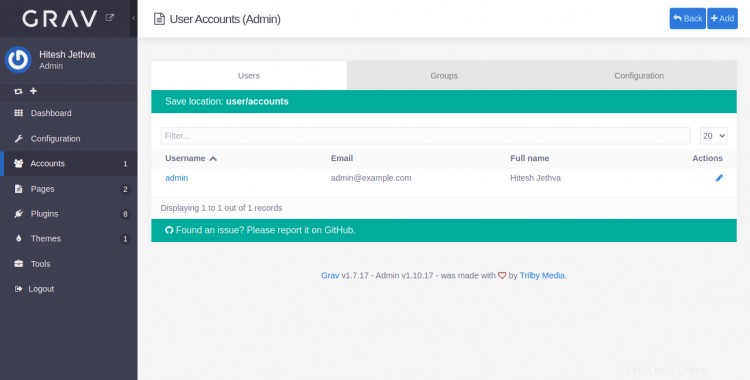
Halaman Akun
Halaman Plugin

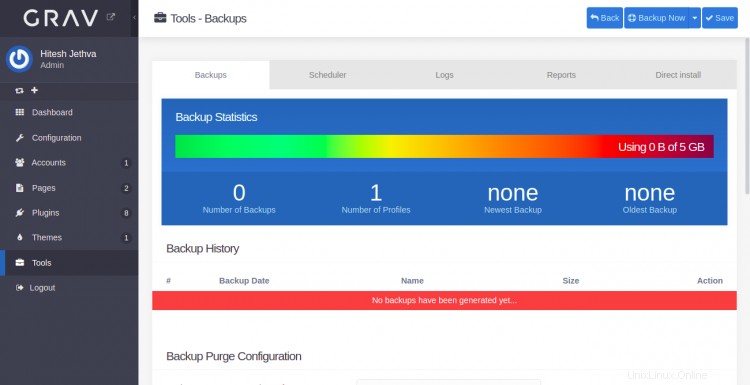
Halaman Alat
Amankan Grav CMS dengan Let's Encrypt SSL
Selanjutnya, Anda perlu menginstal paket klien Certbot untuk menginstal dan mengelola Let's Encrypt SSL.
Pertama, instal Certbot dengan perintah berikut:
apt-get install python3-certbot-nginx -y
Setelah instalasi selesai, jalankan perintah berikut untuk menginstal Let's Encrypt SSL di situs web Anda:
certbot --nginx -d grav.example.com
Anda akan diminta untuk memberikan alamat email yang valid dan menerima persyaratan layanan seperti yang ditunjukkan di bawah ini:
Saving debug log to /var/log/letsencrypt/letsencrypt.log
Plugins selected: Authenticator nginx, Installer nginx
Enter email address (used for urgent renewal and security notices) (Enter 'c' to
cancel): [email protected]

- - - - - - - - - - - - - - - - - - - - - - - - - - - - - - - - - - - - - - - -
Please read the Terms of Service at
https://letsencrypt.org/documents/LE-SA-v1.2-November-15-2017.pdf. You must
agree in order to register with the ACME server at
https://acme-v02.api.letsencrypt.org/directory
- - - - - - - - - - - - - - - - - - - - - - - - - - - - - - - - - - - - - - - -
(A)gree/(C)ancel: A

- - - - - - - - - - - - - - - - - - - - - - - - - - - - - - - - - - - - - - - -
Would you be willing to share your email address with the Electronic Frontier
Foundation, a founding partner of the Let's Encrypt project and the non-profit
organization that develops Certbot? We'd like to send you email about our work
encrypting the web, EFF news, campaigns, and ways to support digital freedom.
- - - - - - - - - - - - - - - - - - - - - - - - - - - - - - - - - - - - - - - -
(Y)es/(N)o: Y
Obtaining a new certificate
Performing the following challenges:
http-01 challenge for grav.example.com
Waiting for verification...
Cleaning up challenges
Deploying Certificate to VirtualHost /etc/nginx/conf.d/grav.conf
Selanjutnya, pilih apakah akan mengarahkan lalu lintas HTTP ke HTTPS seperti yang ditunjukkan di bawah ini:
- - - - - - - - - - - - - - - - - - - - - - - - - - - - - - - - - - - - - - - -
1: No redirect - Make no further changes to the webserver configuration.
2: Redirect - Make all requests redirect to secure HTTPS access. Choose this for
new sites, or if you're confident your site works on HTTPS. You can undo this
change by editing your web server's configuration.
- - - - - - - - - - - - - - - - - - - - - - - - - - - - - - - - - - - - - - - -
Select the appropriate number [1-2] then [enter] (press 'c' to cancel): 2
Ketik 2 dan tekan Enter untuk menyelesaikan instalasi. Anda akan melihat output berikut:
Redirecting all traffic on port 80 to ssl in /etc/nginx/conf.d/grav.conf

- - - - - - - - - - - - - - - - - - - - - - - - - - - - - - - - - - - - - - - -
Congratulations! You have successfully enabled https://grav.example.com

You should test your configuration at:
https://www.ssllabs.com/ssltest/analyze.html?d=grav.example.com
- - - - - - - - - - - - - - - - - - - - - - - - - - - - - - - - - - - - - - - -

IMPORTANT NOTES:
 - Congratulations! Your certificate and chain have been saved at:
   /etc/letsencrypt/live/grav.example.com/fullchain.pem
   Your key file has been saved at:
   /etc/letsencrypt/live/grav.example.com/privkey.pem
   Your cert will expire on 2021-12-30. To obtain a new or tweaked
   version of this certificate in the future, simply run certbot again
   with the "certonly" option. To non-interactively renew *all* of
   your certificates, run "certbot renew"
 - Your account credentials have been saved in your Certbot
   configuration directory at /etc/letsencrypt. You should make a
   secure backup of this folder now. This configuration directory will
   also contain certificates and private keys obtained by Certbot so
   making regular backups of this folder is ideal.
 - If you like Certbot, please consider supporting our work by:

   Donating to ISRG / Let's Encrypt:   https://letsencrypt.org/donate
   Donating to EFF:                    https://eff.org/donate-le

 - We were unable to subscribe you the EFF mailing list because your
   e-mail address appears to be invalid. You can try again later by
   visiting https://act.eff.org.
Sekarang Anda dapat mengakses Grav CMS dengan aman menggunakan protokol HTTPS.
Kesimpulan
Selamat! Anda telah berhasil menginstal Grav CMS dengan Nginx dan Let's Encrypt SSL di server Ubuntu 20.04. Sekarang Anda dapat membuat situs web Anda dengan mudah menggunakan Grav CMS.