Ini adalah "salin &tempel" Caranya! Cara termudah untuk mengikuti tutorial ini adalah dengan menggunakan klien baris perintah/klien SSH (seperti Putty untuk Windows) dan cukup salin dan tempel perintah (kecuali jika Anda harus memberikan informasi sendiri seperti alamat IP, nama host, kata sandi,... ). Ini membantu menghindari kesalahan ketik.
ISP-ServerSetup -Ubuntu 5.10 "Breezy Badger"
Versi 1.0
Penulis:Sampai Brehm
Ini adalah deskripsi mendetail tentang langkah-langkah yang harus diambil untuk menyiapkan Ubuntu server berbasis (Ubuntu 5.10 - Breezy Badger) yang menawarkan semua layanan yang dibutuhkan oleh ISP dan hoster (server web (berkemampuan SSL), server surat (dengan SMTP-AUTH dan TLS!), server DNS, server FTP, server MySQL, POP3/POP3s/ IMAP/IMAP, Kuota, Firewall, dll.).
Saya akan menggunakan perangkat lunak berikut:
- Server Web:Apache 2.0.x
- Server Email:Postfix (lebih mudah dikonfigurasi daripada sendmail; memiliki riwayat lubang keamanan yang lebih pendek daripada sendmail)
- Server DNS:BIND9
- Server FTP:proftpd
- POP3/POP3s/IMAP/IMAPs:dalam contoh ini Anda dapat memilih antara format kotak surat UNIX tradisional (kami kemudian menggunakan ipopd/ uw-imapd) atau format Maildir (dalam hal ini kita akan menggunakan Courier-POP3/Courier-IMAP).
- Webalizer untuk statistik situs web
Pada akhirnya Anda harus memiliki sistem yang bekerja dengan andal dan siap untuk panel kontrol webhosting gratis ISPConfig(yaitu, ISPConfig menjalankannya dari kotak).
Saya ingin mengatakan terlebih dahulu bahwa ini bukan satu-satunya cara untuk menyiapkan sistem seperti itu. Ada banyak cara untuk mencapai tujuan ini tetapi ini adalah cara yang saya ambil. Saya tidak memberikan jaminan apa pun bahwa ini akan berhasil untuk Anda!
Persyaratan
Untuk menginstal sistem seperti itu, Anda memerlukan yang berikut:
- CD instalasi Ubuntu (tersedia di sini:http://www.ubuntu.com/download/)
- Koneksi internet karena saya akan menjelaskan instalasi jaringan dalam dokumen ini.
1 Sistem Basis
Masukkan CD Ubuntuinstall Anda ke dalam sistem Anda dan boot darinya (masukkan server pada prompt boot untuk menginstal hanya sistem dasar yang cocok untuk server).
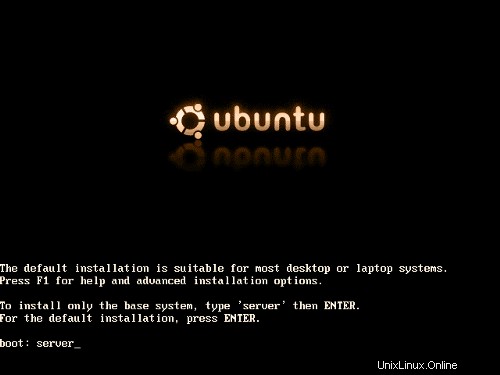
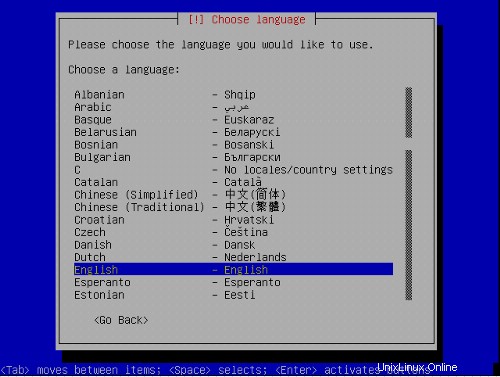
Instalasi dimulai, dan pertama-tama Anda harus memilih bahasa Anda:
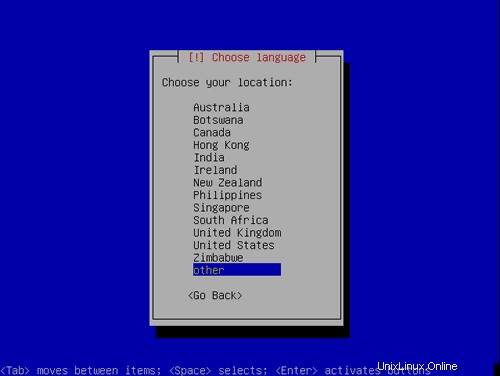
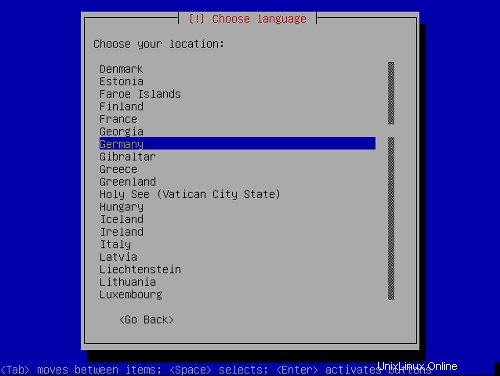
Pilih lokasi Anda:
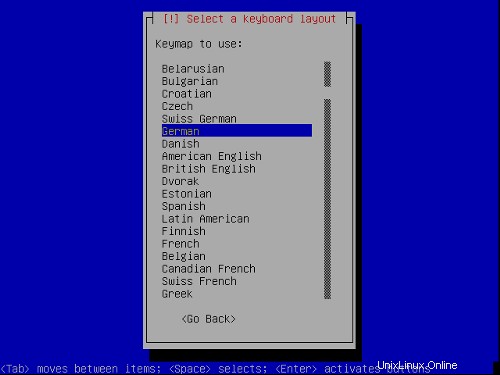
Pilih tata letak keyboard:

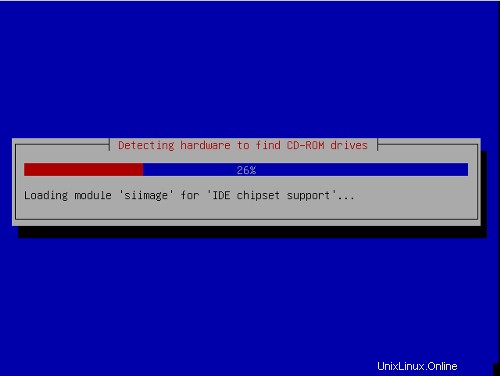
Deteksi perangkat keras dimulai:
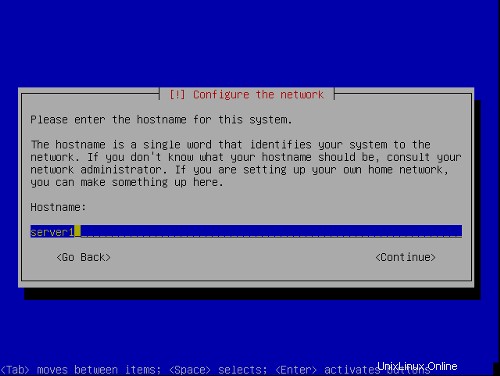
Masukkan nama host. Dalam contoh ini, sistem saya disebut server1 .contoh.com , jadi saya masukkan server1 :
Sekarang kita membuat partisi. Pilih Edit tabel partisi secara manual . Jika sudah ada beberapa partisi, hapus terlebih dahulu dengan memilihnya, tekan kembali lalu pilih hapus.

Saya akan menggunakan skema partisi berikut:
/boot 50 MB
/swap 1 GB
/ 10 GB
/var sisa harddisk
Membuat partisi:Pilih hard disk Anda (dalam kasus saya SCSI1), tekan enter, lalu:

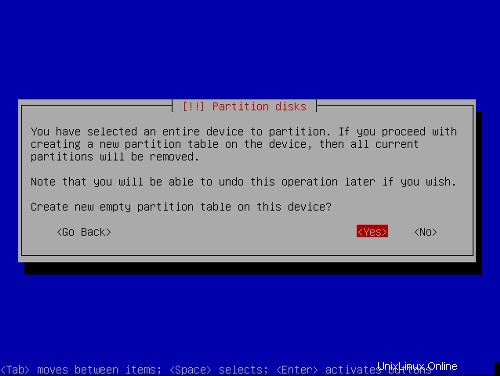
Membuat tabel partisi:Pilih RUANG GRATIS , tekan enter, lalu:

1) Pilih Buat partisi baru .
2) Masukkan ukuran partisi. Nilai dapat dimasukkan dalam MB dan GB atau persen(%)
3) Pilih jenis partisi:primer
4) Pilih lokasi partisi:awal
5) Ubah Gunakan sebagai :Saya akan menggunakan EXT3 untuk semua partisi kecuali partisi swap yang bertipe swap.
6) Ubah:Pilih mountpoint
7) Pilih Selesai mengatur partisi
Ulangi ini untuk semua partisi pada tabel partisi di atas.
Sekarang tabel partisi Anda akan terlihat seperti ini:
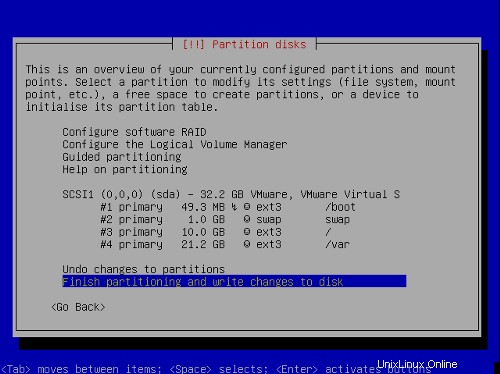
Pilih Selesaikan partisi dan tulis perubahan ke disk , lalu Ya ,untuk melanjutkan ke langkah berikutnya.
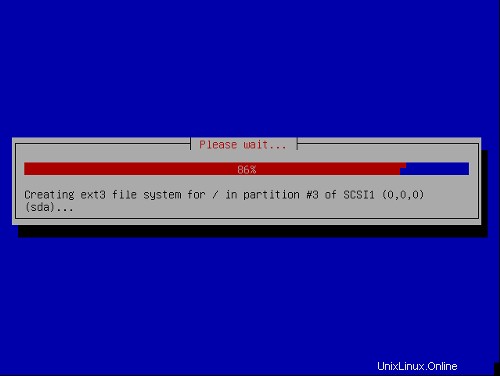
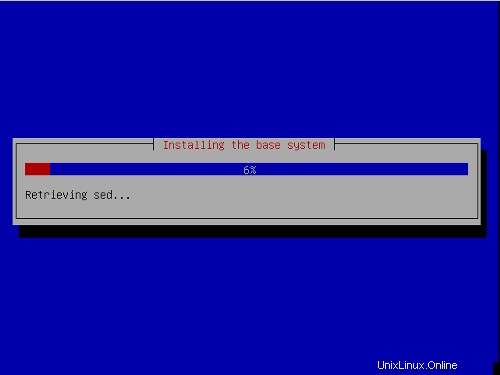
Sekarang sistem dasar sedang diinstal:
Konfigurasikan zona waktu Anda:

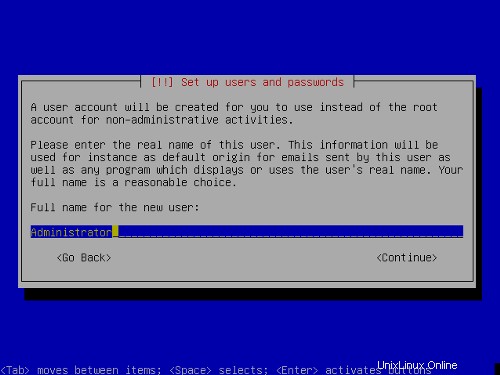
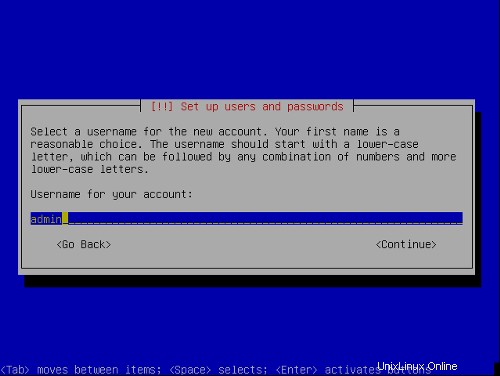
Siapkan pengguna:

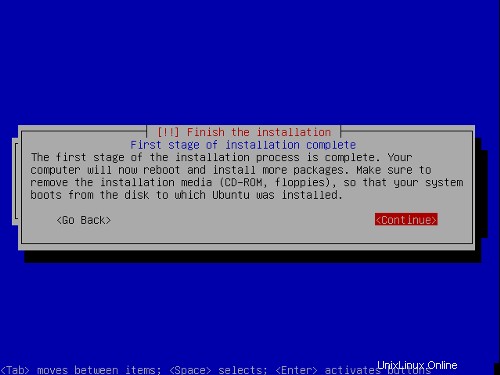
Langkah pertama proses instalasi selesai dan server melakukan booting ke linux Ubuntu yang diinstal.
2 MemasangDan Mengonfigurasi Sistem Lainnya
Aktifkan pengguna root
Sekarang saya bisa login dengan username dan password yang saya masukkan di atas. Pertama saya mengaktifkan pengguna root untuk kemudahan instalasi. Anda dapat menonaktifkannya nanti jika mau.
sudopasswd root
su
Sekarang kita login sebagai pengguna root.
Konfigurasi Jaringan
Karena Ubuntuinstaller telah mengonfigurasi sistem kami untuk mendapatkan pengaturan jaringannya melalui DHCP, kami harus mengubahnya sekarang karena server harus memiliki alamat IP statis . Sunting/etc/network/interfaces dan sesuaikan dengan kebutuhan Anda (dalam contoh pengaturan ini saya akan menggunakan alamat IP 192.168.0.100 ):
# This file describes the network interfaces available on your system |
Jika Anda ingin menambahkan alamat IP 192.168.0.101 ke antarmuka eth0 Anda harus mengubah file agar terlihat seperti ini:
# This file describes the network interfaces available on your system |
Kemudian restart jaringan Anda:
/etc/init.d/networkingrestart
Edit /etc/hosts dan tambahkan alamat IP baru Anda:
127.0.0.1 localhost.localdomain localhost server1 |
Menyetel NamaHost
echo server1.example.com> /etc/hostname
/bin/hostname -F /etc/hostname
Edit /etc/apt/sources.listDan Perbarui Instalasi Linux Anda
Edit /etc/apt/sources.list . Seharusnya terlihat seperti ini:
# deb cdrom:[Ubuntu 5.10 _Breezy Badger_ - Release i386 (20051012)]/ breezy main restricted |
apt-get update
apt-get upgrade
Instal SSH Daemon
apt-get install sshopenssh-server
Instal/Hapus Beberapa Perangkat Lunak
Sekarang mari kita instal beberapa perangkat lunak yang kita perlukan nanti dan hapus beberapa paket yang tidak kita perlukan:
apt-get install binutilscpp cpp-4.0 fetchmail flex gcc gcc-4.0 libarchive-zip-perl libc6-dev libcompress-zlib-perllibdb4.3 -dev libpcre3 libpopt-dev linux-kernel-headers lynx m4 make ncftp nmapopenssl perl perl-modules unzip zip zlib1g-dev autoconf automake1.9 libtoolbison autotools-dev cpp g++ (dalam1 Baris!!)
Kuota
apt-get install quota
Edit /etc/fstab agar terlihat seperti ini (saya menambahkan ,usrquota,grpquota ke partisi dengan titik mount / dan /var ):
# /etc/fstab: static file system information. |
Kemudian jalankan:
sentuh /quota.user /quota.group
chmod 600 /quota.*
mount -o remount /
sentuh /var/quota.user /var/quota.group
chmod 600 /var/quota.*
mount -o remount /var
quotacheck -avugm
quotaon -avug
Server DNS
apt-getinstall bind9
Untuk alasan keamanan, kami ingin menjalankan BIND chroot sehingga kami harus melakukan langkah-langkah berikut:
/etc/init.d/bind9 stop
Edit file /etc/default/bind9 sehingga daemon akan berjalan sebagai pengguna yang tidak memiliki hak 'bind ', di-chroot ke /var/lib/named .Modifikasi baris:OPTS=" -ubind sehingga terbaca OPTIONS="-u bind-t /var/lib/named" :
OPTIONS="-u bind -t /var/lib/named" |
Buat direktori yang diperlukan di bawah /var/lib :
mkdir -p /var/lib/named/etc
mkdir /var/lib/named/dev
mkdir -p /var/lib/named/var/cache/bind
mkdir -p /var/lib/named/var/run/bind/run
Kemudian pindahkan direktori konfigurasi dari /etc ke /var/lib/named/etc
mv /etc/bind /var/lib/named/etc
Buat symlink ke direktori konfigurasi baru dari lokasi lama (untuk menghindari masalah saat bind diupgrade di masa mendatang):
ln -s /var/lib/named/etc/bind/etc/bind
Buat null dan randomdevices, dan perbaiki izin direktori:
mknod /var/lib/named/dev/nullc 1 3
mknod /var/lib/named/dev /random c 1 8
chmod 666 /var/lib/named/dev/null /var/lib/named/dev/random
chown -R bind:bind /var/lib/named/var/ *
chown -R bind:bind /var/lib/named/etc/bind
Kita perlu memodifikasi skrip startup /etc/init.d/ sysklogd dari sysklogd sehingga kita masih bisa mendapatkan pesan penting yang masuk ke log sistem. Ubah baris: SYSLOGD="-u syslog" sehingga berbunyi:SYSLOGD="-u syslog -a /var/lib/named/dev/log" :
#! /bin/sh |
Mulai ulang loggingdaemon:
/etc/init.d/sysklogd restart
Mulai BIND, dan centang /var/log/syslog untuk kesalahan apa pun:
/etc/init.d/bind9 start
MySQL
apt-getinstall mysql-server mysql-client libmysqlclient12-dev
mysqladmin -u root passwordyourrootsqlpassword
mysqladmin -h server1.example.com -u root password yourrootsqlpassword
Saat Anda menjalankan netstat-tap Anda sekarang akan melihat garis seperti ini:
tcp 0 0 localhost.localdo:mysql *:* LISTEN 2449/mysqld |
yang berarti MySQL dapat diakses pada port 3306. Anda dapat menuju ke bagian berikutnya (Postfix). Jika Anda tidak melihat baris ini, edit /etc/mysql/my.cnf dan beri komentar lewati-jaringan :
# skip-networking |
Jika Anda harus mengedit/etc/mysql/my.cnf Anda harus me-restart MySQL:
/etc/init.d/mysql restart
Postfix
Untuk menginstalPostfix dengan SMTP-AUTH dan TLS lakukan langkah-langkah berikut:
apt-get install postfixpostfix-tls libsasl2 sasl2-bin libsasl2-modules libdb3-util procmail (1 baris!)
dpkg-reconfigurepostfix
<- Situs Internet
<- TIDAK ADA
<- server1.example.com
<- server1.example.com, localhost.example.com, localhost
<- Tidak
<- 127.0.0.0/8
<- 0
<- +
postconf -e 'smtpd_sasl_local_domain='
postconf -e 'smtpd_sasl_auth_enable =yes'
postconf -e 'smtpd_sasl_security_options =noanonymous'
postconf -e 'broken_sasl_auth_clients =yes'
postconf -e 'smtpd_recipient_restrictions =permit_sasl_authenticated,permit_mynetworks,reject_unauth_destination'
postconf -e 'checkinet_'
saslauthd'>> /etc/postfix/sasl/smtpd.conf
echo 'mech_list:login biasa'>> /etc/postfix/sasl/smtpd.conf
mkdir /etc/postfix/ssl
cd /etc/postfix/ssl/
openssl genrsa - des3 -rand /etc/hosts -out smtpd.key 1024
chmod 600 smtpd.key
openssl req -new -key smtpd.key -out smtpd.csr
openssl x509 -req -hari 3650 -in smtpd.csr -signkey smtpd.key -out smtpd.crt
openssl rsa -in smtpd.key -out smtpd.key.unencrypted
mv -f smtpd.key.unencrypted.key
openssl req -new -x509 -extensions v3_ca -keyout cakey.pem -out cacert.pem -days3650
postconf -e 'smtpd_tls_auth_only=tidak'
postconf -e 'smtp_use_tls =yes'
postconf - e 'smtpd_use_tls =yes'
postconf -e 'smtp_tls_note_starttls_offer =yes'
postconf -e 'smtpd_tls_key_file =/etc/postfix/ssl/smtpd.key'
post_cerpd_file 'smtpd_use_tls =yes'
etc/postfix/ssl/smtpd.crt'
postconf -e 'smtpd_tls_CAfile =/etc/postfix/ssl/cacert.pem'
postconf -e 'smtpd_tls_loglevel =1'
postconf -e 'smtpd_tls_received_header =yes'
postconf -e 'smtpd_tls_session_cache_timeout =3600s'
postconf -e 'tls_random_source =dev:/dev/urandom'
postconf -e 'myhostname =server1.
File /etc/postfix/main.cf sekarang akan terlihat seperti ini:
# See /usr/share/postfix/main.cf.dist for a commented, more complete version |
/etc/init.d/postfixrestart
Otentikasi akan dilakukan oleh saslauthd .Kita harus mengubah beberapa hal untuk membuatnya bekerja dengan baik. Karena Postfix berjalan dengan root di /var/spool/postfix kita harus melakukan hal berikut:
mkdir -p /var/spool/postfix/var/run/saslauthd
rm -fr /var/run/saslauthd
Sekarang kita harus mengedit /etc/default/saslauthd untuk mengaktifkan saslauthd .Remove # in front of START=yes and add the line PARAMS="-m/var/spool/postfix/var/run/saslauthd" :
# This needs to be uncommented before saslauthd will be run automatically |
Finally we haveto edit /etc/init.d/saslauthd .Change the line
dir=`dpkg-statoverride --list $PWDIR` |
to
#dir=`dpkg-statoverride --list $PWDIR` |
Then change thevariables PWDIR and PIDFILE and add the variable dir at the beginning of the file:
PWDIR="/var/spool/postfix/var/run/${NAME}" |
/etc/init.d/saslauthd should now looklike this:
#!/bin/sh -e |
Now start saslauthd :
/etc/init.d/saslauthd start
To see if SMTP-AUTHand TLS work properly now run the following command:
telnetlocalhost 25
After you haveestablished the connection to your postfix mail server type
ehlolocalhost
If you see thelines
250-STARTTLS
and
250-AUTH
everything is fine.

Type
quit
to return to thesystem's shell.
Courier-IMAP/Courier-POP3
Install Courier-IMAP/Courier-IMAP-SSL(for IMAPs on port 993) and Courier-POP3/Courier-POP3-SSL (for POP3s on port995).
apt-get install courier-authdaemoncourier-base courier-imap courier-imap-ssl courier-pop courier-pop-ssl courier-sslgamin libgamin0 libglib2.0-0 (oneline!)
<- No
<- OK
Then configurePostfix to deliver emails to a user's Maildir:
postconf -e 'home_mailbox=Maildir/'
postconf -e 'mailbox_command ='
/etc/init.d/postfix restart
Please go sureto enable Maildir underManagement -> Settings -> EMail in the ISPConfig web interface.
Apache
Run
apt-get install apache2apache2-common apache2-doc apache2-mpm-prefork apache2-utils libapr0 libexpat1ssl-cert (1line!)
apt-get install autoconf automake1.4 autotools-dev libapache2-mod-php4 libkrb53php4 php4-common php4-dev php4-imagick php4-mcrypt php4-rrdtool php4-sqlitephp4-curl php4-domxml php4-gd php4-imap php4-ldap php4-mcal php4-mhash php4-mysqlphp4-odbc php4-pear php4-xslt (1 line!)
<- Yes
Edit /etc/apache2/apache2.conf . Change
DirectoryIndex index.html index.cgi index.pl index.php index.xhtml |
to
DirectoryIndex index.html index.htm index.shtml index.cgi index.php index.php3 index.pl index.xhtml |
Edit /etc/mime.types and comment out the following lines:
#application/x-httpd-php phtml pht php |
Edit /etc/apache2/mods-enabled/php4.conf and comment out the following lines:
<IfModule mod_php4.c> |
Edit /etc/apache2/ports.conf and add Listen 443 :
Listen 80 |
Now we have toenable some Apache modules (SSL , rewrite and suexec ):
a2enmod ssl
a2enmod rewrite
a2enmod suexec
a2enmod include
Reload Apacheconfiguration:
/etc/init.d/apache2force-reload
Proftpd
apt-getinstall proftpd proftpd-common ucf
<- standalone
For security reasonsyou can add the following lines to /etc/proftpd.conf (thanks to Reinaldo Carvalho; more information can be found here:http://proftpd.linux.co.uk/localsite/Userguide/linked/userguide.html):
DefaultRoot ~
IdentLookups off
ServerIdent on "FTP Server ready."
and restart Proftpd:
/etc/init.d/proftpd restart
Webalizer
apt-getinstall webalizer
Install somePerl Modules needed by SpamAssassin (comes with ISPConfig)
apt-get installlibhtml-parser-perl libdb-file-lock-perl libnet-dns-perl
On To TheNext Step...
The configurationof the server is now finished, and we go on by installing ISPConfigon it.
3 Installing ISPConfig
I will installthe current ISPConfig version. Download the current ISPConfig version from http://www.ispconfig.org/downloads.htmto your /tmp directory.
Unpack the ISPConfig-archiveand change to the directory install_ispconfig :
tarxvfz ISPConfig*.tar.gz
cd install_ispconfig
Start the setupscript
./setup
The installer willnow compile an Apache with PHP5 that will run on port 81 and is needed by theISPConfig system itself. It will not interfere with your existing Apache installationso you can go on unworried.
When the ISPConfigApache is built, a custom SSL certificate is built. Therefore you are askeda few questions. You can accept the default values, or you can enter new valuesthere, this does not matter:
In step 7 (EncryptingRSA private key of CA with a pass phrase for security [ca.key] ) andstep 8 (Encrypting RSA private keyof SERVER with a pass phrase for security [server.key] ) of the certificatecreation process you are asked if you want to encrypt the respective key now.Choose n there becauseotherwise you will always be asked for a password whenever you want to restartthe ISPConfig system which means it cannot be restarted without human interaction!
If the compilationfails, the setup is stopped and all compiled files are removed. From the errormessage you get you should be able to see the reason for the failure (in mostcases a package (like the MySQL header files) is missing). Try to solve theproblem and the re-run ./setup .
In case of successthe setup goes on:
Pleasechoose your language. This is the language of the ISPConfig interface.
Afterwards youare shown the ISPConfig licence (BSD licence). Please read it carefully! Youaccept it by typing y .If you do not want to accept the ISPConfig licence, type n ,and the installation routine stops.
As installation mode I chose expert becausei want to set the website root to /var/www .When you are asked for installation mode, type 2 and hit return.
Now you are askif the daemons like postfix etc. are recognized correctly and for their filelocations, chose yes y .
When you are asked:
Web-Root:/home/www
Is this correct? [y/n]
choose n and enter /var/www as Web-Root.
Now you are askedfor some installation settings:
Pleaseenter your MySQL server: localhost
Please enter your MySQL user: root
Please enter your MySQL password: (Enter the password you chose when setting up the MySQL Server)
Please enter a name for the ISPConfigdatabase (e.g. db_ispconfig): db_ispconfig
Please enter the IP addressof the ISPConfig web (e.g. 192.168.0.1): 192.168.0.100 (Enteryour IP here)
Now you are askto enter the host and domain of your server. If your server has a host and domainname,enter them now. As this is a test install in my local network, I leave the hostempty and enter my IP address instead of the domain.
Pleaseenter the host name (e.g. www):
Please enter the domain (e.g.xyz.de): 192.169.0.100
Pleaseselect the protocol (http or https (SSL encryption)) to use to access the ISPConfigsystem:
1) HTTPS
2) HTTP
Your Choice: 1
After you haveanswered the questions ISPConfig should be duly installed. If you indicated www as host and xyz.com as the domain during the installation, you will find the ISPConfig interfaceunder https://www.xyz.de:81 or http://www.xyz.de:81 .Here you can login first with the user name admin and password admin . Itis recommended to change the password immediately! This can be done in the ISPConfigweb interface under Tools -> Changepassword .
Then go to Management-> Server -> Settings in the ISPConfig control panel and tickthe Maildir checkbox onthe EMail tab.
If your serverhas more than one IP address, please check if your additional IP addresses havebeen correctly detected by the installation routine under Management-> Server ->
Settings on the tab Server-> IP List .
You can find thewhole ISPConfig installation instructions here:http://www.ispconfig.org/manual_installation.htm
The ISPConfig manualscan be found here:http://www.ispconfig.org/documentation.htm
Links
- http://www.ubuntu.com
- http://www.ispconfig.org