Apa itu Host Virtual Apache?
Host Virtual istilah mengacu pada metode menjalankan lebih dari satu situs web seperti host1.domain.com, host2.domain.com, atau www.domain1.com, www.domain2.com dll., pada satu sistem. Ada dua jenis Virtual Hosting di Apache, yaitu berbasis IP hosting virtual dan berbasis nama hosting maya. Dengan hosting virtual berbasis IP, Anda dapat meng-host beberapa situs web atau domain pada sistem yang sama, tetapi setiap situs web/domain memiliki alamat IP yang berbeda. Dengan hosting virtual berbasis nama, Anda dapat meng-host beberapa situs web/domain pada alamat IP yang sama. Hosting virtual dapat berguna jika Anda ingin meng-host beberapa situs web dan domain dari satu server fisik atau VPS. Semoga Anda mendapatkan ide dasar tentang host virtual Apache. Hari ini, kita akan melihat cara mengkonfigurasi host virtual Apache di Ubuntu 18.04 LTS.
Unduh - eBuku gratis:"Buku Masak Server HTTP Apache"Konfigurasi Apache Virtual Host di Ubuntu 18.04 LTS
Alamat IP kotak uji saya adalah 192.168.225.22 dan nama host adalah ubuntuserver .
Pertama, kita akan melihat cara mengkonfigurasi host virtual berbasis nama di server web Apache.
Mengonfigurasi host virtual berbasis nama
1. Instal server web Apache
Pastikan Anda telah menginstal server web Apache. Untuk menginstalnya di Ubuntu, jalankan:
$ sudo apt-get install apache2
Setelah apache diinstal, uji apakah itu berfungsi atau tidak dengan menjelajahi halaman pengujian apache di browser.
Buka browser web Anda dan arahkan ke http://IP_Address atau http://localhost . Anda akan melihat halaman seperti di bawah ini.

Bagus! Server web Apache aktif dan berfungsi!!
2. Buat direktori web untuk setiap host
Saya akan membuat dua virtual host, yaitu ostechnix1.lan dan ostechnix2.lan .
Mari kita buat direktori untuk ostechnix1.lan virtual host pertama. Direktori ini diperlukan untuk menyimpan data host virtual kami.
Untuk melakukannya, masukkan:
$ sudo mkdir -p /var/www/html/ostechnix1.lan/public_html
Demikian juga, buat direktori untuk ostechnix2.lan virtual host kedua seperti yang ditunjukkan di bawah ini.
$ sudo mkdir -p /var/www/html/ostechnix2.lan/public_html
Dua direktori di atas dimiliki oleh pengguna root. Kami perlu mengubah kepemilikan menjadi pengguna biasa.
Untuk melakukannya, jalankan:
$ sudo chown -R $USER:$USER /var/www/html/ostechnix1.lan/public_html
$ sudo chown -R $USER:$USER /var/www/html/ostechnix2.lan/public_html
Di sini, $USER merujuk pengguna yang saat ini masuk.
Selanjutnya, atur izin baca ke direktori root Apache yaitu /var/www/html/ menggunakan perintah:
$ sudo chmod -R 755 /var/www/html/
Kami melakukan ini karena kami telah membuat direktori terpisah untuk setiap host virtual untuk menyimpan data mereka. Jadi kami membuat direktori root apache sebagai read only untuk semua pengguna kecuali pengguna root.
Kami telah membuat direktori yang diperlukan untuk menyimpan data dari setiap host virtual, mengatur izin yang tepat. Sekarang, saatnya membuat beberapa contoh halaman yang akan disajikan dari setiap virtual host.
3. Buat halaman web demo untuk setiap host
Mari kita buat halaman contoh untuk situs ostechnix1.lan. Untuk melakukannya, jalankan:
$ sudo vi /var/www/html/ostechnix1.lan/public_html/index.html
Tambahkan baris berikut di dalamnya:
<html>
 <head>
 <title>www.ostechnix.lan</title>
 </head>
 <body>
 <h1>Hello, This is a test page for ostechnix1.lan website</h1>
 </body>
</html>
Simpan dan tutup file.
Demikian juga, buat halaman contoh untuk situs ostechnix2.lan:
$ sudo vi /var/www/html/ostechnix2.lan/public_html/index.html
Tambahkan baris berikut di dalamnya:
<html>
 <head>
 <title>www.ostechnix.lan</title>
 </head>
 <body>
 <h1>Hello, This is a test page for ostechnix2.lan website</h1>
 </body>
</html>
Simpan dan tutup file.
4. Buat file konfigurasi untuk setiap host
Selanjutnya, kita perlu membuat file konfigurasi untuk setiap virtual host. Pertama, mari kita lakukan ini untuk situs ostechnix1.lan.
Salin file host virtual default bernama 000-default.conf isi ke file host virtual baru seperti di bawah ini.
$ sudo cp /etc/apache2/sites-available/000-default.conf /etc/apache2/sites-available/ostechnix1.lan.conf
$ sudo cp /etc/apache2/sites-available/000-default.conf /etc/apache2/sites-available/ostechnix2.lan.conf
Harap diperhatikan bahwa Anda harus menyimpan semua file konfigurasi dengan .conf ekstensi di akhir, jika tidak maka tidak akan berfungsi.
Sekarang, ubah file konfigurasi agar sesuai dengan host virtual kami.
Sunting ostechnix.lan1.conf berkas:
$ sudo vi /etc/apache2/sites-available/ostechnix1.lan.conf
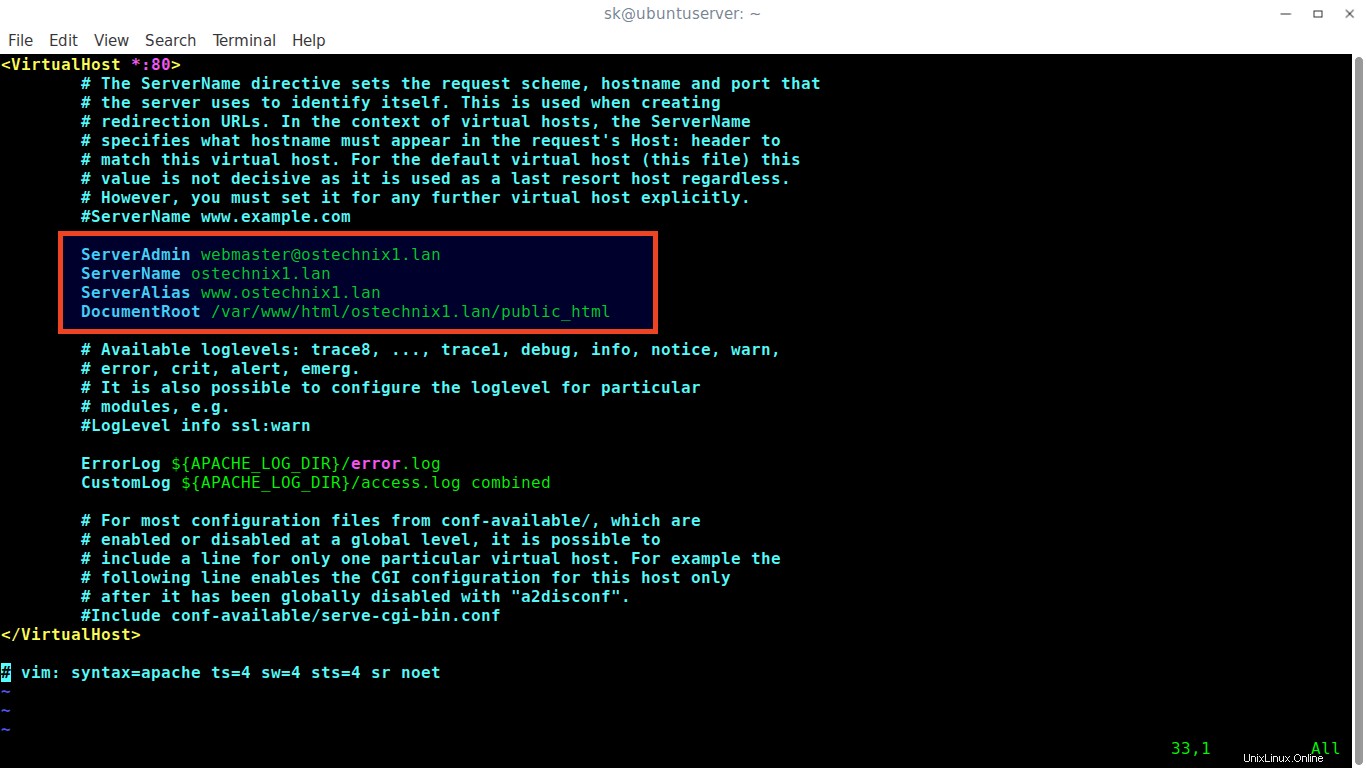
Mengedit/memodifikasi nilai ServerAdmin, ServerName, ServerAlias, dan DocumentRoot cocok dengan host virtual.
<VirtualHost *:80>
 # The ServerName directive sets the request scheme, hostname and port that
 # the server uses to identify itself. This is used when creating
 # redirection URLs. In the context of virtual hosts, the ServerName
 # specifies what hostname must appear in the request's Host: header to
 # match this virtual host. For the default virtual host (this file) this
 # value is not decisive as it is used as a last resort host regardless.
 # However, you must set it for any further virtual host explicitly.
 #ServerName www.example.com

   ServerAdmin [email protected]
   ServerName ostechnix1.lan
   ServerAlias www.ostechnix1.lan
   DocumentRoot /var/www/html/ostechnix1.lan/public_html

# Available loglevels: trace8, ..., trace1, debug, info, notice, warn,
 # error, crit, alert, emerg.
 # It is also possible to configure the loglevel for particular
 # modules, e.g.
 #LogLevel info ssl:warn

ErrorLog ${APACHE_LOG_DIR}/error.log
 CustomLog ${APACHE_LOG_DIR}/access.log combined

# For most configuration files from conf-available/, which are
 # enabled or disabled at a global level, it is possible to
 # include a line for only one particular virtual host. For example the
 # following line enables the CGI configuration for this host only
 # after it has been globally disabled with "a2disconf".
 #Include conf-available/serve-cgi-bin.conf
</VirtualHost>
Simpan dan tutup file.
Selanjutnya, edit ostechnix2.lan.conf berkas:
$ sudo vi /etc/apache2/sites-available/ostechnix2.lan.conf
Buat perubahan yang diperlukan.
<VirtualHost *:80>
 # The ServerName directive sets the request scheme, hostname and port that
 # the server uses to identify itself. This is used when creating
 # redirection URLs. In the context of virtual hosts, the ServerName
 # specifies what hostname must appear in the request's Host: header to
 # match this virtual host. For the default virtual host (this file) this
 # value is not decisive as it is used as a last resort host regardless.
 # However, you must set it for any further virtual host explicitly.
 #ServerName www.example.com

    ServerAdmin [email protected]
    ServerName ostechnix2.lan
    ServerAlias www.ostechnix2.lan
    DocumentRoot /var/www/html/ostechnix2.lan/public_html

# Available loglevels: trace8, ..., trace1, debug, info, notice, warn,
 # error, crit, alert, emerg.
 # It is also possible to configure the loglevel for particular
 # modules, e.g.
 #LogLevel info ssl:warn

ErrorLog ${APACHE_LOG_DIR}/error.log
 CustomLog ${APACHE_LOG_DIR}/access.log combined

# For most configuration files from conf-available/, which are
 # enabled or disabled at a global level, it is possible to
 # include a line for only one particular virtual host. For example the
 # following line enables the CGI configuration for this host only
 # after it has been globally disabled with "a2disconf".
 #Include conf-available/serve-cgi-bin.conf
</VirtualHost>

Simpan/tutup file.
5. Aktifkan file konfigurasi host virtual
Setelah membuat perubahan yang diperlukan, nonaktifkan file konfigurasi host virtual default yaitu 000.default.conf , dan aktifkan semua file konfigurasi host virtual yang baru dibuat seperti yang ditunjukkan di bawah ini.
$ sudo a2dissite 000-default.conf
$ sudo a2ensite ostechnix1.lan.conf
$ sudo a2ensite ostechnix2.lan.conf
Mulai ulang server web Apache untuk menerapkan perubahan.
$ sudo systemctl restart apache2
Itu dia. Kami telah berhasil mengonfigurasi host virtual di Apache. Mari kita lanjutkan dan periksa apakah mereka berfungsi atau tidak.
6. Uji Host virtual
Buka file /etc/hosts di editor apa pun:
$ sudo vi /etc/hosts
Tambahkan semua situs/domain virtual Anda satu per satu seperti di bawah ini.
[...]
192.168.225.22   ostechnix1.lan
192.168.225.22   ostechnix2.lan
[...]
Harap dicatat bahwa jika Anda ingin mengakses host virtual dari sistem jarak jauh mana pun, Anda harus menambahkan baris di atas di setiap file /etc/hosts sistem jarak jauh.
Simpan dan tutup file.
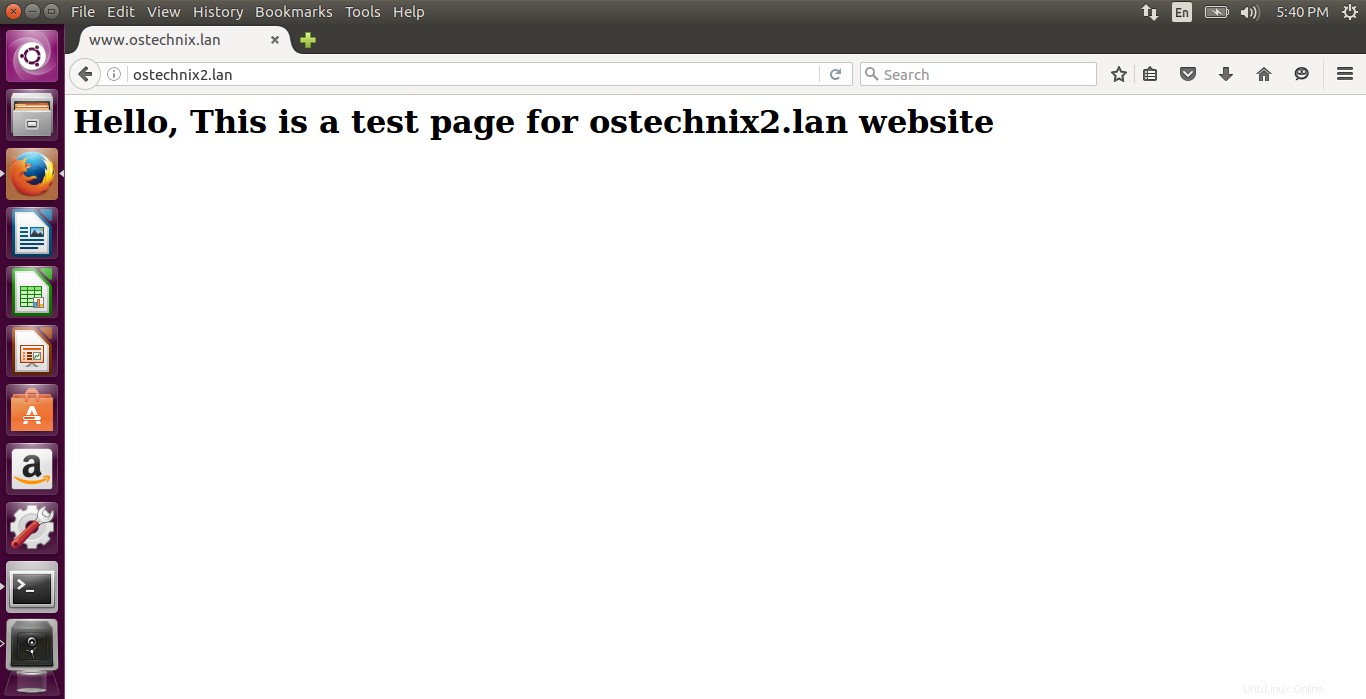
Buka browser web Anda dan arahkan ke http://ostechnix1.lan atau http://ostechnix2.lan .
laman pengujian ostechnix1.lan:

laman pengujian ostechnix2.lan:
Selamat! Anda sekarang dapat mengakses semua situs web Anda. Mulai sekarang, Anda dapat mengunggah data dan menyajikannya dari situs web yang berbeda.
Seperti yang Anda perhatikan, kami telah menggunakan alamat IP yang sama (yaitu 192.168.225.22) untuk menghosting dua situs web yang berbeda (http://ostechnix1.lan dan http://ostechnix2.lan). Inilah yang kami sebut hosting virtual berbasis nama. Semoga ini membantu. Saya akan menunjukkan cara mengkonfigurasi hosting virtual berbasis IP di panduan berikutnya. Sampai saat itu tiba, pantau terus!